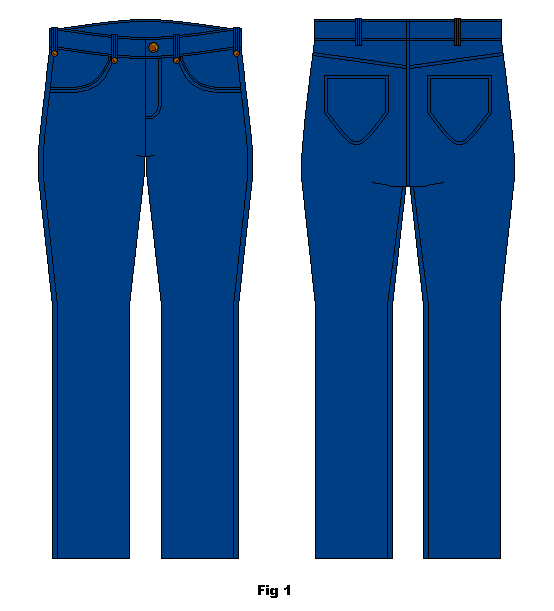
Jeans like most garments are basically made to stand up in (fig. 1) . Adding tucks to the knees of jeans and pants is not a necessity but it may be something you wish to try. It makes the pants or jeans slightly more shapely over the bent knees and tapers some of the fabric that builds up behind knees when they are bent, which can be especially noticeable with jeans cause of the thickness of the fabric.
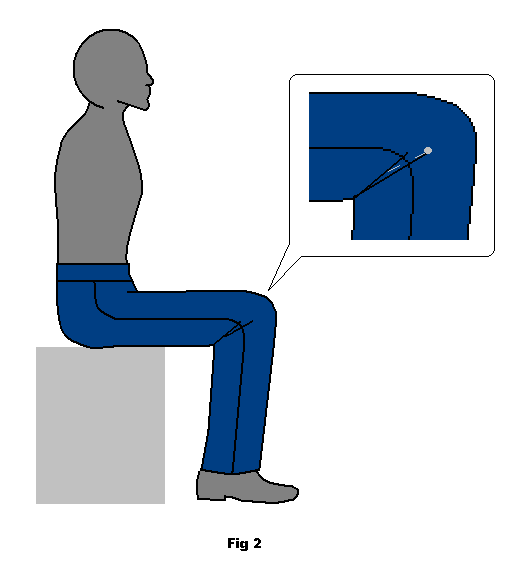
While trying the pants/jeans, measure down from the sides to the creases behind the knee and mark the place with a pin (fig. 2).
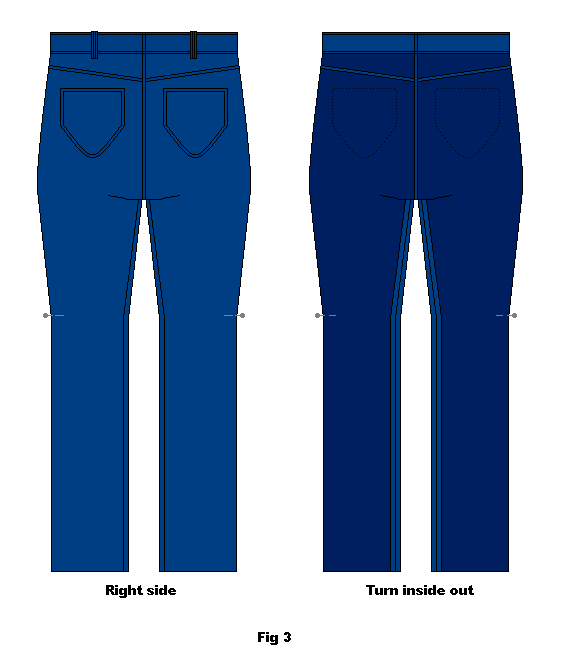
 Remove pants/jeans, turn them inside out, leaving the pin in place. If your legs are even then it is only really necessary to measure one leg, but if you have uneven legs you will need to measure both. This sample was done for even legs but the process is pretty much the same with odd legs in the sewing part. It’s just the measuring that needs to be different (fig 3).
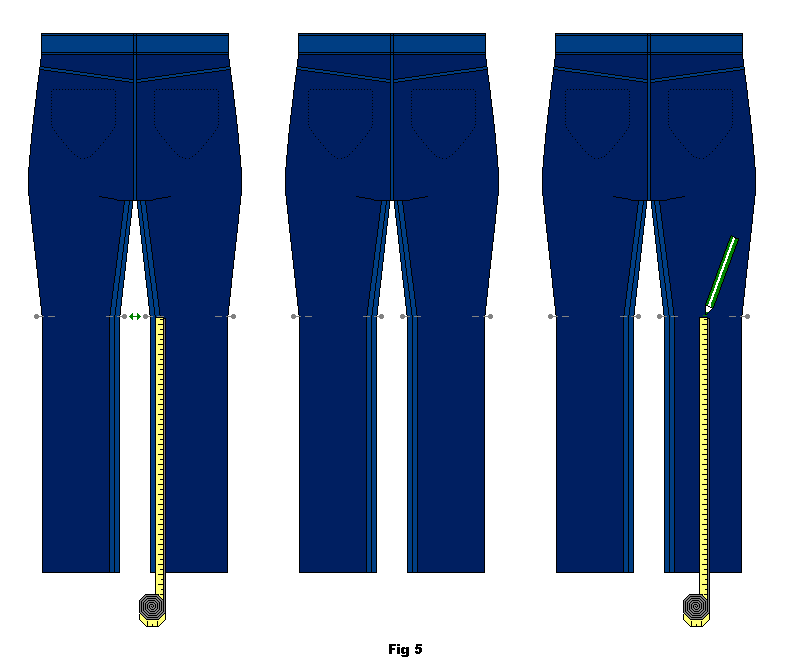
Focus on the back side of the pants/jeans. Measure the distance with a tape measure from the bottom of the leg up to the pin. Then measure the same length on the inside of the leg to mark the same height. Measure out the same height in the middle of the leg. Mark all the measurements (fig. 4 and 5). 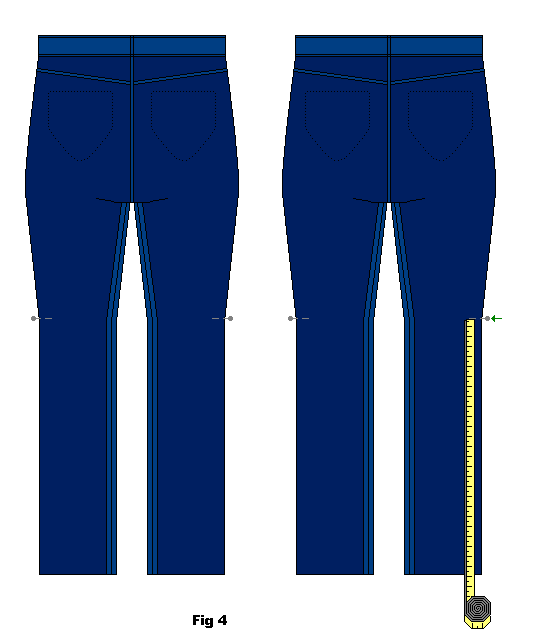
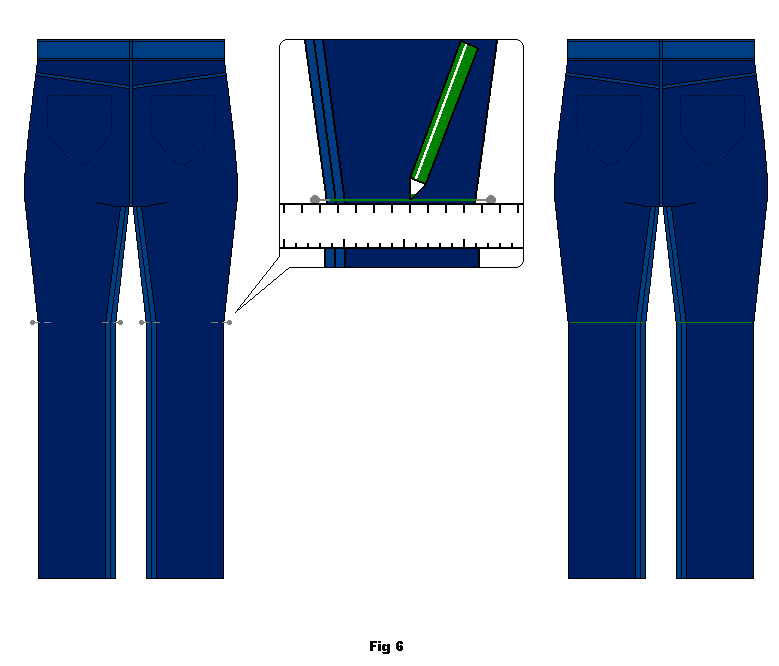
Use a ruler and a fabric marker and draw a straight line between the side pins using you mid point mark as a helpful guide to re-adjust the line if you need to. Make sure the line is straight and in alignment with the cuff on the pants/jeans (fig. 6).
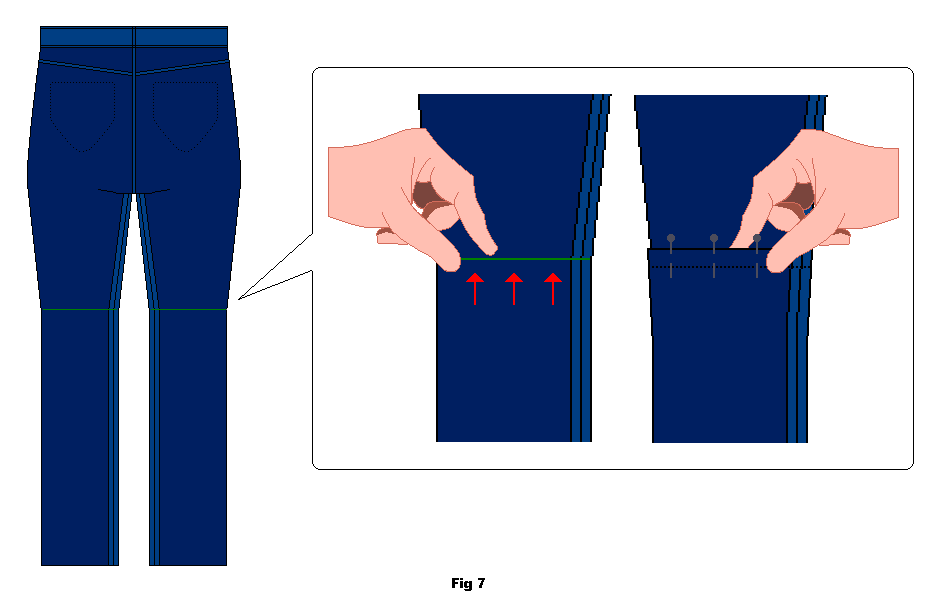
Repeat on the other side of the leg, and on the other leg of the pants/jeans so that you have a line marked on the back or both legs. Use the line as your guide and pinch the fabric between your fingers so it makes a 1 cm wide fold. Pin it (fig 7).
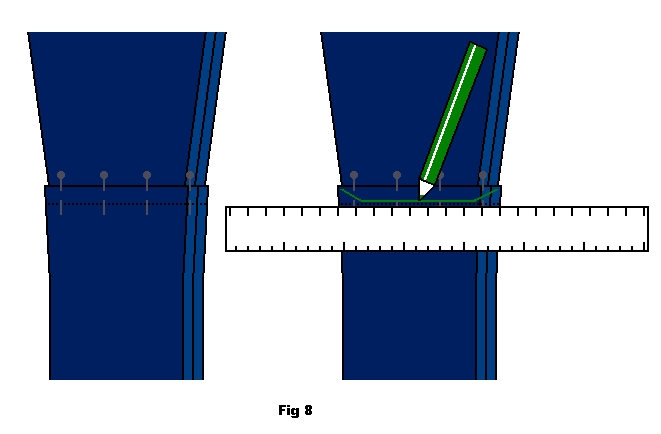
Make sure that you only pinned fabric from the back side of the jeans/pants leg. You don’t want the fabric from the front side of the leg getting caught up in the tuck. Draw a line, tapering the fold off at the edges (sides of the legs), approximate ½ cm from the side seams. This will be your sewing line (fig 8).
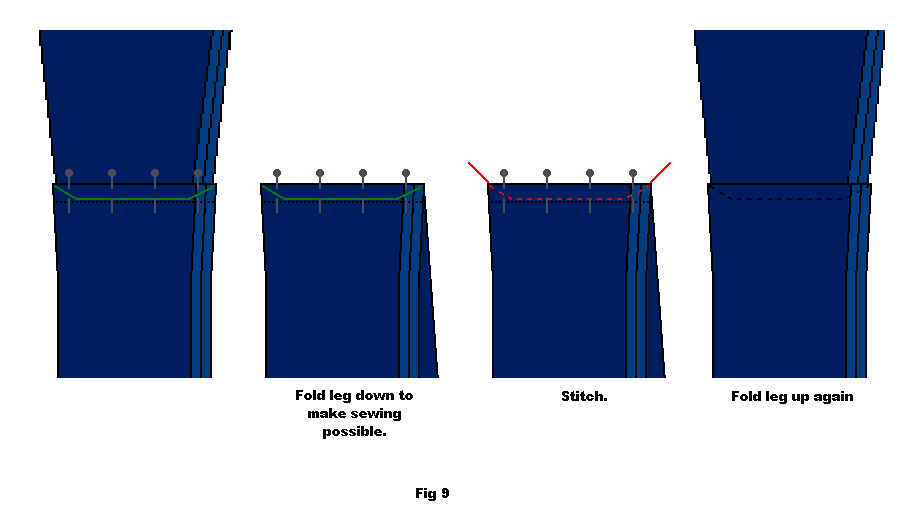
Fold the jeans/pants in a way that will enable you to pass the folded area through the sewing machine. Sew the line. If you have trouble passing it through the machine it is fine to do it by hand, use small strong stitches (fig 9).
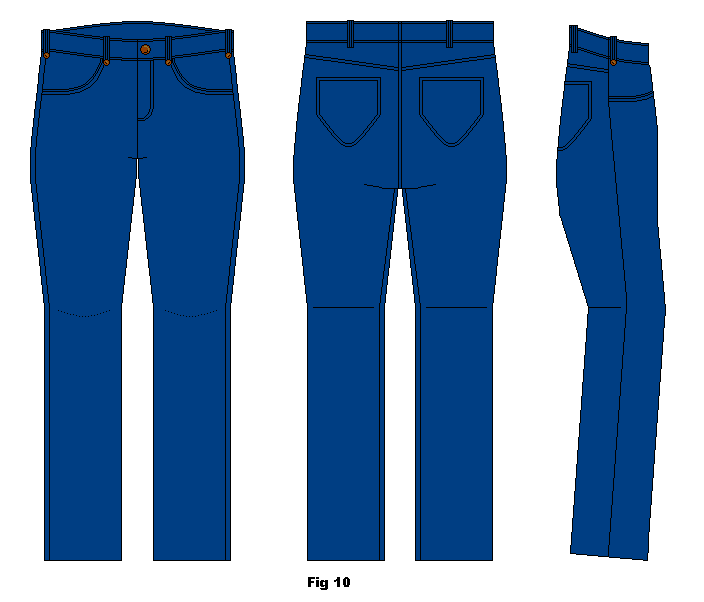
Turn the pants/jeans right side out and press the seam. The tuck gives a small but noticeable curve to the knee area (fig. 10).



Bra guide! Är det någon som har tips på hur man gör om man efter det sydda vecket ska sy in extra tyg, på längden, tvärs över knävecket?
Menar du tvärs över knäet – horisontellt – på framsidan av byxan?
Det är inget vi har prövat så det här är bara en gissning (hur vi förmodligen skulle gå till väga för att testa det). Så det kan bli helt käpprätt fel! Svårt att sdia om sådant 🙂
Jag skulle testa att använda den urklippta biten från baksidan av byxan (halvmånen du klippte bort när du gjorde vecket) och använda som mönsterdel för inlägget fram. Kom ihåg att lägga till sömsmån som du viker in på biten du ska sy in + att inte klippa ut hålet totalt utan att lämna tyg som du kan sy fast inlägget på.
Sy fast den ungefär som du gör med inprovning bak på jeans
http://fashionfreaks.se/images/jnsi4sv.gif
och
http://fashionfreaks.se/images/jnsi5sv.gif
Viktigt att komma ihåg om du testar är att det aldrig – ALDRIG – behövs så stora ingrepp som man tror.