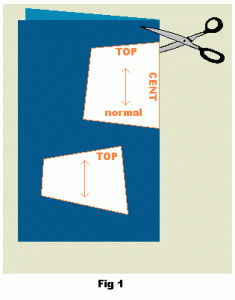
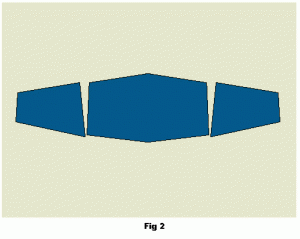
Cut out pattern pieces in the fabric you have chosen for your adaptation (fig.1). Note that you have to place the centre pattern piece on the fold of the fabric. This should not be done with the side pattern piece. No seam allowance is required now as this is included in the pattern pieces. As you can see in the right illustration below (fig.2) you will have three fabric pieces cut out with the centre piece dubbel the size of its pattern piece.
Pin the pieces and sew together as shown in illustration below (fig.3). The side pieces will be attached to the centre piece with right the side of the fabric facing each other. Overlock or zig-zag the seams. Fold out the piece and press the seams flat facing outwards. Finally overlock or zig-zag the raw edges around the piece like in the illustration to the right below.
Fold all the edges of the adaptation piece under 1cm and press well (fig. 4 ). Below you can see how the adaptation piece looks from inside and outside.
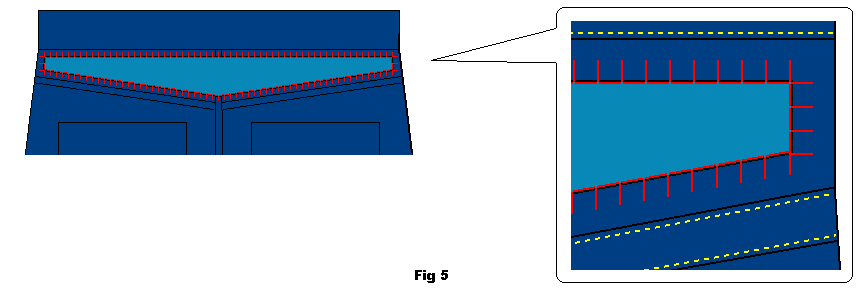
The edges in the cut out section of the jeans have to be closed. You do this by zig-zagging the raw edges in the cut out as seen below (fig. 5).
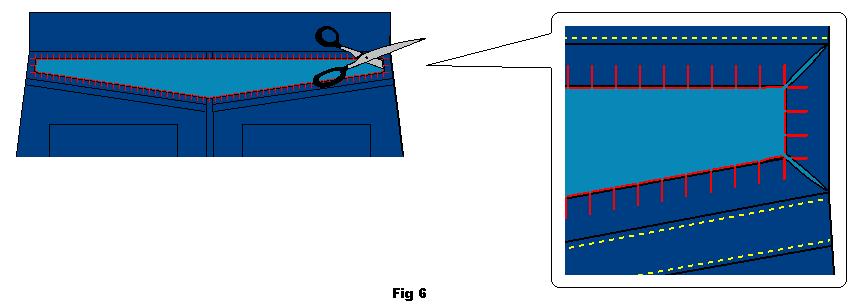
Cut small notches in the corners of the Jeans, this allows for more movement or the original garment when inserting the new piece. (fig. 6)
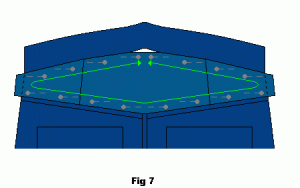
Begin to pin the new adapted piece to the jeans. Start at the bottom part of the adaptation and work you way out to the sides. Continue up to the centre along the top part of the adaptation. Make sure the adaptation piece will fit in evenly by alternating putting in one pin to the right and then one to the left (equal distance). You will probably have to pin and re-pin the adaptation piece a couple of times during the process of shortening the waistband (se below).
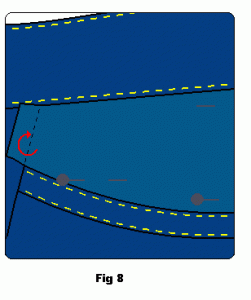
Pinning together the jeans with the adaptation piece is done with right side of fabric facing you. You have already folded the edges of the adaptation piece and are covering the edges in the cut our section with this. The only parts of the adaptation piece you will have to fold under is the sides as these might be a little long for the cut out section (fi. 7 and 8).
Note that the waistband will be slightly long with access length in middle of back. Continue reading for instructions on how to shorten this.
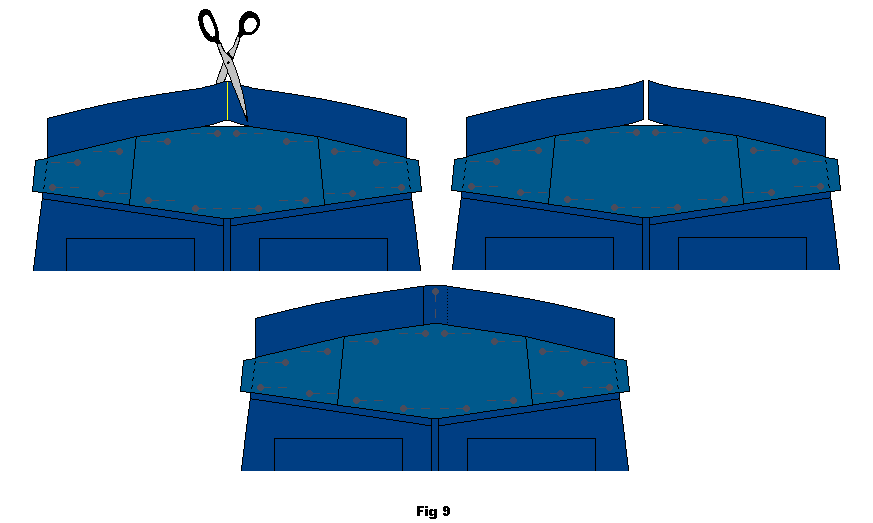
The NORMAL waist adaptation will shorten the waistband of the jeans slightly as it alters the angle of this. You will therefore need to shorten the waistband (fig. 9) by overlapping it. Divide the waistband at middle of back. Cut through the centre of the waistband if it is in one piece.
Layer the pieces of the waistband over one-another and pin them together. You may need to readjust the overlapping.
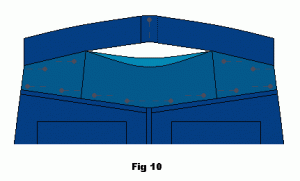
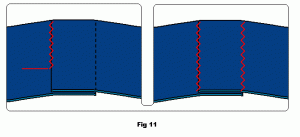
Once you know exactly how much shortened the waistband needs to be to fit the adaptation piece unpin some of the upper section of the adaptation piece. Leave the waistband pinned together so that you can sew it in a machine. Use zig-zag stitch over both the raw edges to join the piece together and seal the ends (fig. 10 and 11).
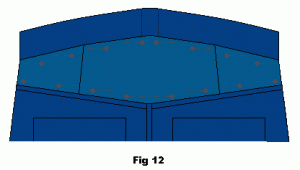
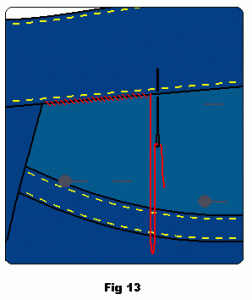
Pin the adaptation piece to the jeans making extra sure it is even and fits in the cut out sector. Hand sew the adaptation piece to pants as shown below (fig. 12 nd 13).
To add extra strength top stitch the adaptation piece to the seam allowance in the cut out section (fig. 14).





Hi
I’m looking for the link for the pattern pieces so I can addapt my jeans because I’am in a wheelchair. Tx