NOTE! Please read “IMPORTANT to read before adapting shirts/tops” to decide what type of back suits you best. Also note that these instructions can be followed for SHIRTS and other hooded or collared TOPS.
You will need a shirt or other top (slightly looser fit) for this as well as a copy of the original curved back jacket pattern in matching size from the pattern part of Fashionfreaks.
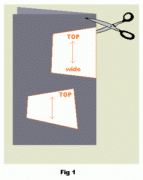
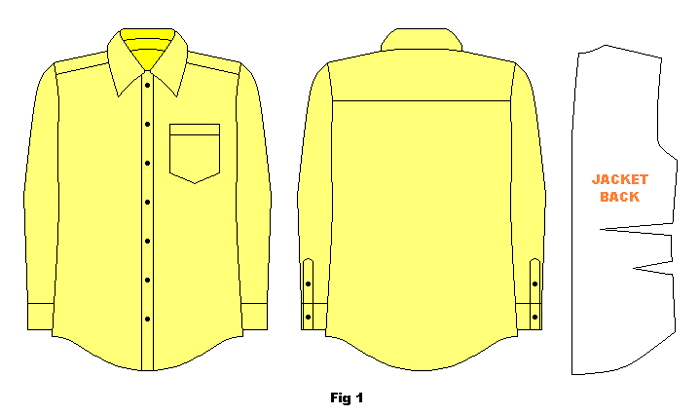
Regular button-down dress shirt viewed from front and back plus pattern piece (fig. 1).’
Sewing the tucks in the back piece
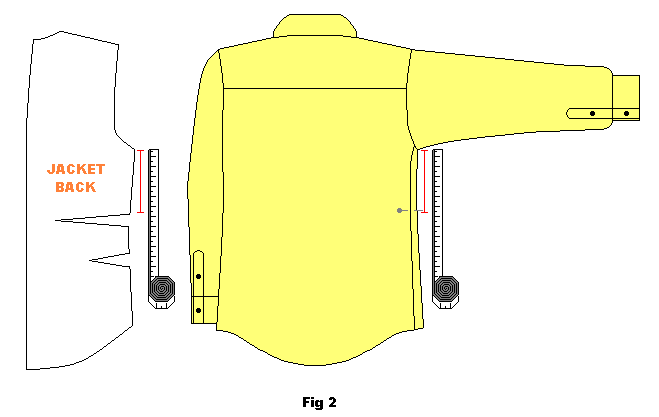
Use the pattern piece as a guide and measure down from under the arm (bottom point of sleeve hole) to the approximate point where the first back tuck should begin. Mark this point with a pin on both sides (fig. 2).
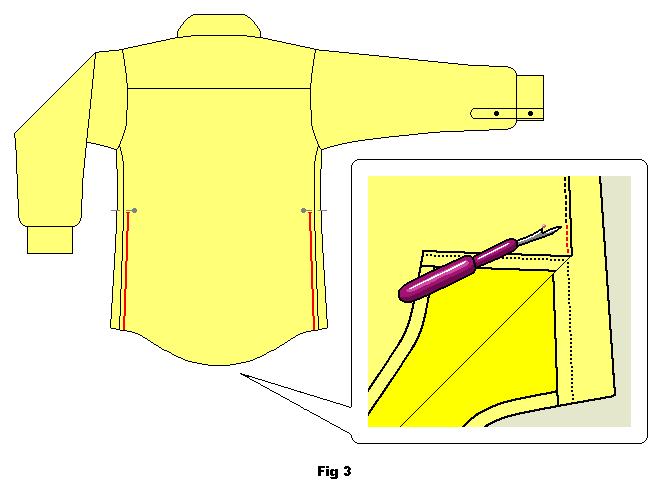
Unpick the side seams of the shirt up to the marked point on both sides (fig. 3).
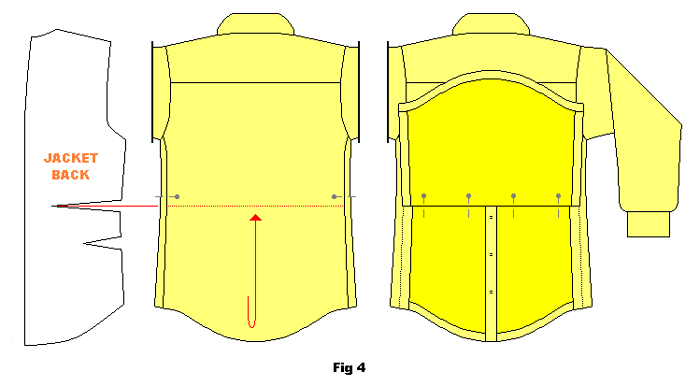
Fold the now unpicked back part of the shirt up flat and straight at the height of the approximate center of the FIRST tuck. Pin along the line (fig. 4).
Use the pattern piece as a guide and mark the length and depth of the tuck along the fold you just pinned in place. See close up of marked tuck in bottom image (fig. 5).

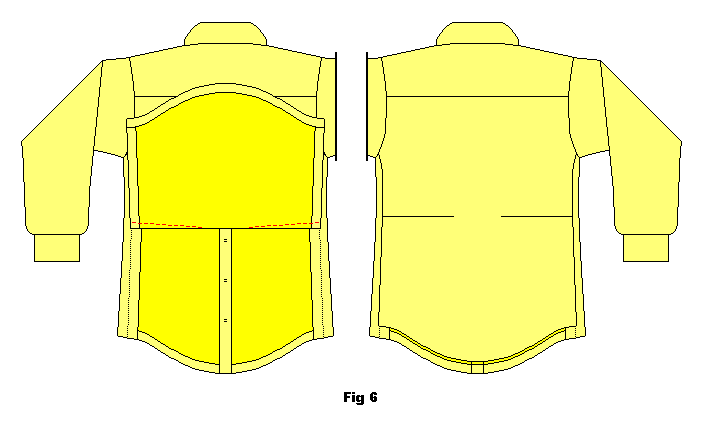
Sew and press tucks flat. Illustration below to the left of sewn and pressed tuck from inside and on right side from outside of shirt (fig. 6).
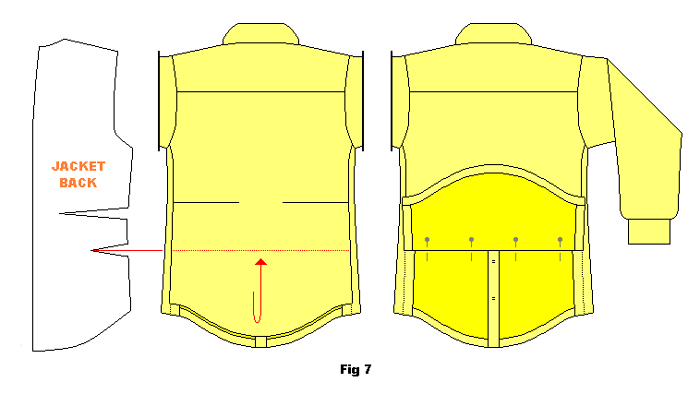
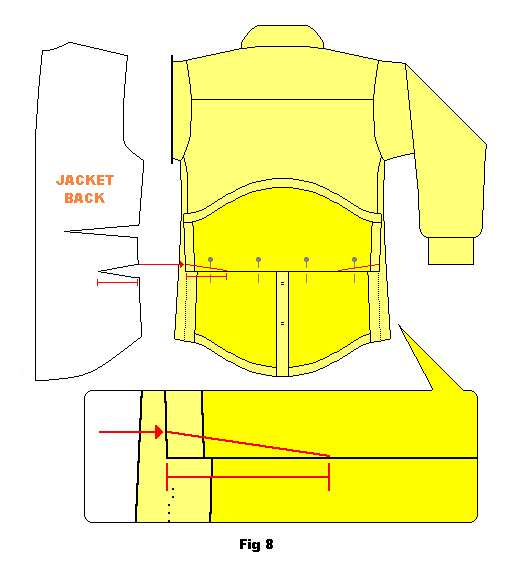
Use the pattern piece as guide and in the same manner fold the shirt up flat and straight to the approximate center height of the SECOND tuck. Pin along the line (fig. 7).
Use the pattern piece as a guide and mark the length and depth of the tuck along the fold as you did for the first tuck (fig. 8).
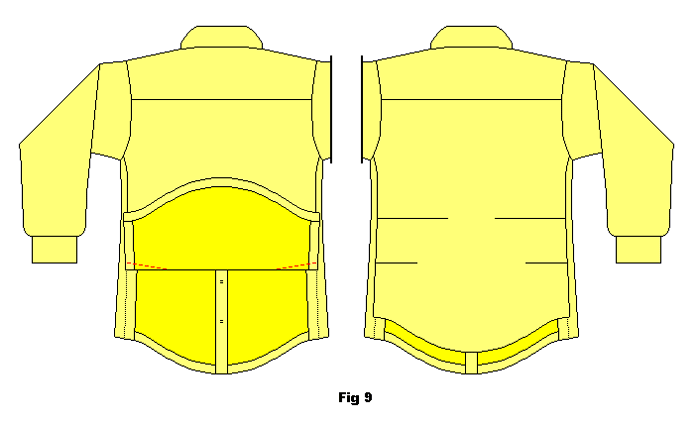
Sew and press tucks flat (fig. 9).
Adapting the length of the front piece
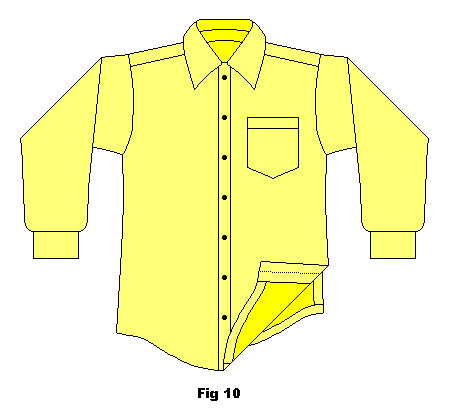
You will now see that the side seams of the shirt are not equal and the front piece hangs down longer (fig. 10).
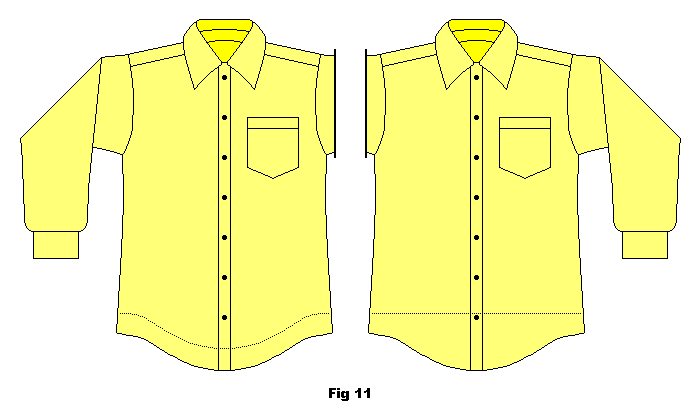
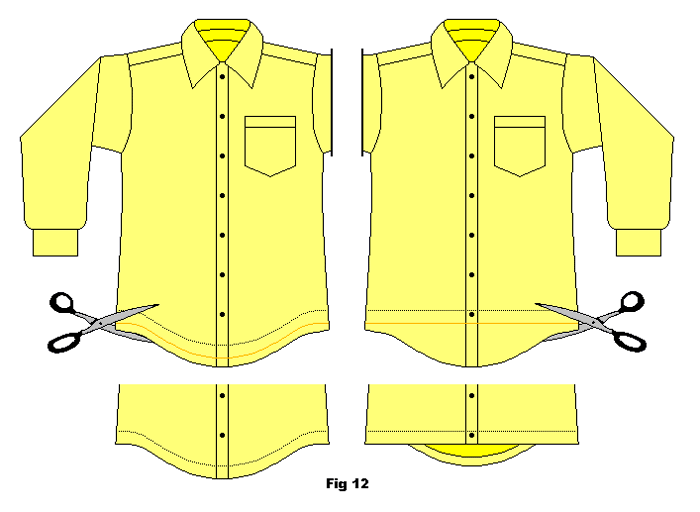
The solution to this (if you do not wish to simply leave it) are to re-cut the front hem either rounded (following the line of the original shirt) or straight (fig. 11).
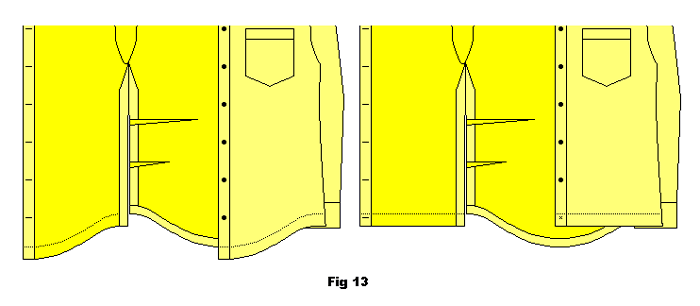
Whether you decide to cut rounded or straight you need to mark your desired hem line on the inside of the shirt. Then add 2 cm seam allowance and cut away the excess fabric (fig. 12 and 13).
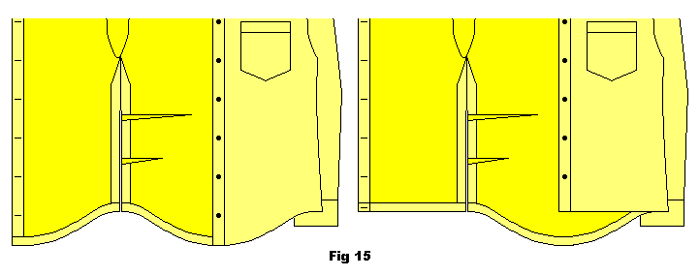
Double fold the seam allowance up. Pin, sew the hem and press (fig. 14 and 15).

Sew side seams together
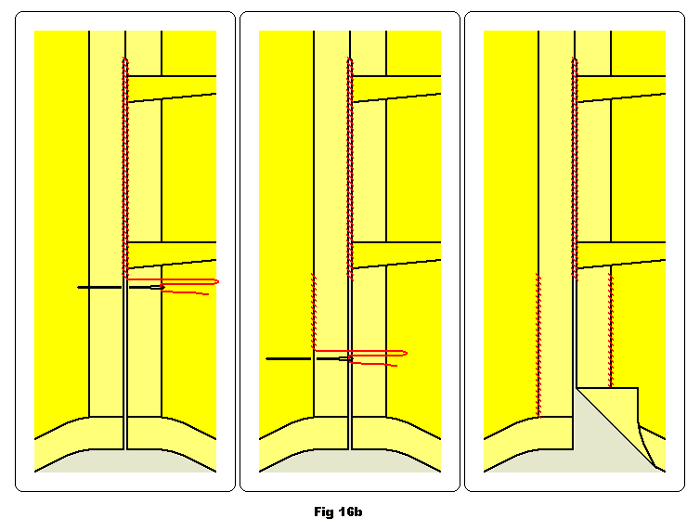
You can chose to sew together the side seams all the way down for completely closed side (fig. 16a). Or if you want a little bit more flexibility in the shirt you can sew them half way closed. This option requires you to hem the sides seams at the bottom instead (fig. 16b).

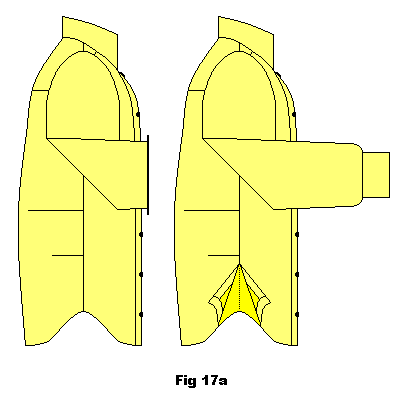
Example of shirt with rounded front with the seams sewn completely closed and half way (fig. 17a).
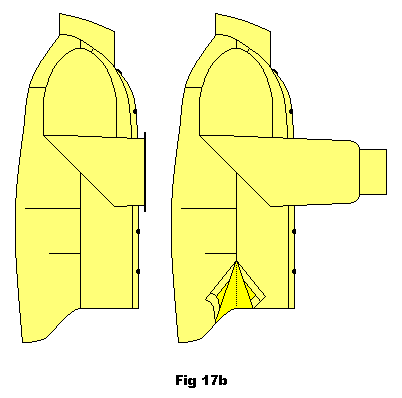
Example of shirt with straight front with side seams sewn completely closed and half way (fig. 17b).
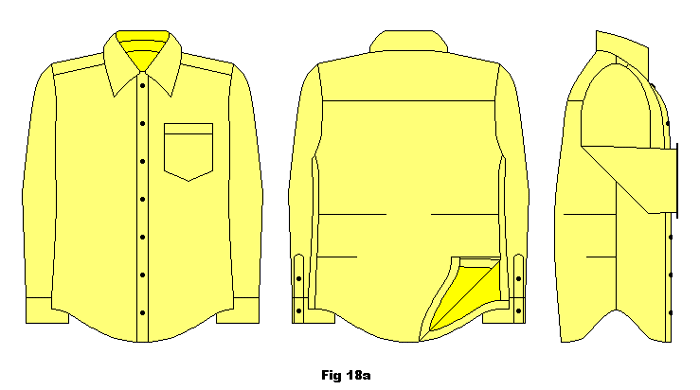
Finished example of the shirt with round front (fig. 18a).
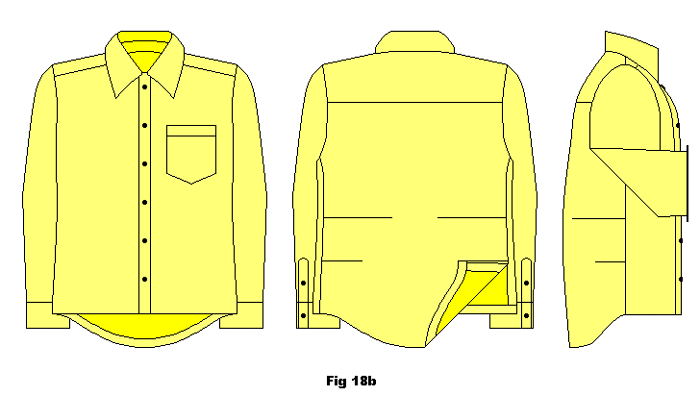
Finished example of the shirt with straight front (fig. 18b).
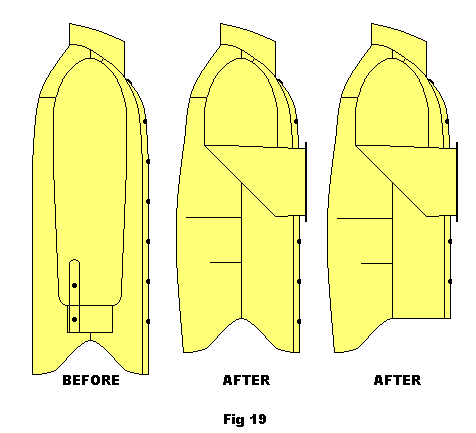
Finished example showing shirt before and after making the curved back (fig. 19).