NOTE!
You can pretty much line any type of front closure jumper or sweater. It can have buttons or a zip, be V or round neck, have a hood or a collar -but it cannot be tight! It can be a little fitted but it cannot be a jumper/sweater that needs to stretch a lot when being worn.
For the pattern making aspect of this adaptation you will need some cheap white non-stretch cotton or calico fabric. The pattern you make will ONLY be suited to that one Jumper/Sweater you are making the pattern from. For each new garment you wish to line you will need to re-do the same pattern making process.
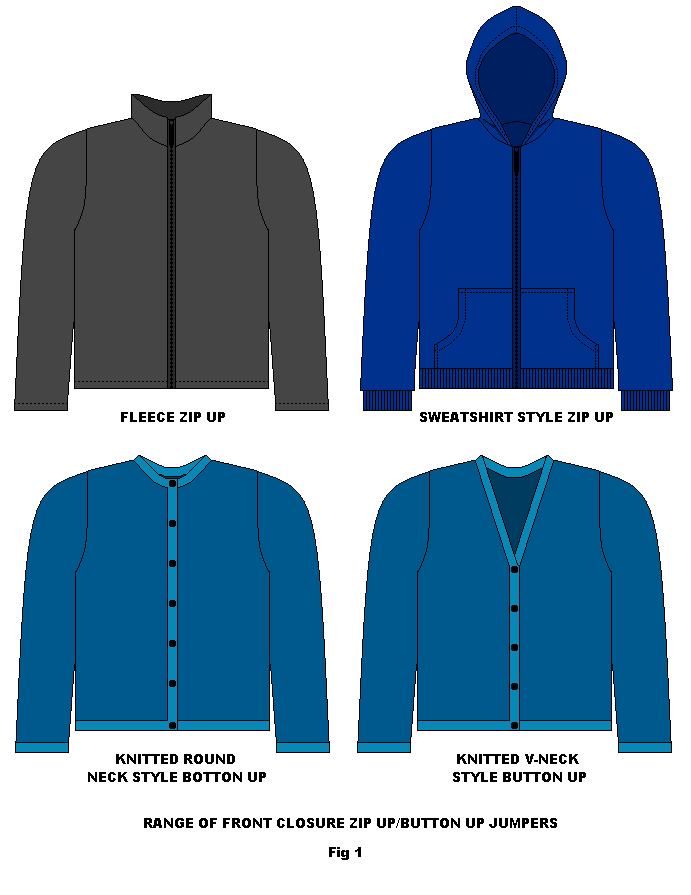
There are different styles of jumpers/sweaters you can use. Fleece, sweatshirt material or knitted (fig. 1).
Making the front pattern piece
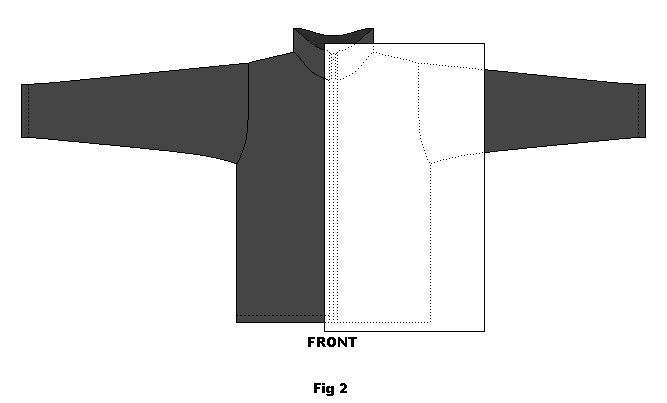
You will need a piece of cotton fabric that is large enough to cover half the front of the jumper/sweater you wish to line with a little extra overlap to spare. Lay the piece of fabric over one side of the jumper/sweater (fig. 2).
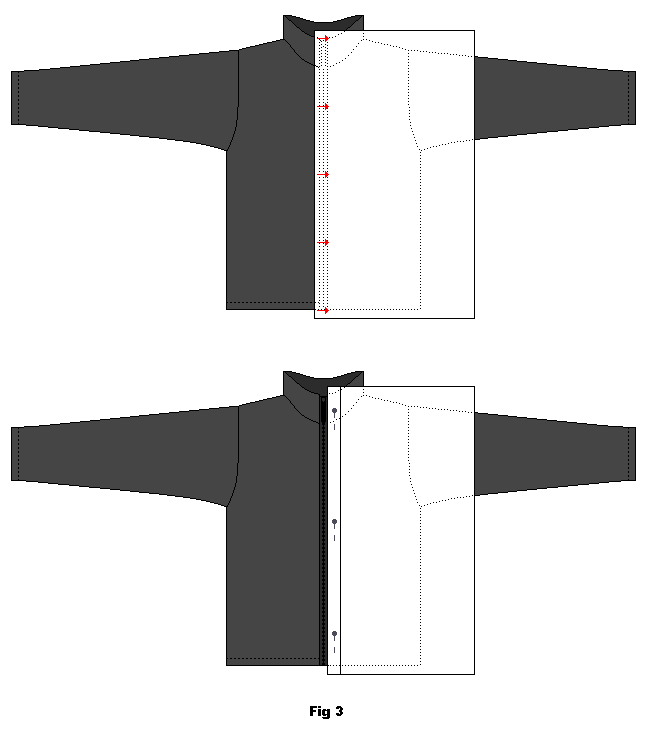
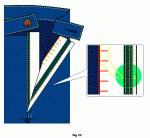
Fold a 2 cm straight edge on the longest side of the cotton fabric. Pin this to the jumper/sweater along the line of the zip. Make sure it sits on the exact edge (fig. 3)
This description uses mainly illustrations of a sweater with zip. Patterns to jumpers/sweaters with buttons are made in he same way.
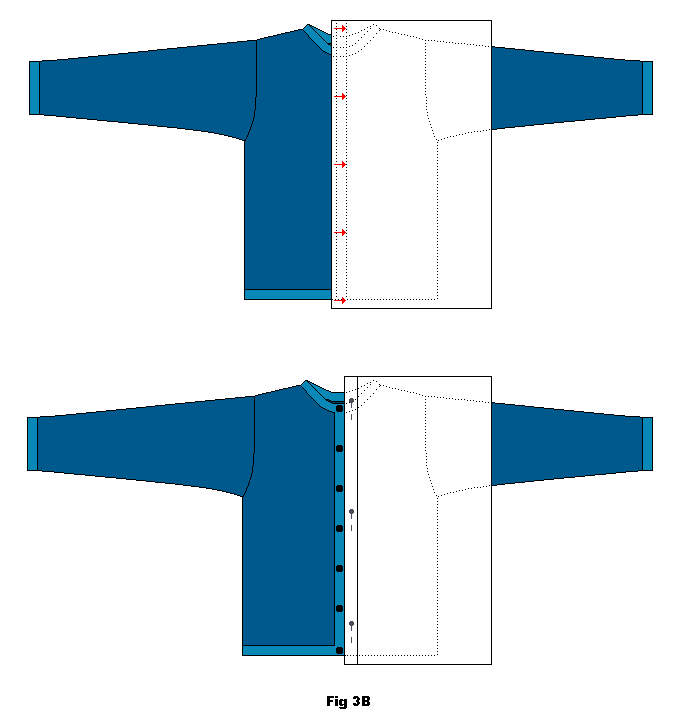
Fold a 2 cm straight edge on the longest side of the cotton fabric. On a button up sweater pin the edge along the seam or line of the jumper/sweater where you want your lining to begin (fig. 3B).
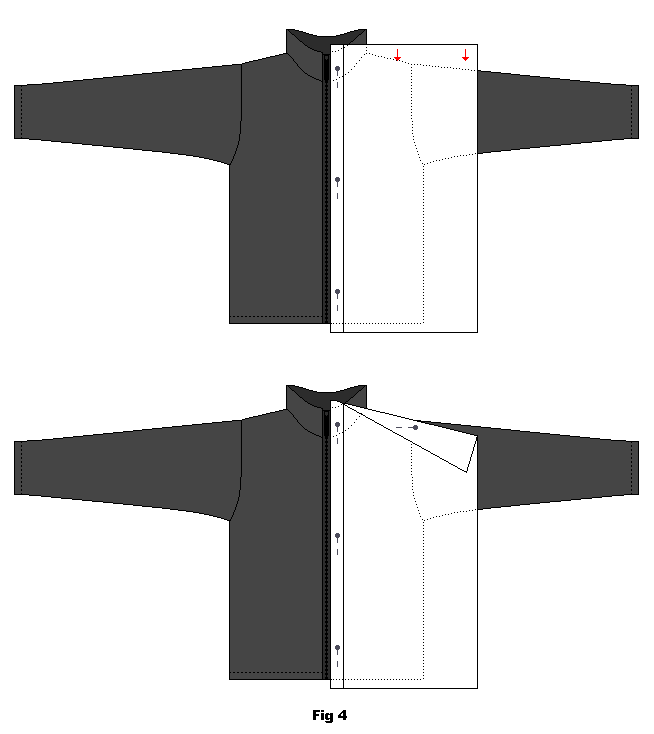
Fold the top edge of the cotton fabric down, on an angel so that it matches the line of the shoulder seam (fig. 5).
Pin the cotton fabric to the jumper/sweater shoulder seam (it can take a little manipulation) (fig. 5). 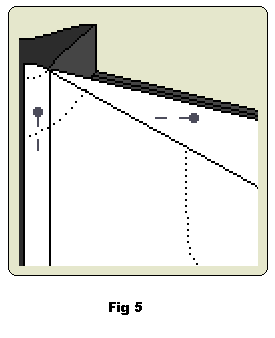
Pin the cotton fabric under the arm of the jumper/sweater (down where the sleeve and body meet up), and around the arm hole if needed. Use pins wherever you need them to hold the fabric in place. Cut with scissors along the seam line of the arm hole, using small cuts (fig. 6).
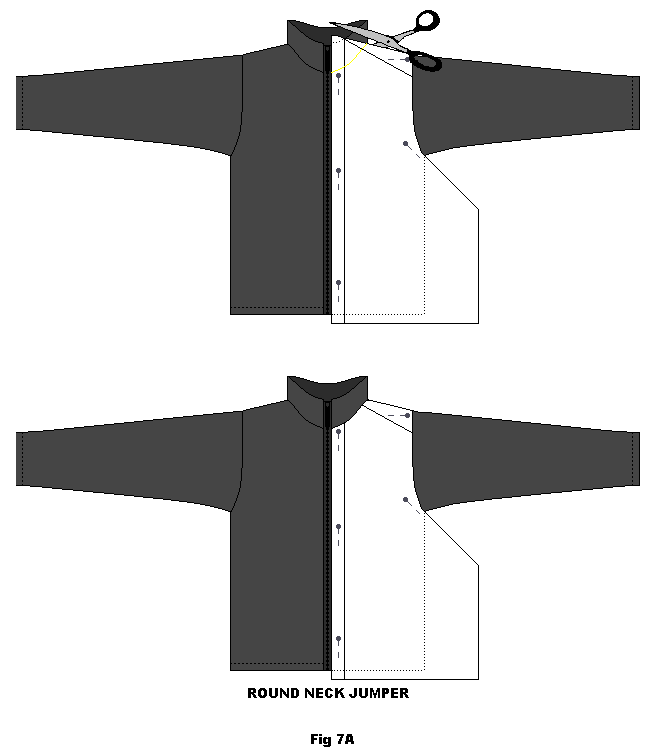
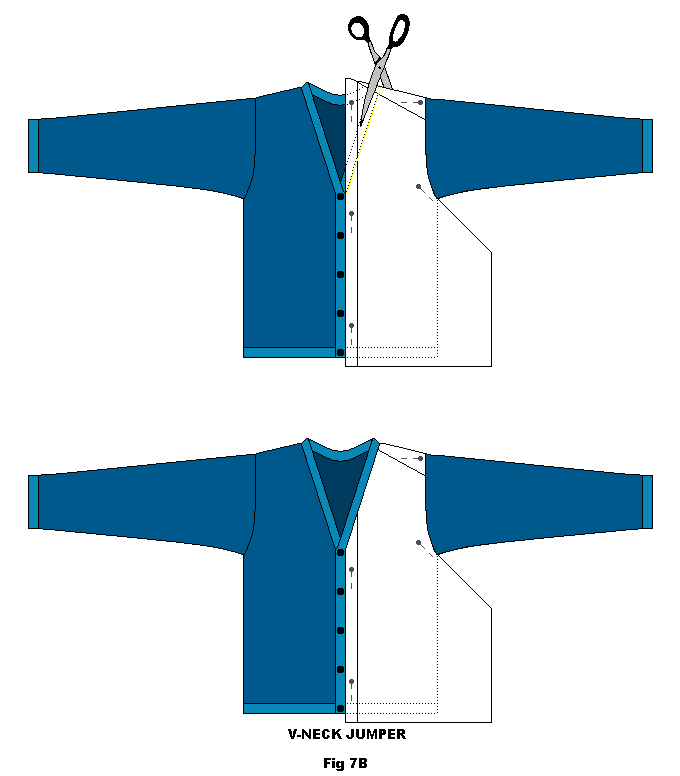
Cut the neck line out using the same technique of cutting small cuts and following the seam line (Fig. 7A (Round neck) or fig. 7B (V-neck).
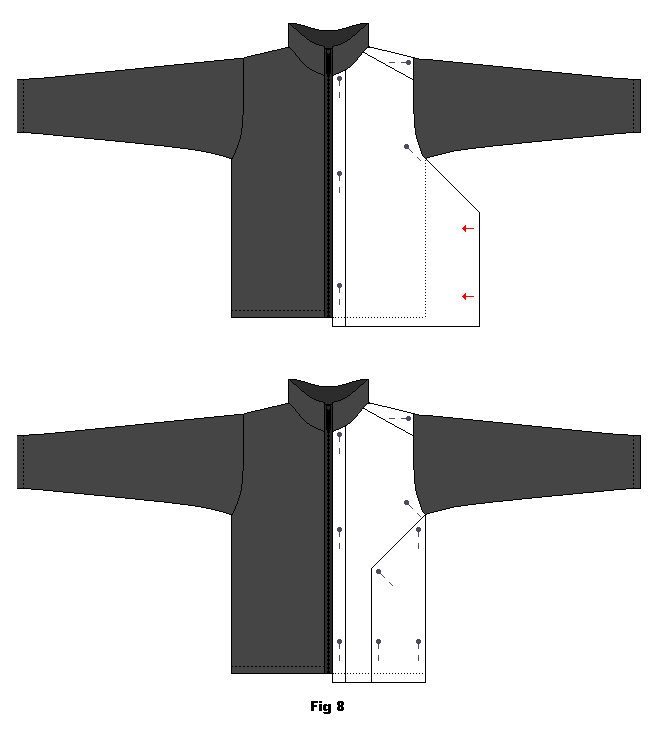
Fold the side edge of the cotton fabric in so that it matches the line of the side seam of the jumper/sweater (fig. 8).
Pin the side edge of the cotton fabric to the jumper/sweater side seam (it can take a little manipulation) (fig. 9). 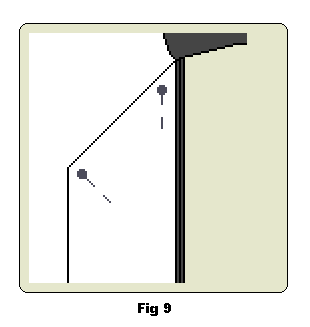
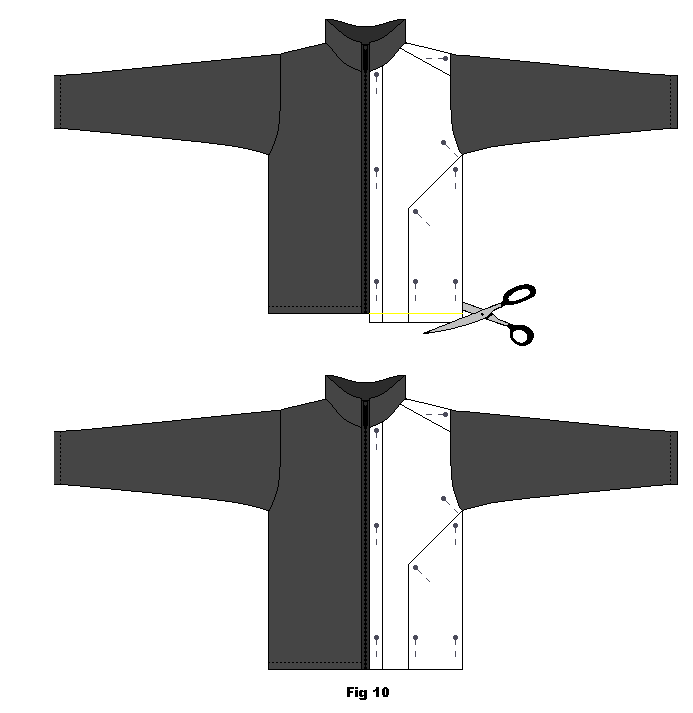
Trim off the bottom edge so it matches the bottom length of the Jumper/Sweater (fig. 10).
Carefully un-pin the cotton fabric pattern piece from the jumper/sweater and then re-pin the pattern piece in the same place. Make sure that all the edges and folds stay in place and the pattern piece keeps its shape.
Now you have your FRONT pattern piece (fig. 11). 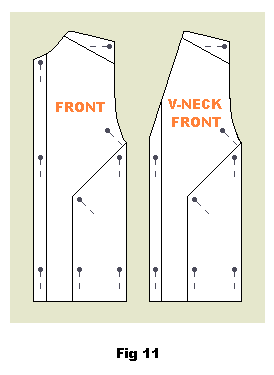
Making the back pattern piece
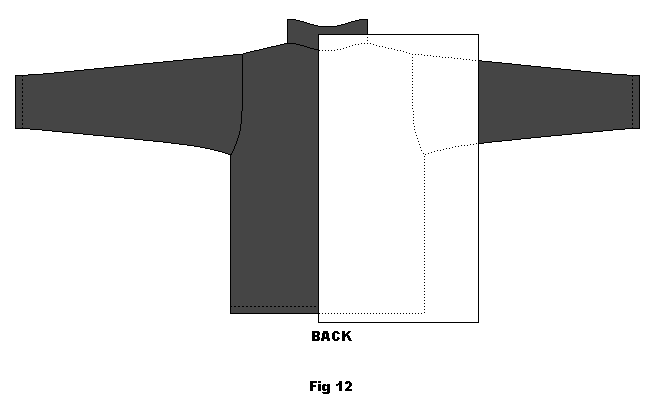
You will need a piece of cotton fabric that is large enough to cove half the back of the jumper/sweater with a little extra overlap to spare. Lay the piece of fabric over one side of the jumper/sweater (fig. 12).
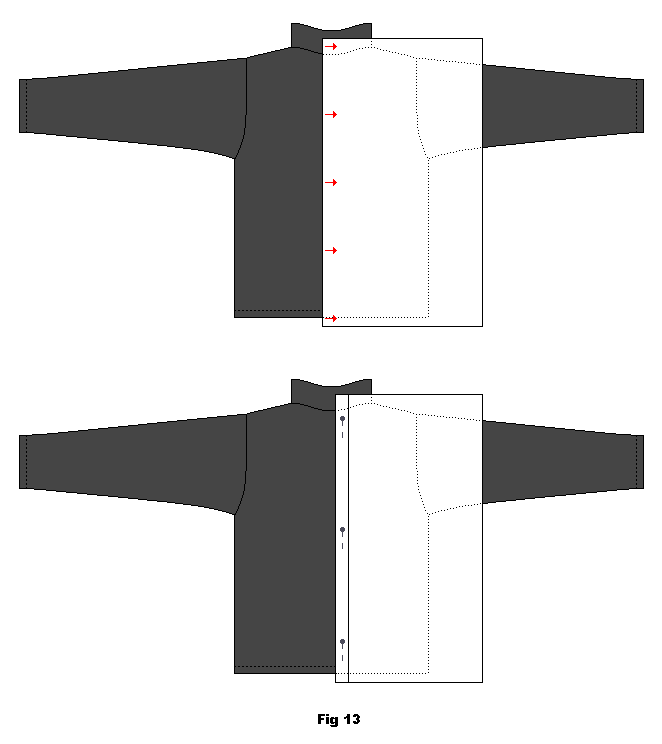
Fold a 2 cm straight edge on the longest side of the cotton fabric. Pin this to the center back of the jumper/sweater (fig. 13).
Follow the same instructions that are used for making the front pattern.
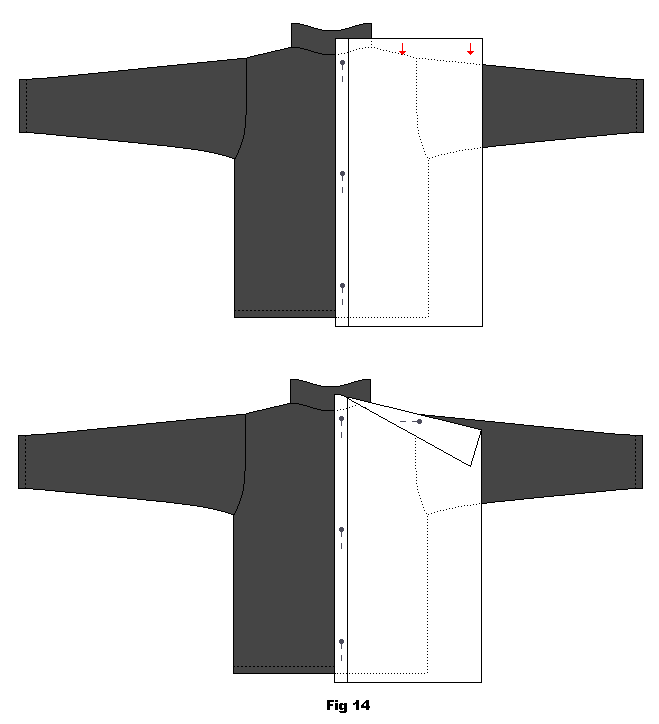
Fold the top edge of the cotton fabric down, on an angel so that it matches the line of the shoulder seam. Pin the cotton fabric to the jumper/sweater shoulder seam (it can take a little manipulation) (fig. 14).
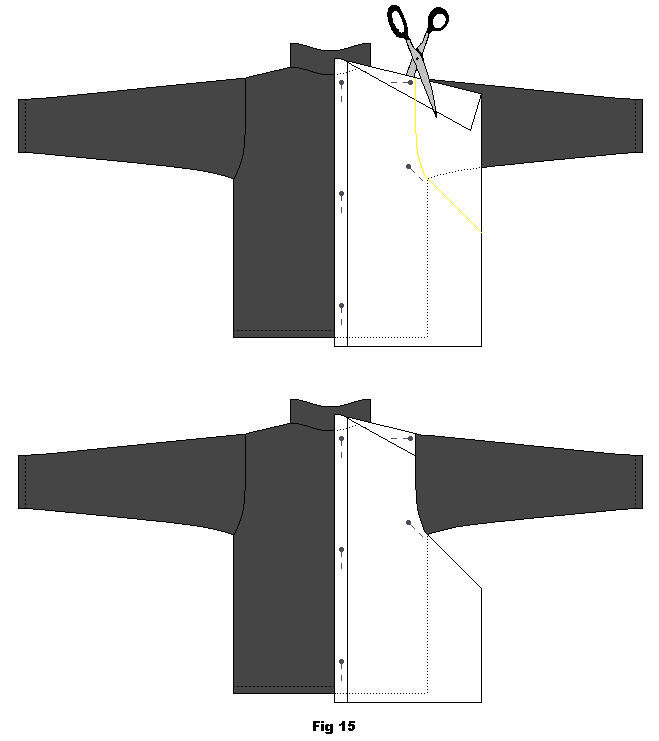
Pin the cotton fabric under the arm of the jumper/sweater (down where the sleeve and body meet up), and around the arm hole if needed. Use pins wherever you need them to hold the fabric in place. Cut with scissors along the seam line of the arm hole, using small cuts (fig. 15).
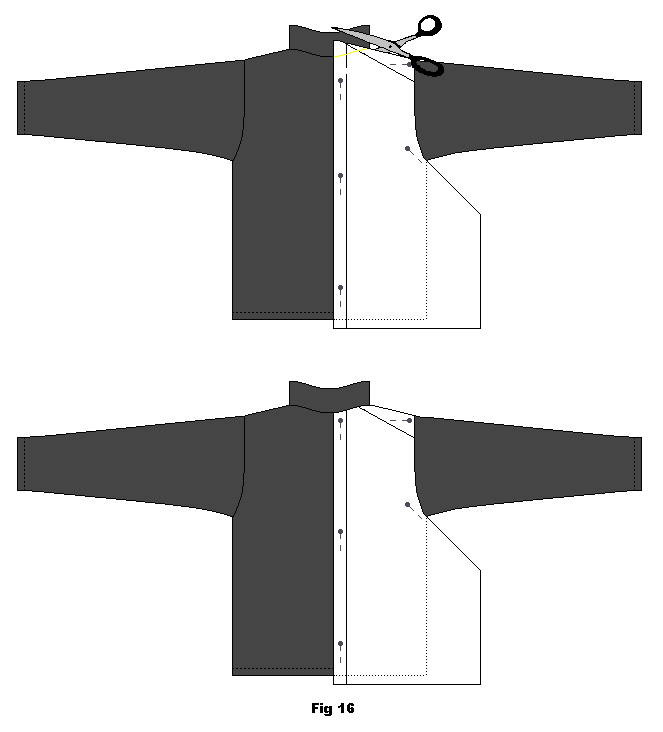
Use the same technique – small cuts with the scissor – and cut the patterns fabric along the neck line. Follow the seam (fig. 16).
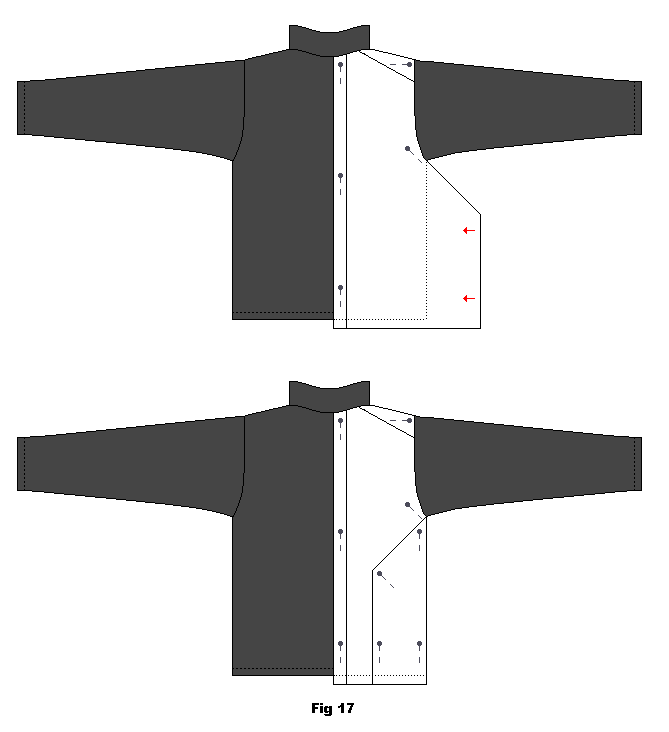
Fold the side edge of the cotton fabric in so that it matches the line of the side seam of the jumper/sweater (fig. 17).
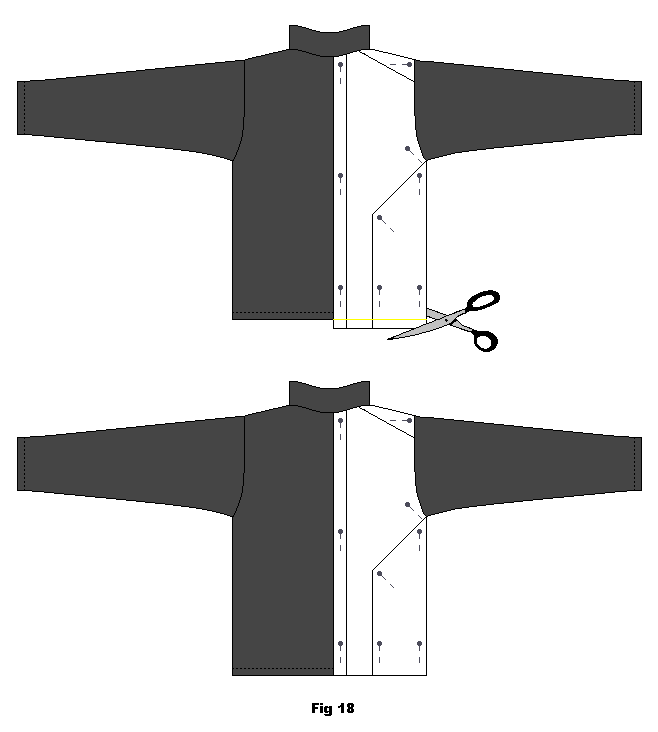
Trim off the bottom edge so it matches the bottom length of the jumper/sweater (fig. 18).
Carefully remove the pattern piece like you did on the FRONT piece. Now you have your BACK pattern piece (fig. 19). 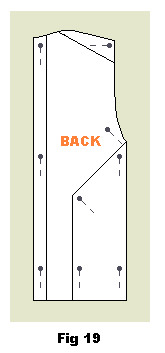
Making the sleeve pattern piece
You will need a piece of cotton fabric that is large enough that when it is folded in half it covers the entire sleeve (fig. 20). 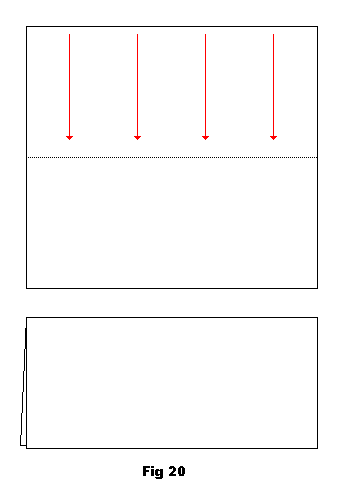
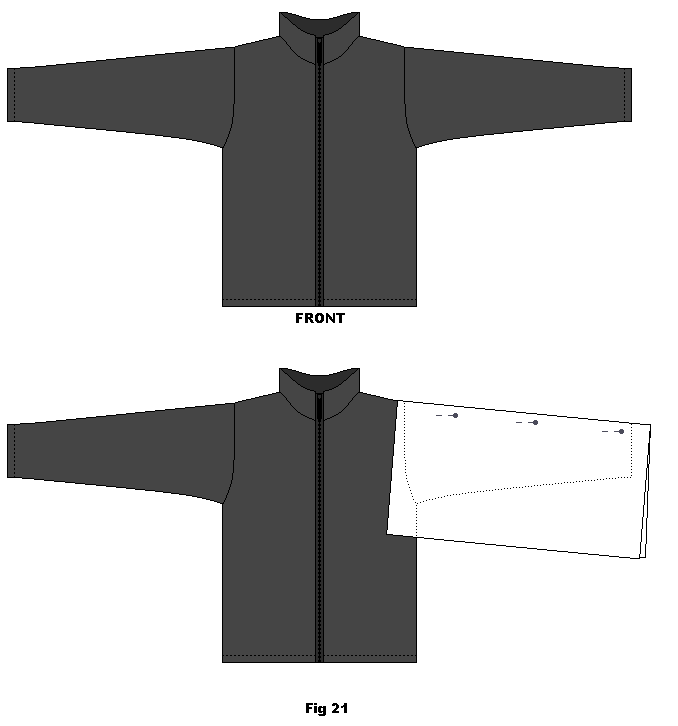
Place the cotton fabric, with the fold line laying along the top center of the sleeve (the natural crease when the top is laying flat on a surface) so that one side of the cotton fabric covers the ‘front’ side of the sleeve, and one side covers the ‘back’. Pin into place along the top of the sleeve both font and back (fig. 21).
Start on the front side of the sleeve:
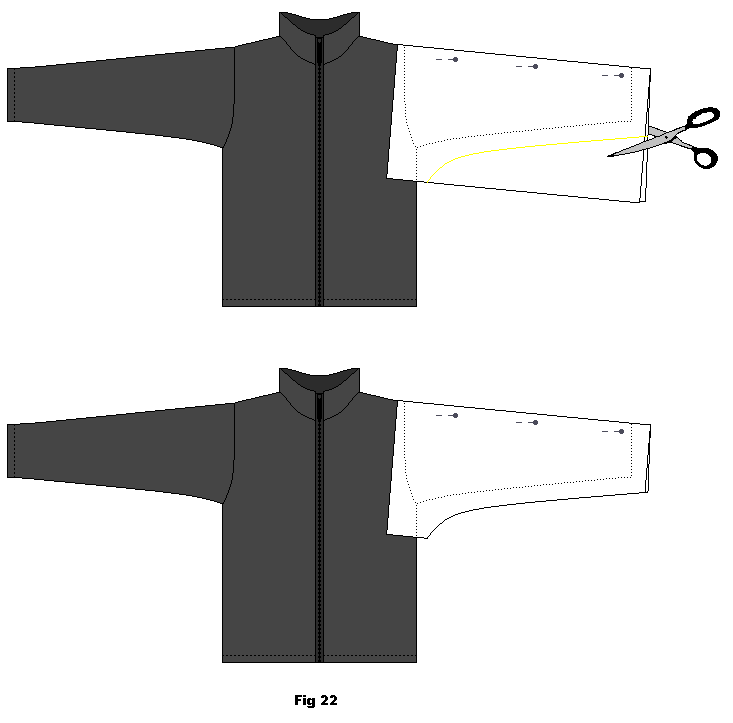
Roughly cut away some of the cotton fabric that hangs below the seam edge on both side. Leave a few cm excess! Don’t cut too close to the seams as you just want to get rid of some of the bulk (fig. 22).
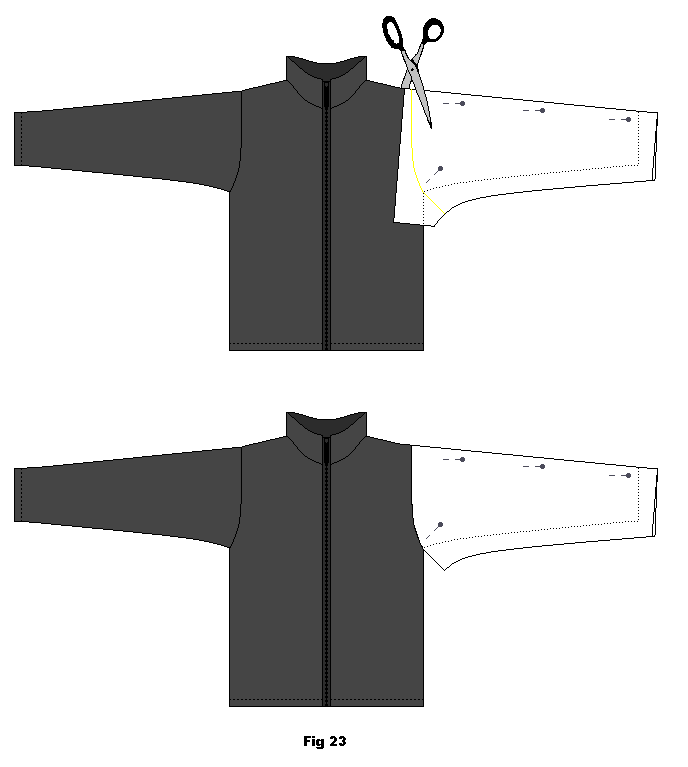
Pin the cotton fabric under the arm on the sleeve, (down where the sleeve and body meet up)and around the arm hole if needed.
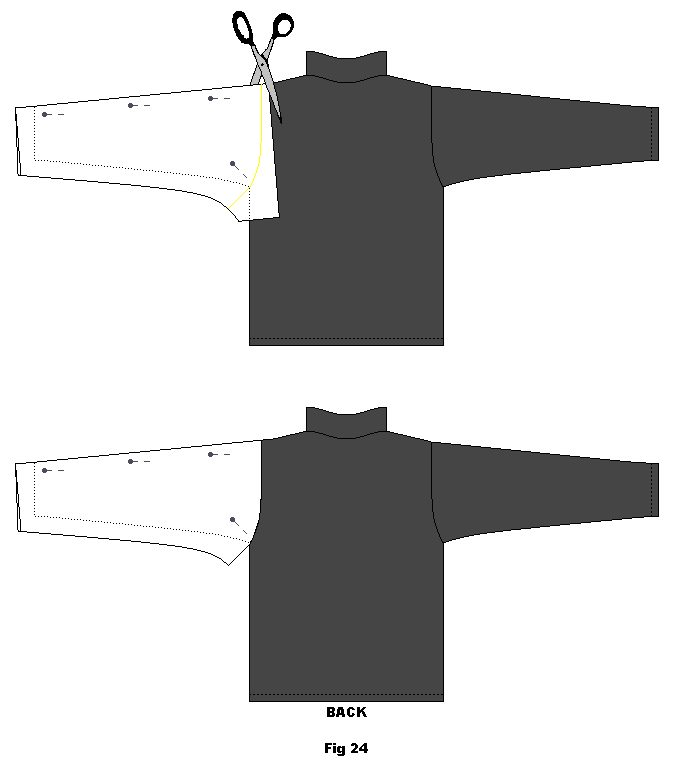
Cut with scissors following the seam line of the arm hole, using small cuts exactly like you did on the front and back pieces. Do this on the ‘front’ side and the ‘back’ side (fig. 23 and 24).
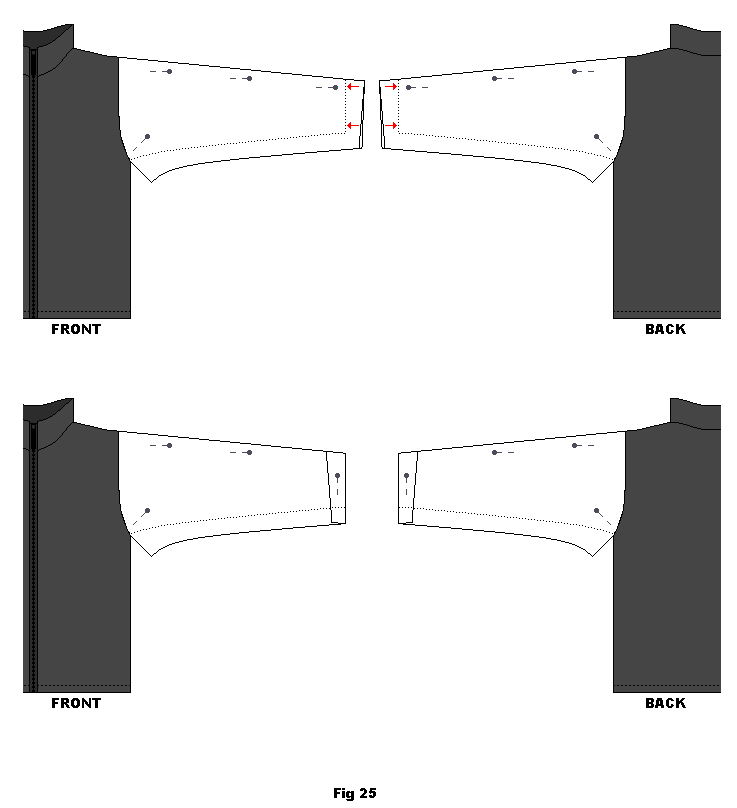
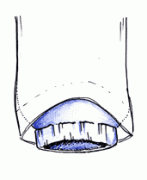
FRONT and BACK (around the arm): Fold and pin the cotton fabric at the cuffs so that it is lined up with the cuff of the jumper/sweater (fig. 25).
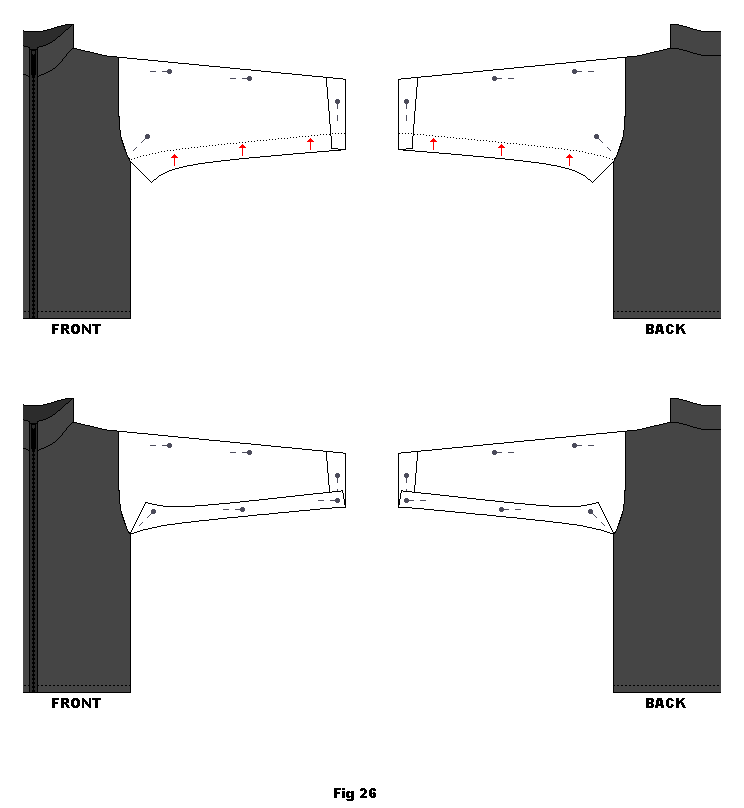
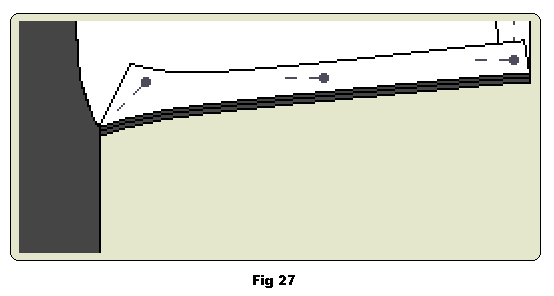
Fold and pin the cotton fabric at the seam, at the bottom of the sleeve so that the cotton fabric follows the line of the seam, both ‘front’ and ‘back’. (it can take a little manipulation) (fig. 26 and 27).
Mark on the pattern piece which side is the ‘front; and which is the ‘back’.
Carefully remove the pattern piece like you did on the FRONT and BACK pieces, un-pinning and re-pinning so that the pattern piece keeps its shape. When you open out the pattern piece flat, you have your SLEEVE pattern piece (fig. 28).
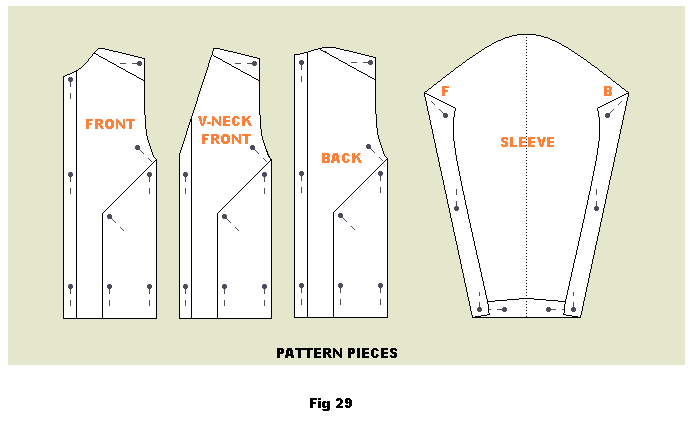
All pattern pieces including how they should roughly look with a round and a V-neck jumper/sweater (fig. 29).





Behöver fodra en sticksig kofta dom är stickad uppifrån och ned med ok.