Pages to read before using the patterns:
Making sample garment for adaptions
There are many reasons for making a sample garment, and although it can be a tiresome and often boring process, it gives you a finished pattern that is adapted to you and can be used for endless amounts of finished garments. The fabric you make your sample garment out of will be dependent on what you want to make your finished garment in. There is no point making a sample skirt out of stretch fabric if you intend to have the finished skirt in nonstretch fabric. It is just a waste of time.
Sample garments give you a chance to see how the finished garment will fit you. Is it the right size? Is it the right length? Are there any changes you need to make? Consider the fabric you will make the finished garment in. Will it be a thick double layer jacket? Then you’ll need to make the sample a little larger to accommodate this. It is wise to make the sample out of the cheapest fabric you can find. Go to you local fabric store and look at their end of roll stuff, their cheap and discount stuff, their sale stuff. It doesn’t need to be fancy, look for unbleached cotton or calico, and stretch T-shirt fabric. (For users in Sweden, Ikea sells unbleached cotton on the roll for 20 kronor per meter, almost unbeatable, and perfect for this) You can also use old cotton sheets.
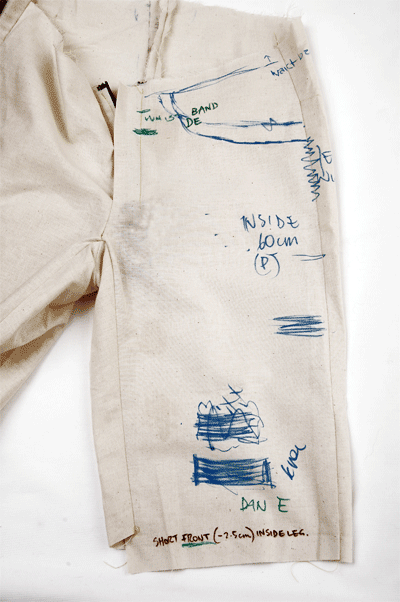
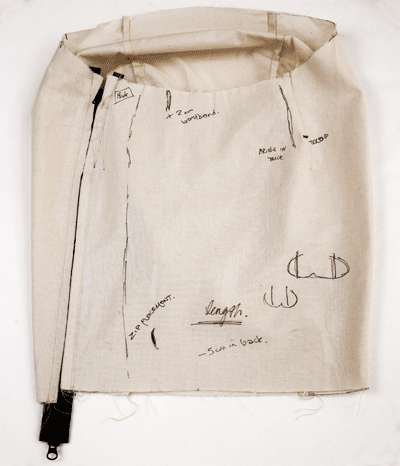
Look for something white or pale. Then you can use a marker or text pen and mark your changes directly on the fabric, so you know where you need to fix things when you take the sample off.
 When cutting and sewing your sample, it doesn’t need to be perfectly finished. Don’t worry about fixing hems or pockets. But you will need to use zips when making a sample for pants and skirts with zips in. Mark out the places where you want to have pockets and buttons while you are wearing the sample. If you need to change the position of a zip or something mark theses changes too. Make sure you check yourself in a mirror, not just by looking down at your self. Sit in your normal position. Make sure, if you intend to wear a special bra or underwear under a particular garment, that you also wear these while testing the sample.
When you have finished testing, you can un-pick the sample and make the changes you need to make. Then either make the changes on your paper pattern, or if the changes are extensive, cut a new paper pattern. You can also use the un-picked fabric sample as a pattern for your finished garment.
Sometimes you will need to make several samples before finding the solution that suits you and fits you best.
Hang in there; it will all be worth it in the end when you have your perfect pattern!


Are seam allowances present on the patterns, or do I needs to add them to the patterns.
Hiya
You need to add your own seam allowance. 1.5cm or 2cm. 😉