Note! You might need to make up for the lack of warmth around the backside by lining the back of the wheelchair or/and cover the cushion in fleece or other warming fabric/material.
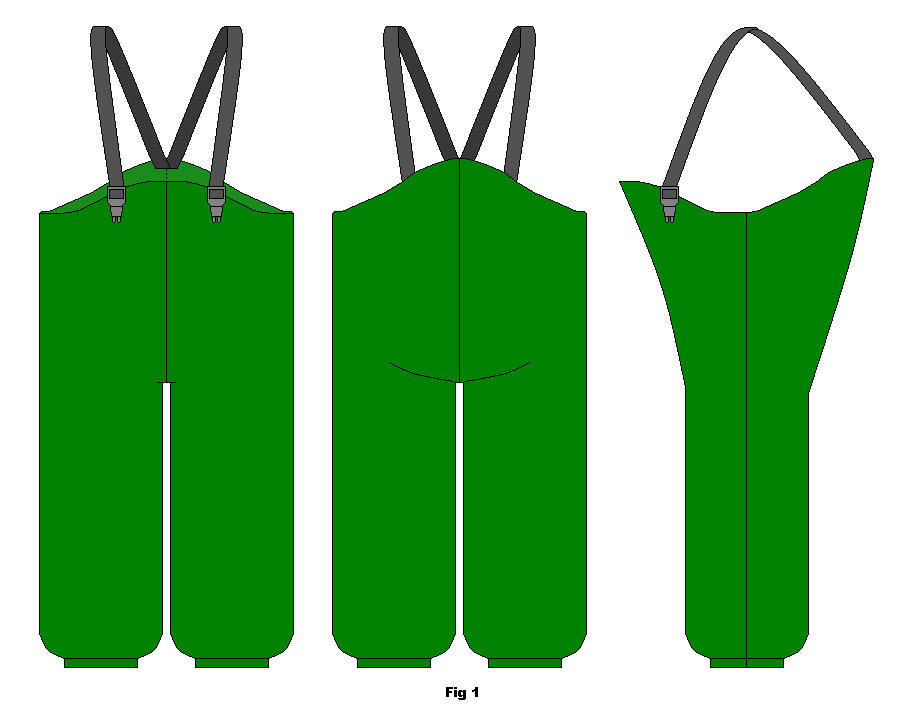
This pattern is for Children’s overalls, either snow or rain. The process is almost the same for both and any differences are noted.
Basic rain/snow pants with elastic straps and clips. (Fig 1)
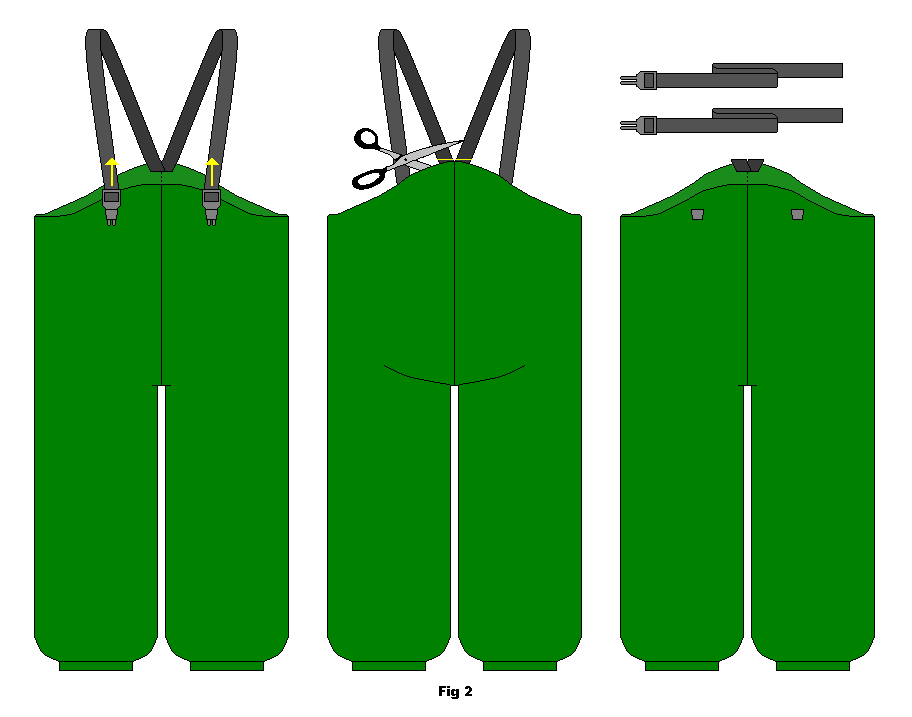
Unclip the straps at the front and remove them (fig. 2).
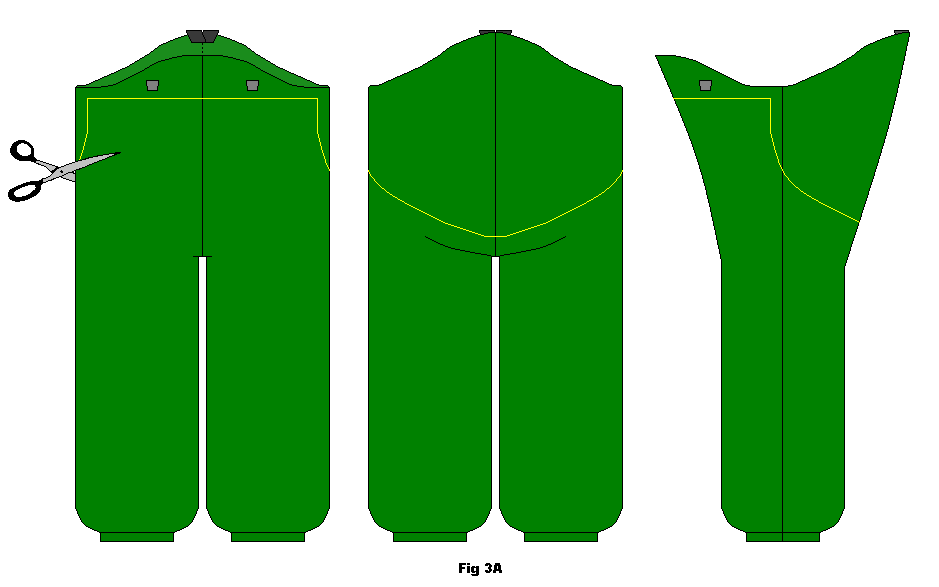
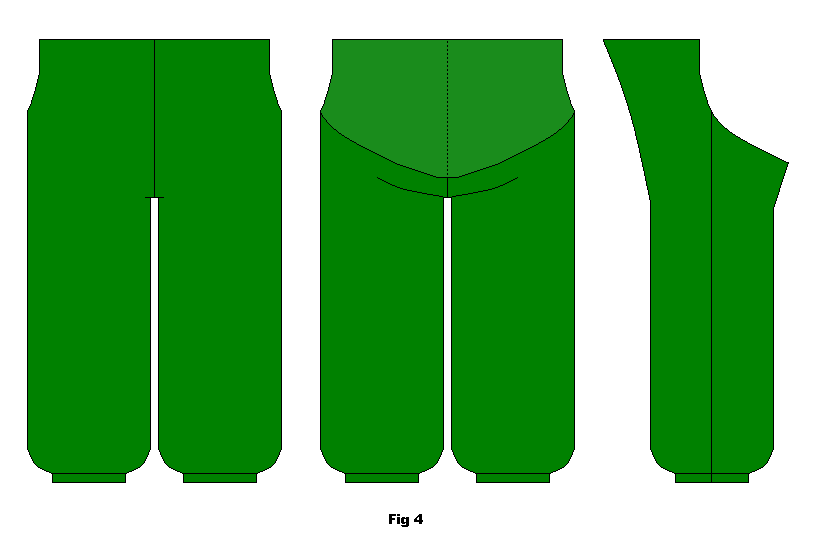
Draw up the lines for the cut-out in the back. There are no rules for this but you want to keep some of the length in the front at the same time as you go down quite low at the back. Be careful to not go too low as you might compromise the crotch line. Once you are satisfied cut away the excess fabric (fig. 3A).
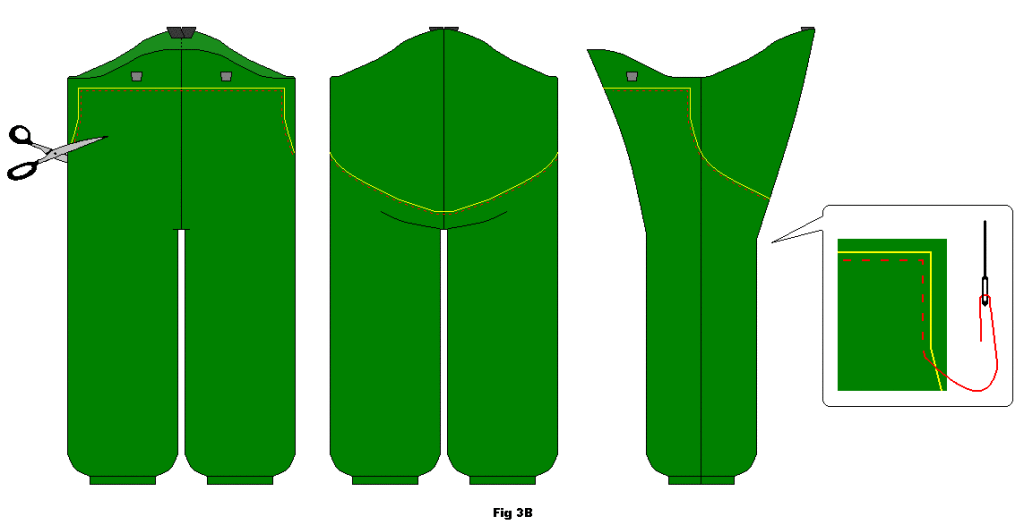
For snow pants you need to hand sew a line of stitching on the pants below the drawn line before you cut as these pants are thicker and made of several layers of fabric and you want to be able to keep these layers together (fig. 3B).
Excess fabric is removed (fig. 4).
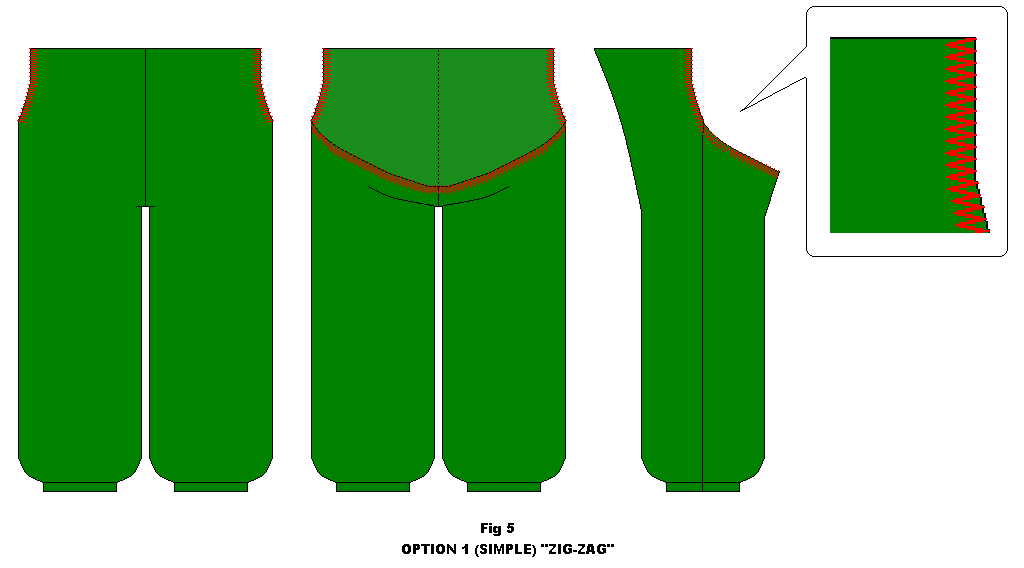
OPTION 1 – using zig-zag.
Depending on the type of fabric your rain/snow pants are made of, you might be able to get away with simply zig-zagging the edges on the sewing machine. It will not be as neat a finish as option 2 below but it is simple and fast.
Just set your zig-zag stitch to wide with a short stitch distance (so the zig-zags are close together) and sew around the edge. Depending on your machine it might not be possible to sew certain fabric types. Fabrics with rubbery or plastic surfaces can get stuck in ther machine as they do not move as smoothly. An option for this is sewing with a sheet of tissue paper between the presser foot and the fabric. A “walking” foot for your machine might also do the trick (fig. 5).
OPTION 2 – using facing.
You will need some cotton knit rib fabric for this option. It is the type of fabric used in sleeve cuffs etc. on clothing. It is ribbed and stretchy and comes in a tube. You do not need much, ¼ of a meter should be enough with some to spare. The reason to use ribbing rather than regular fabric is that ribbing will pass around the curves easier due to the stretch quality of it (fig. 6).
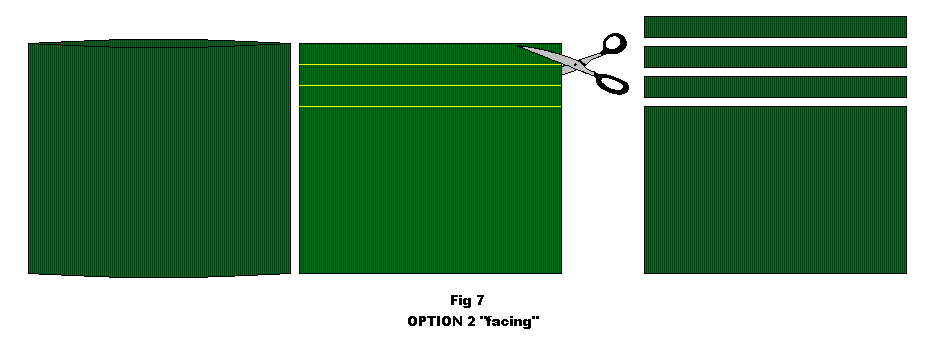
Mark out and cut 3 cm strips from your ribbed fabric. Depending on the length required and the width of the ribbing 2- 3 strips should be enough (fig. 7).
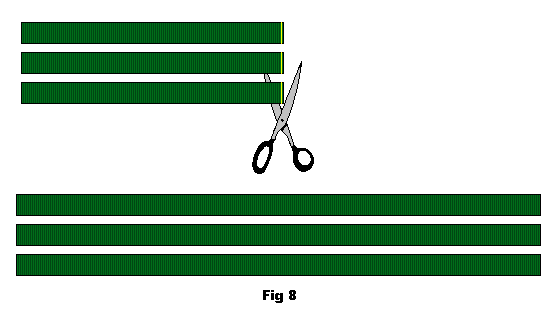
Cut the side of the strips so they can be opened flat (fig. 8).
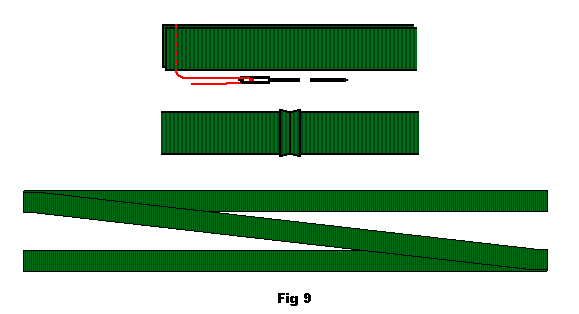
Join the lengths together and press the seams flat (fig. 9).
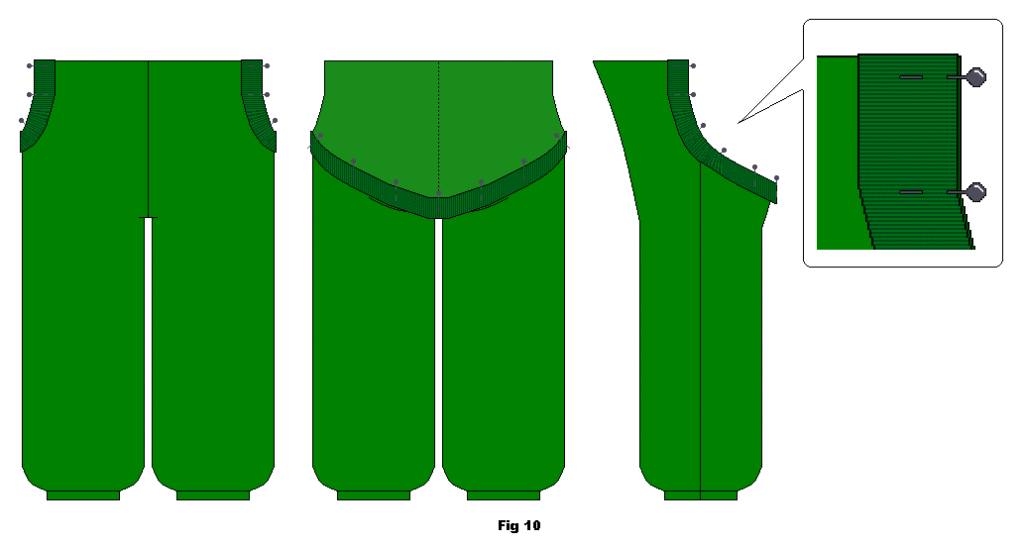
Pin the (now long) strip to the FRONT side of the pants (right side to right side) all around the edge. Line up the raw edge of the pants with the raw edge of the strip (fig. 10).
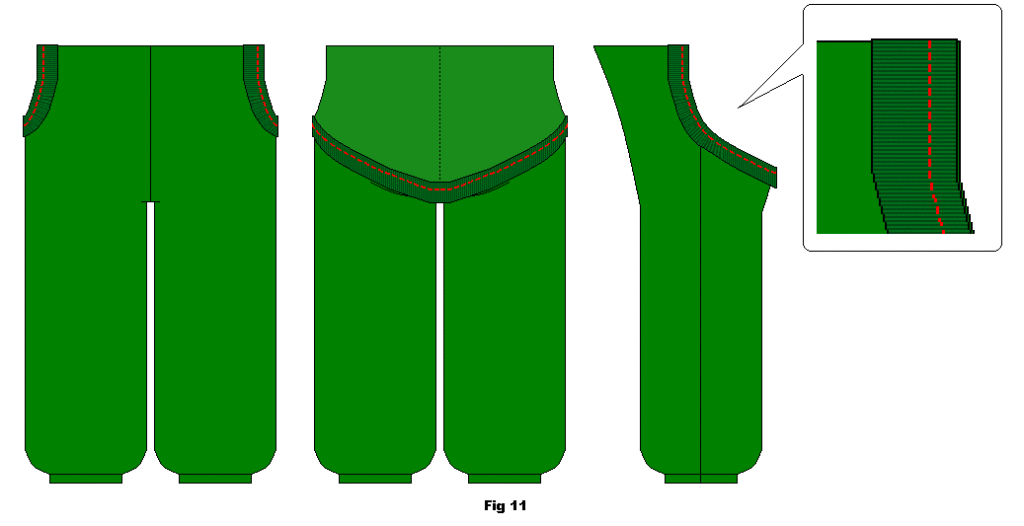
Sew around the entire edge with a seam allowance of 1 cm or slightly less on the edge side (fig. 11).
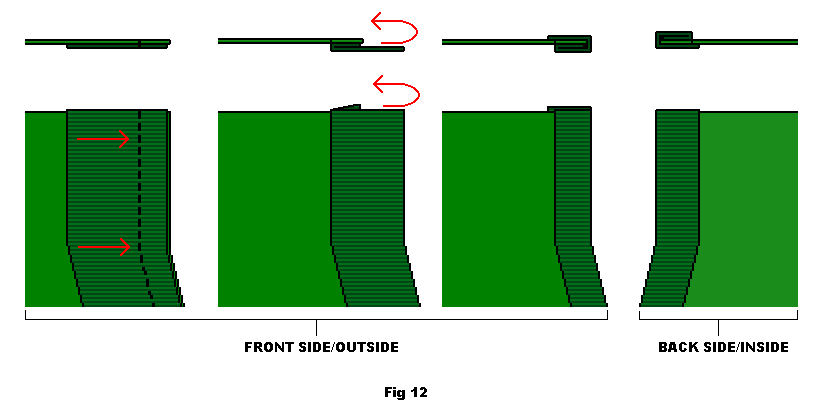
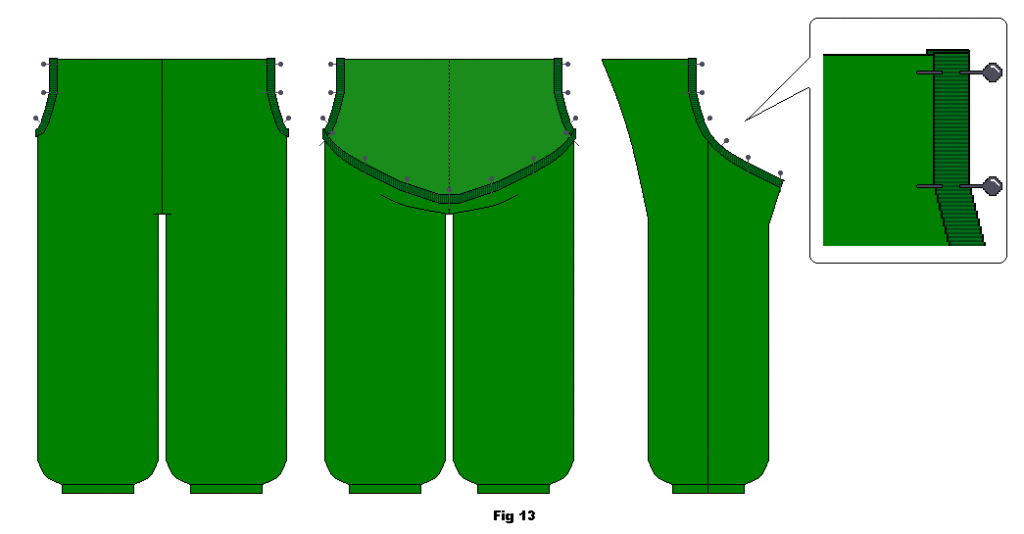
Once the strip is sewn into place fold it out then around the raw edge of the pants and to the back side (fig. 12).
Pin into place (fig. 13).
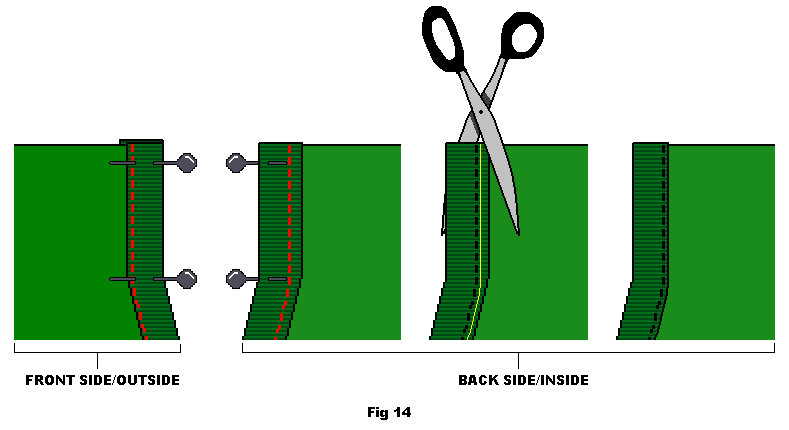
Sew close to the inner edge on the front side (about 1 cm in). Once strip is sewn you can remove any excess strip fabric from the back (fig. 14).
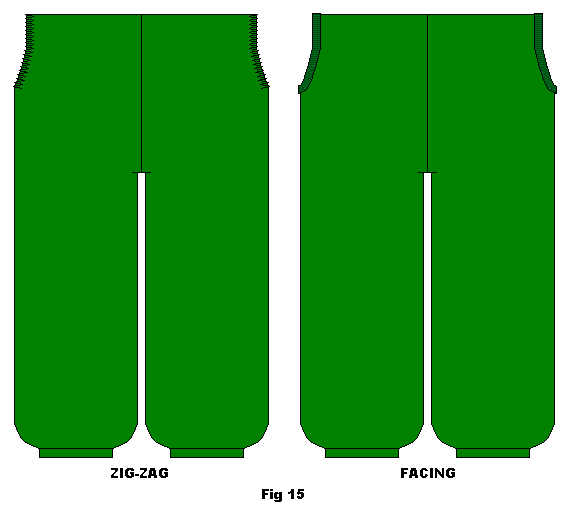
Examples of Zig-zag and facing finishes (fig. 15).
Now you need to make a channel for the waist band at the front. It needs to be wide enough to fit the elastic through if you are using the SINGLE CLIP waist (see fig. 19 below).
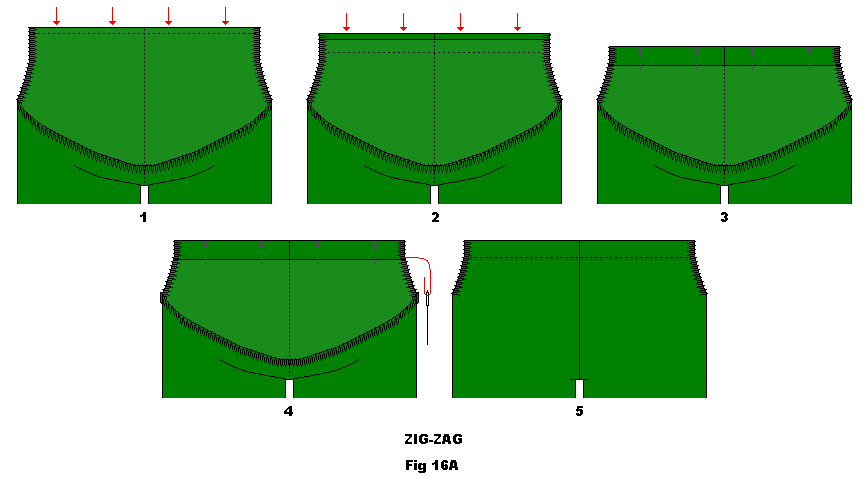
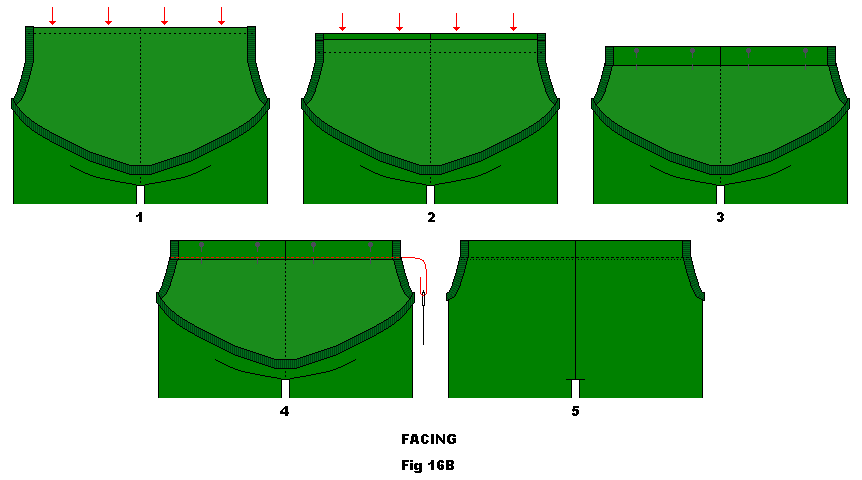
Fold the top down about 1 cm, then fold it down again, about 4-5 cm (width depending on elastic) and pin into place. Sew at the lowest edge. If the rain pants fabric is not moving through the machine, you will need to use strips of tissue paper (that you can remove later) between the machine foot and the fabric surface or a “walking” foot. Or you might need to sew it by hand (fig. 16A and 16B).
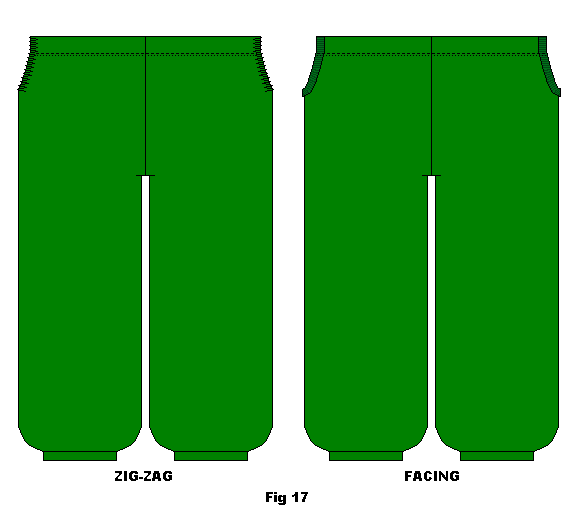
Examples of finished waistband (fig. 17).
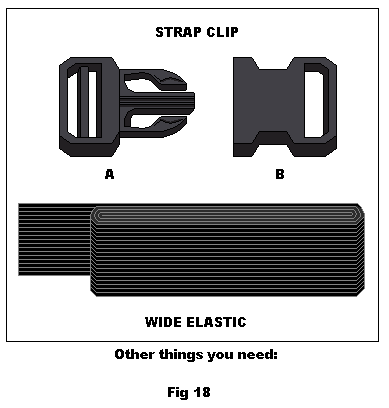
Examples of clips and wide elastic. Make sure the elastic width matches the clip when you buy it (fig. 18).
SINGLE CLIP: (can be placed on either side.)
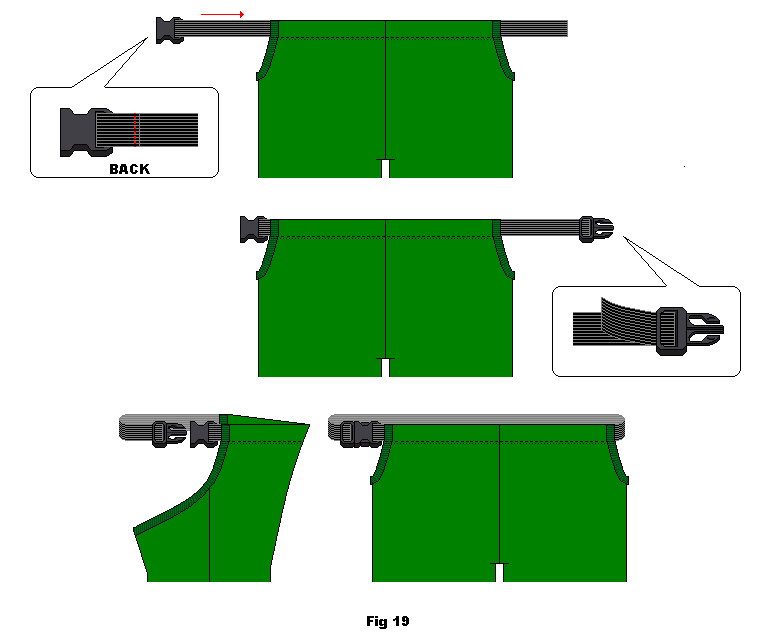
Measure the waist to see how much elastic is needed. Add around 20 cm extra length and cut the elastic. You can always trim it down later. It is better to start with more than not enough.
Attach the elastic to clip piece “B” and sew into place. Thread the end of the elastic through the channel in the front of the pants. Attach the end of the elastic to clip piece “A”. This end should be kept adjustable (not sewn into place) so that you can make it looser and tighter when putting the garment on (fig. 19).
DOUBLE CLIP:
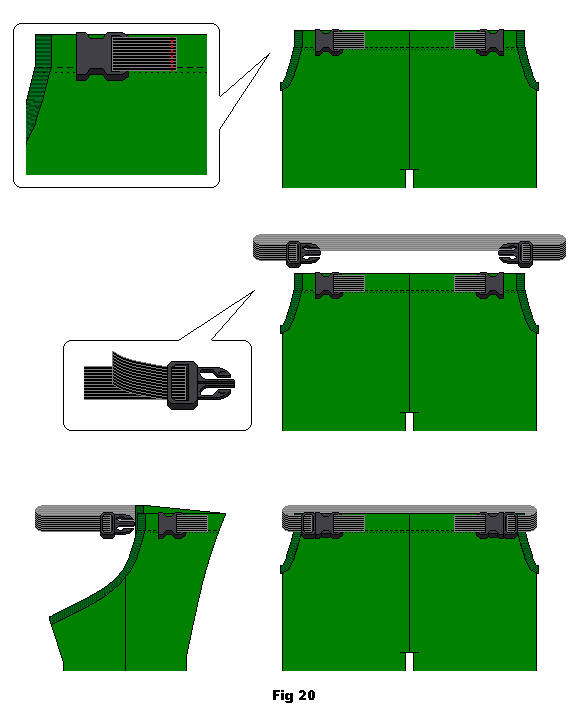
Use a small length of elastic (about 8 cm) and attach clip “B” by threading elastic through the clip lining up the edges. The elastic is basically folded in half with the clip at one end and the raw edges matched up at the other. Then sew it into place on the pants.
Sew a clip on each side close to the outer edge. Measure the waist, and cut the elastic with about 5-10 cm extra. You can always trim it down later. It is better to start with more than not enough. Attach the two “A” clips to the ends of the elastic. These ends are to be kept adjustable so don’t sew them into place (fig. 20).
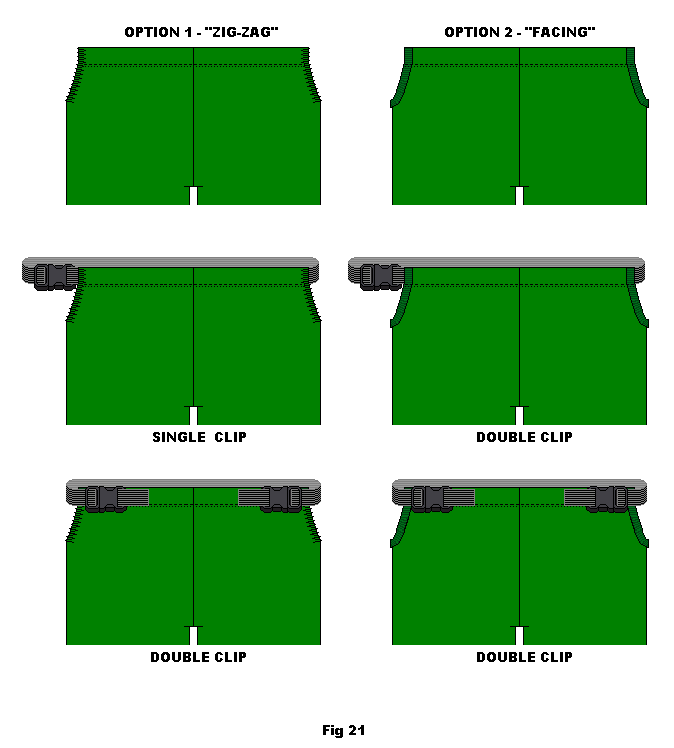
Finished examples of different clip and facing combinations (fig. 21).




Absolutely love this ideal! I am also going to try this for a regular warmer pants for sitting in her wheelchair when going out and match it up with a hi/lo shirt. My daughter who is 27 but very short can’t move her arms towards the back and not too much even towards the side at all due to shoulder dysplasia. Her arms are also very short she can’t reach down to the side of her hip. Since she is always in house she never wear pants, short, or shirt because she can’t get the back down and she has a large rounded protruding back side, like most dwarfs. If I see her going to the bathroom I will pre-pull down the back of her panties and shorts. I am not a great sower I have renin many set of pants trying to find a solution to this problem. I going to find some rib knit fabric which I never brought before is there anything I should be aware of for this fabric.