Here you will use the jumper/sweater you wish to line, the pattern pieces you have already made to suit this and some lining fabric.
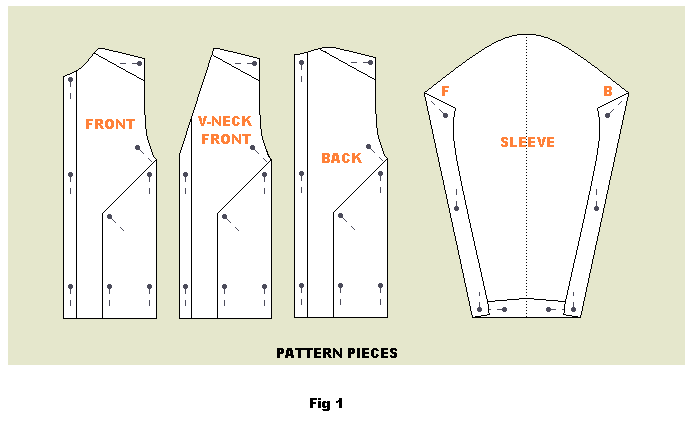
Have the pattern pieces you made for the sweater ready (fig. 1).
Cutting out the fabric pieces and making the pleats
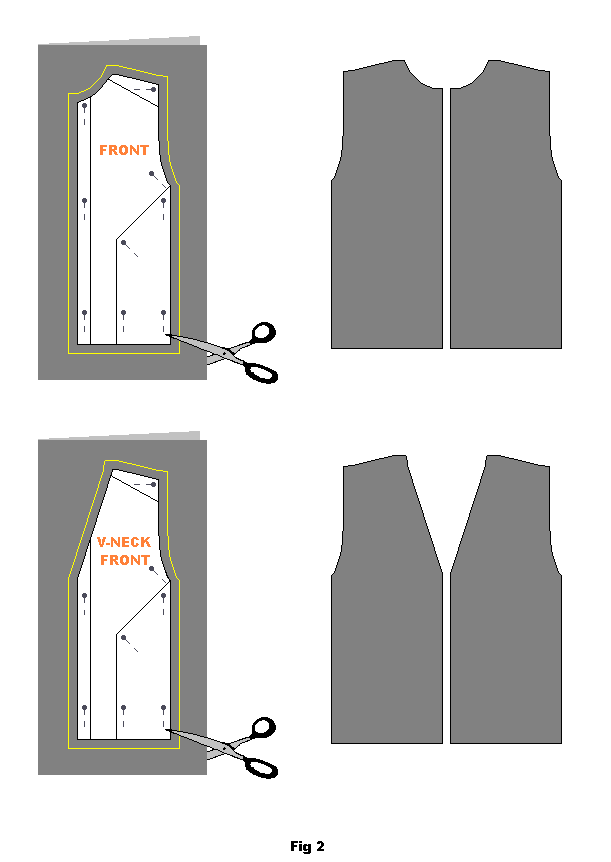
You need two pieces of the FRONT pattern piece that mirror each other. Lay on pattern piece on double layer of fabric and add approximately 1 cm seam allowance around the whole piece. Cut out (fig. 2).
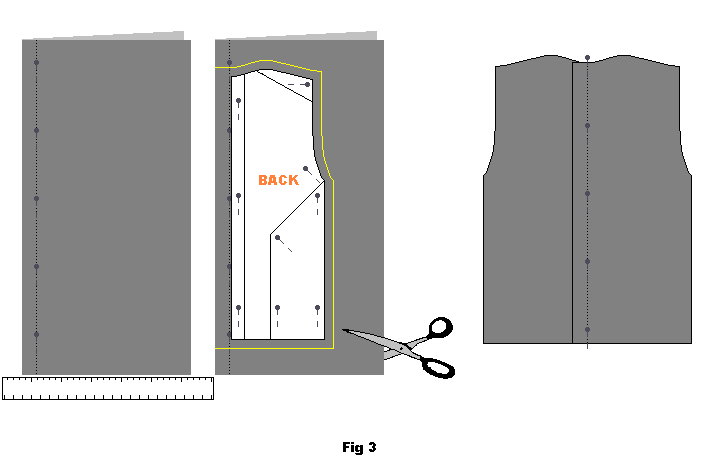
The BACK piece has an extra pleat of fabric in it to make it more roomy, so it requires a little extra work cutting.
Fold the lining fabric in half and press the fold lightly with an iron so you get a slight crease. Measure about 2 cm in from the crease and pin along that line. Lay your BACK pattern piece along the line (2 cm in from the fold). Line it up straight on the pinned line. Add 1 cm seam allowance all around and cut out. NOTE! Cut straight across when you get to the folded edge. do not divide the folded parts! (fig. 3).
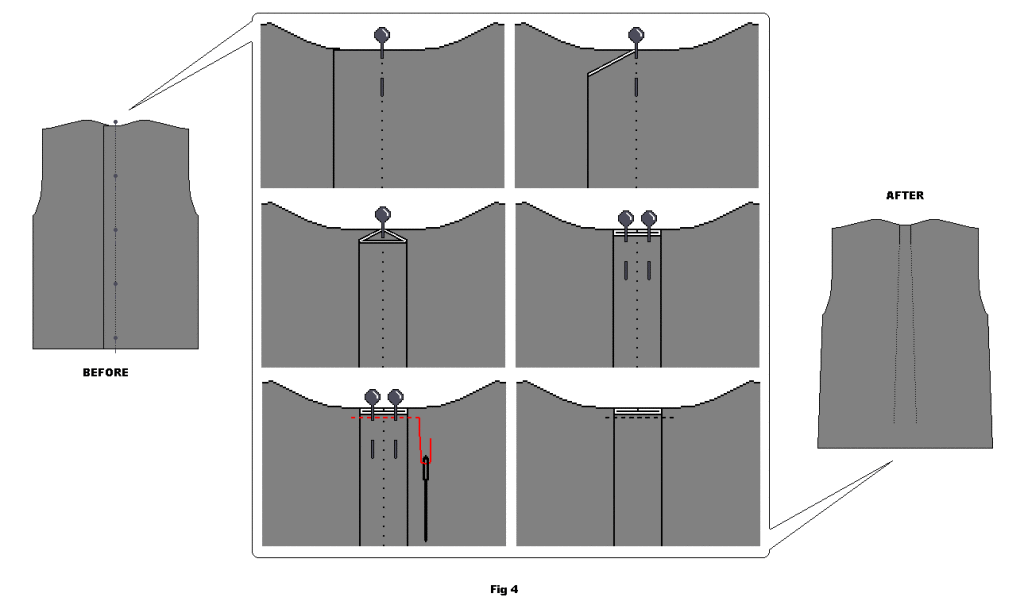
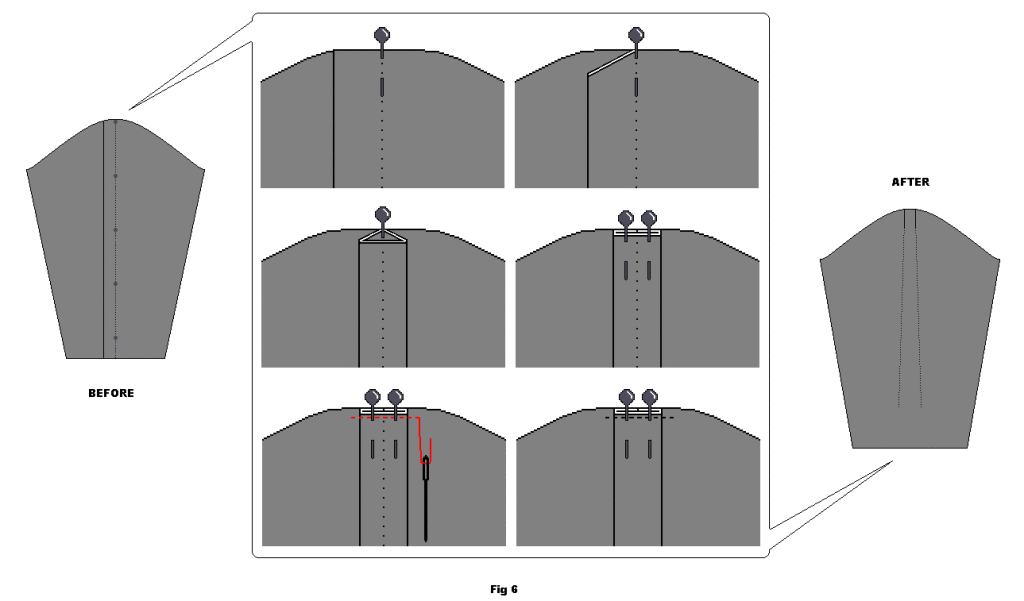
Now you are going to make a pleat along the pinned line 2 cm in from the fold on the back piece. To make the pleat you will follow the illustrated instructions.
Take the fabric of the pinned fold and press so it lays flat straight over the pinned line – 1 cm on each side. Pin the flat folded fabric tight at the neck line and use small stitches to attach it. You have now created a pleat at the center of the back piece (fig. 4).
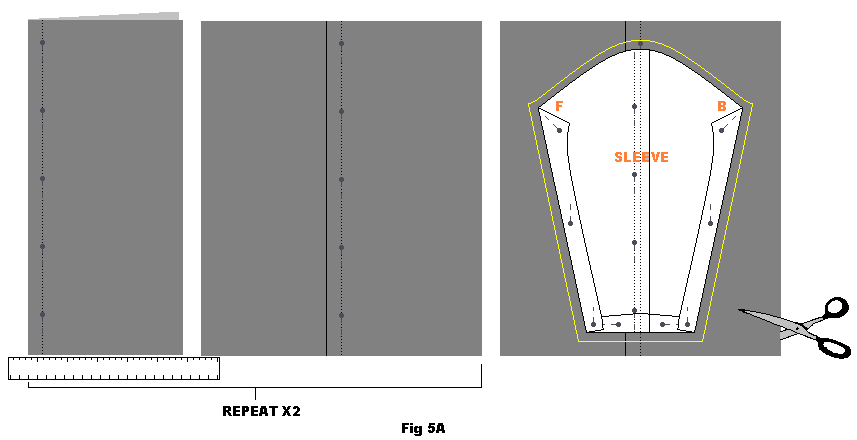
The SLEEVE piece needs to be cut out in a similar fashion to the BACK. You need to prepare 2 pieces of lining fabric big enough for the sleeve with added space for the pleat (4 cm extra width).
Fold the fabric pieces and iron lightly to create a crease. Pin along a line 2 cm in from the crease/fold.
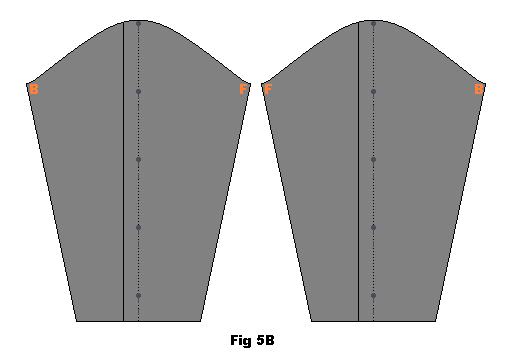
Instead of leaving the piece folded in half when cutting open the piece out flat. Lay the pattern piece with the pinned line running right down the center of the sleeve pattern. You may need to cut each sleeve individually as it is easier than trying to line up the lining fabric pieces. If you are using fabric with front- and backside make sure you cut the sleeve so they mirror each other.
Cut the sleeve with approximately 1 cm seam allowance all around. Remember to mark on each sleeve where the front and back are (fig. 5A and 5B).
Follow the illustrated instructions to get the pleat in the center of both sleeves. You do this exactly as you did the pleat in the center of the back piece (fig. 6).
Sewing the lining together.
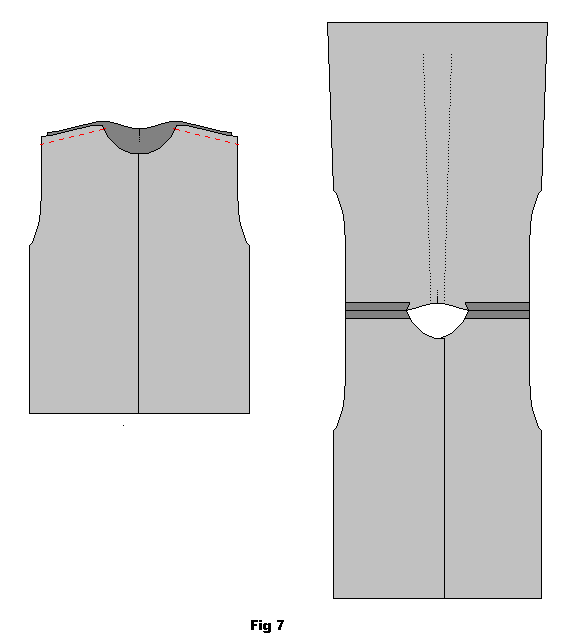
Attach the FRONT pieces to the BACK piece at the shoulder seams (if fabric has front and back side lay front side against each other). Sew approximately 1 cm from the edge. Press the seams open (fig. 7).
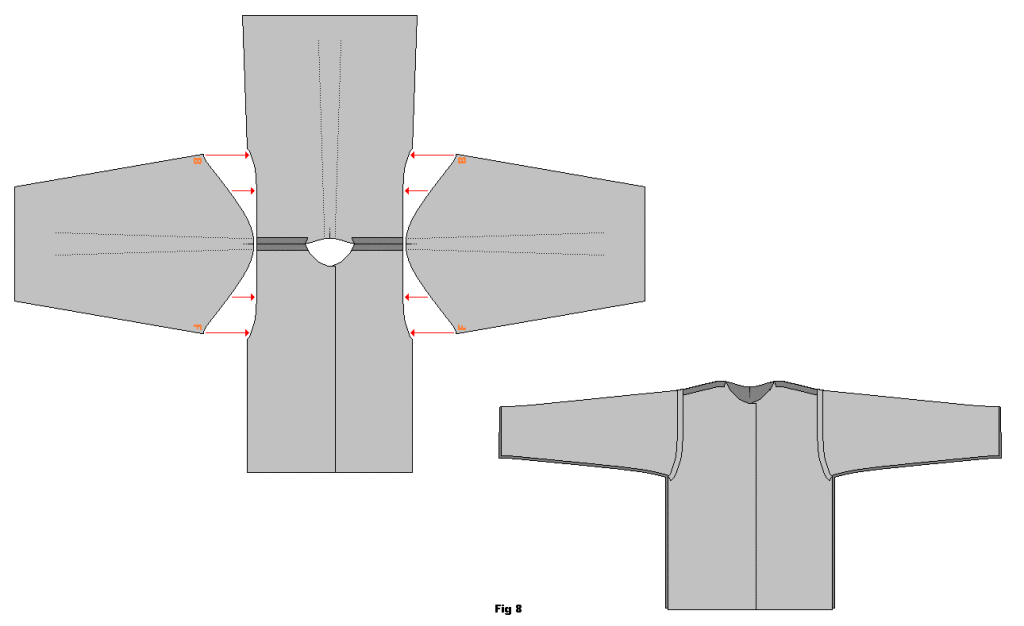
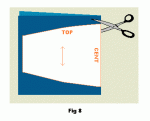
Attach the SLEEVES, making sure you place them on the right sides (front side of fabric facing down/inwards). Sew approx 1 cm from the edge. Press both seams towards the sleeve (fig. 8).
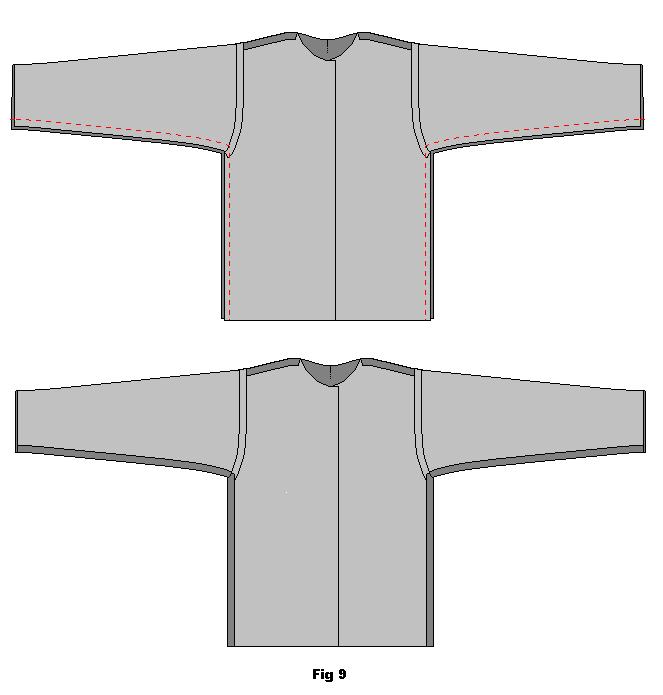
Sew a seam along the bottom of the sleeve and continuing down the side of the body. this will join the sleeve edges to each other and the front pieces and back piece together. Sew approximately 1 cm from the edge. Press the seams open (fig, 9).
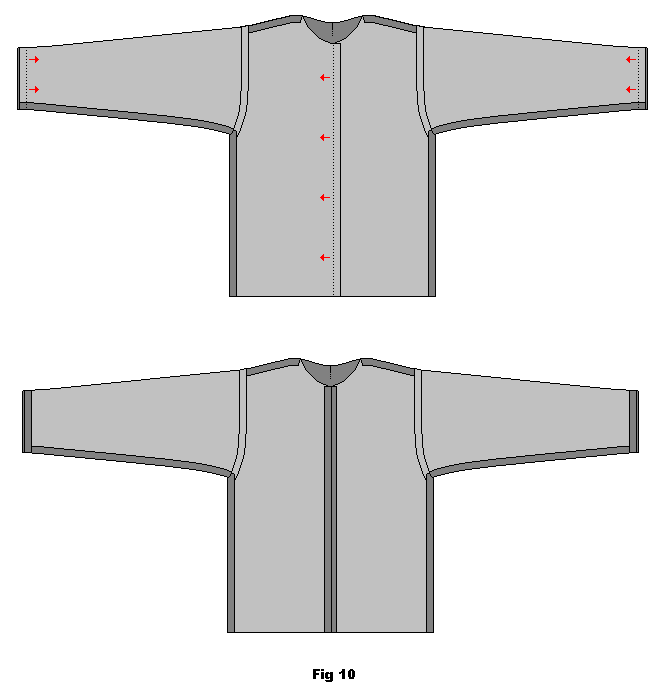
Fold and press the cuffs of the sleeves about 1 cm in. Fold and press the edged of the center fronts about 1 cm in (fig. 10).
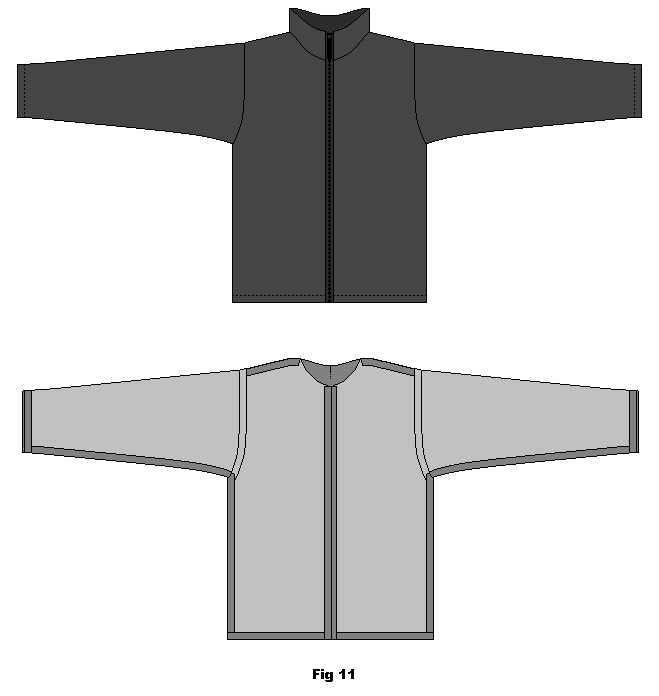
Lining piece is finished and ready to be sewn into the jumper/sweater (fig. 11).
Attaching the lining to the sweater/jumper
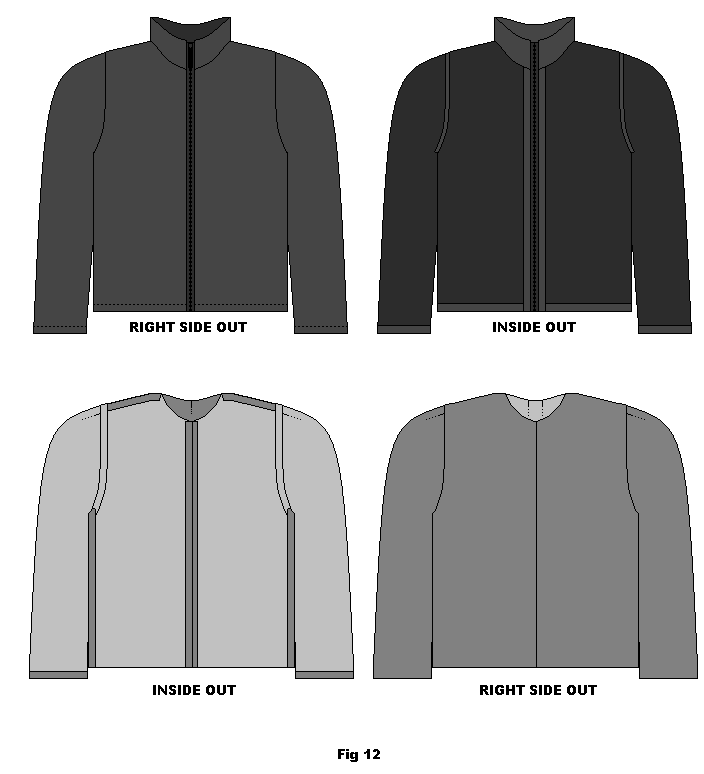
Turn the jumper/sweater inside out. Turn the lining right side out (fig. 12).
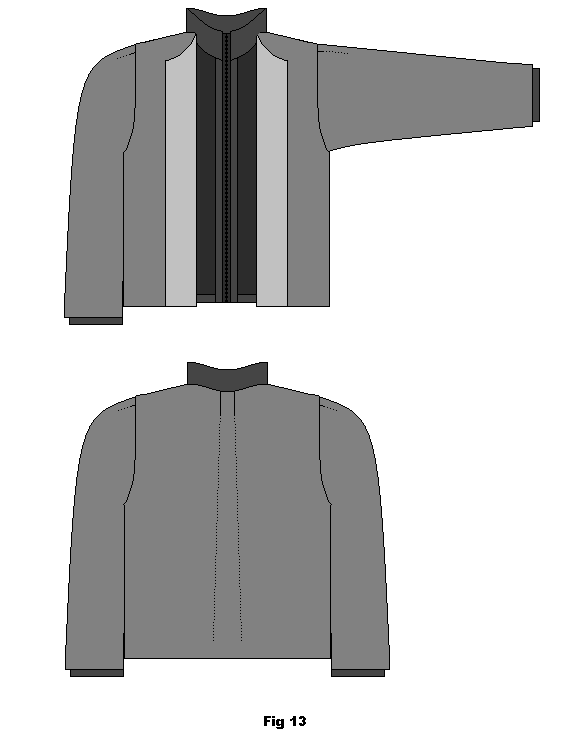
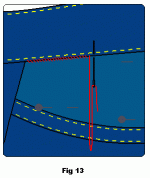
Slip the lining onto the jumper/sweater (fig. 13).
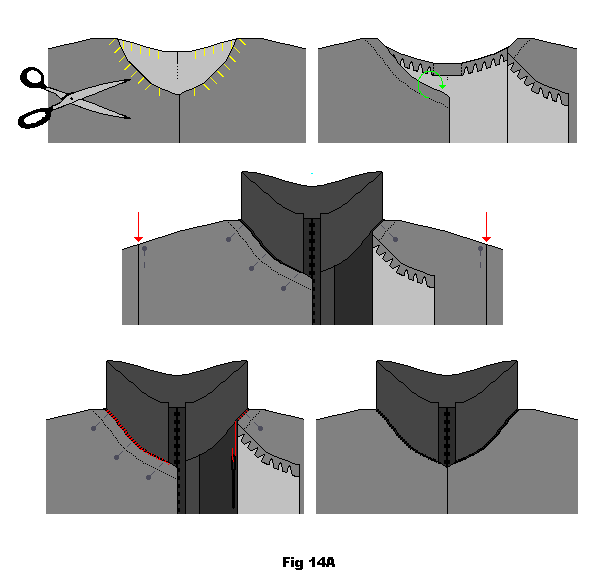
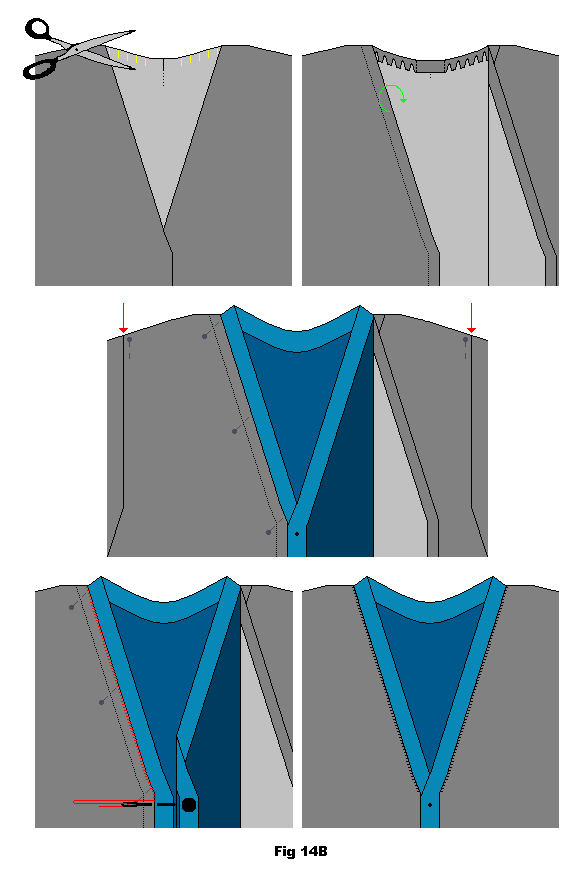
Along the neck of the lining cut small ¾ cm slits about a cm or less apart. Cut all around the neckline on a round neck garment and only on the back of the neck on the V-neck.
This helps to make it easier to turn the edge so it will fit on the sweater’s neckline. Make sure that the lining is lined up properly on the jumper/sweater (use the shoulder seams as a guide). Fold the neck line of the lining while matching it with the the seam of the jumper/sweater. Hand stitch into place (fig. 14A and 14B).
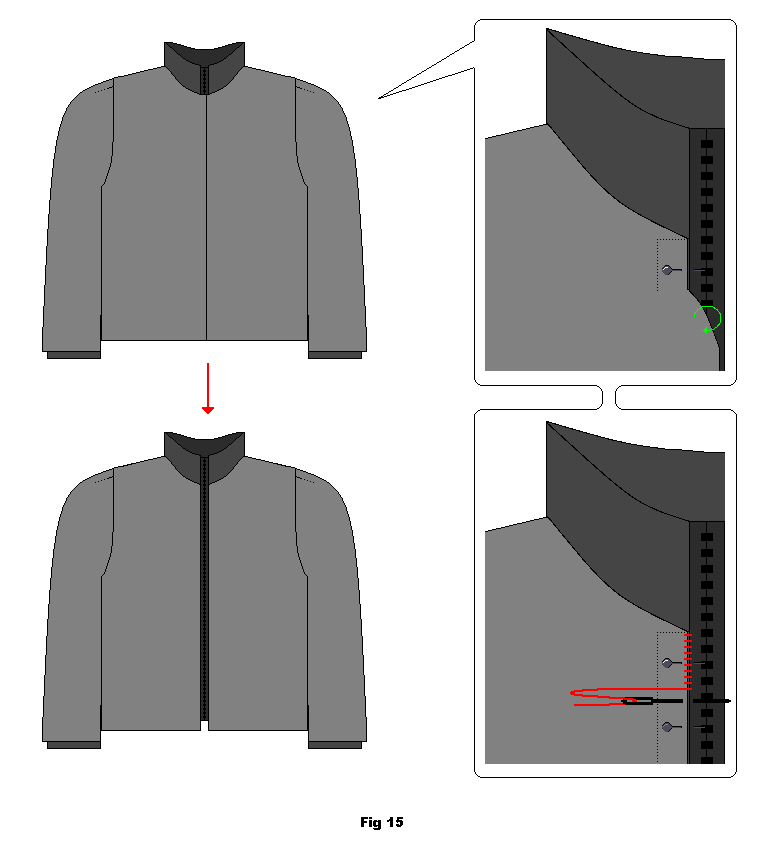
Fold the center edges of the front pieces under so that they match up with the seams where zip or buttons sit. Hand stitch (from top to bottom) in place (fig. 15).
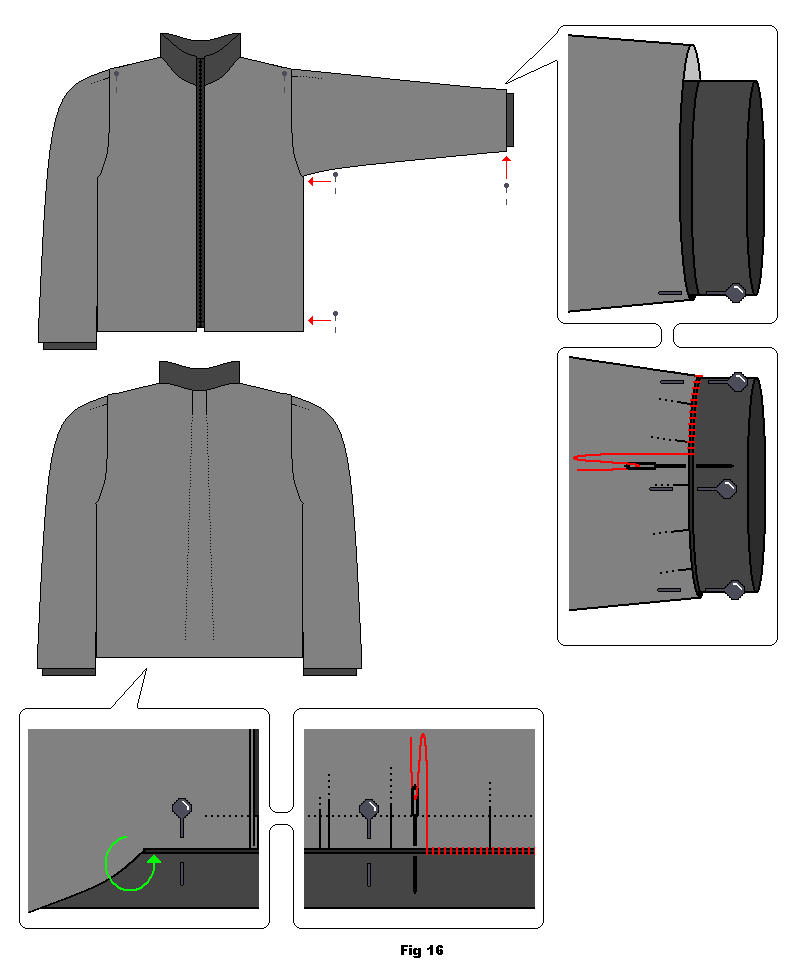
Anchor the lining piece to the sweater with pins at the under the sleeves, at the bottom where the side seams are and at the sleeve cuffs where the seams are.
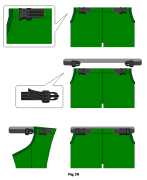
Line up the (already folded under) cuff of the lining with the cuff of the sweater and hand stitch into place. You will need to gather and pleat the fabric of the lining a little so that it fits the sweater’s cuff. This is because the extra 4 cm of fabric used in the center pleat of the sleeves’ lining (fig. 16).
Fold up the bottom of the lining to the length required to match up with the bottom of the sweater and hand stitch into place just like the sleeve cuffs. You will need to gather the fabric a little here too (because of the extra 4 cm of fabric that the center pleat of the lining’s back piece) (fig. 16 bottom images).
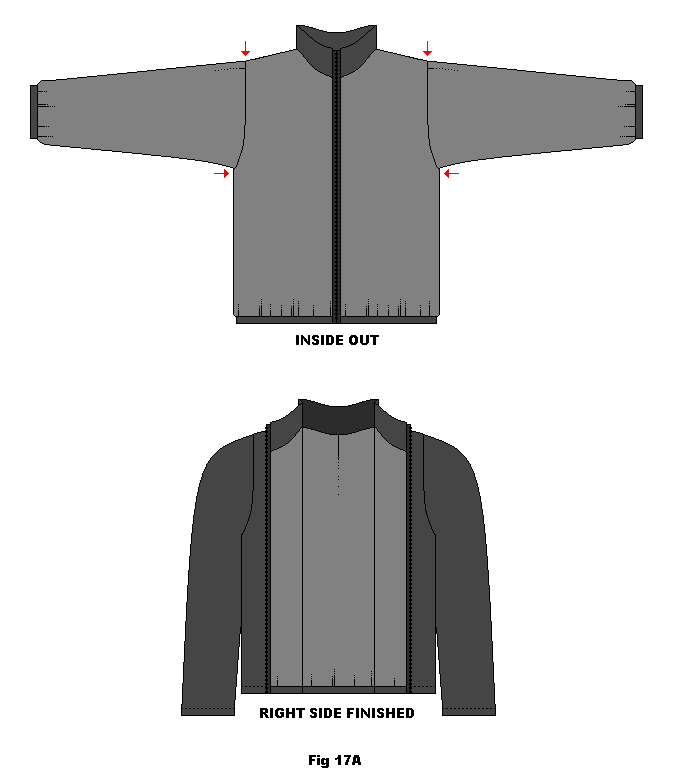
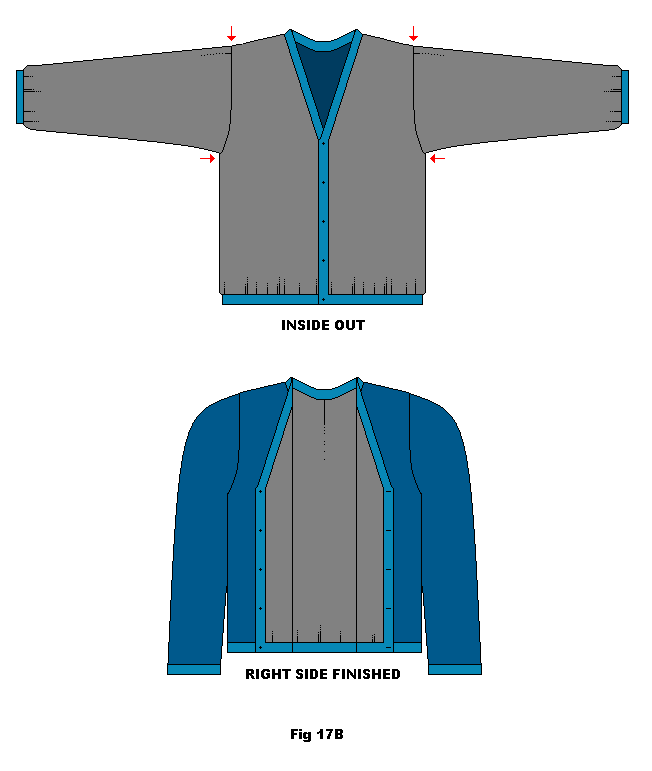
Use some small stitches to anchor the lining to the jumper/sweater where the seams meet at the top of the sleeves and bottom of sleeve hole. OBS! Remember to remove all pins before turning right side out! (fig. 17A and 17B).




Thank you for this. It is just what I have been looking for. I made a coat using intarsia and there are a lot of yarn ends. Lining my coat will negate the necessity of having to weave in all those ends as well as making the coat warmer.