Sewing instructions for women’s pants:
- description of the content in the sewing instructions,
- cutting out the pattern,
- sewing pants without zip (in stretch),
- sewing pants with simple fly,
- sewing pants with more complicated fly (jeans style) ,
- sewing pockets.
Sewing Pants With Complicated Fly
NOTE that the outside of the pants is marked as grey and the inside of the pants as white on the explanatory pictures. 
BACK PIECE
Sew the tucks in the back piece. 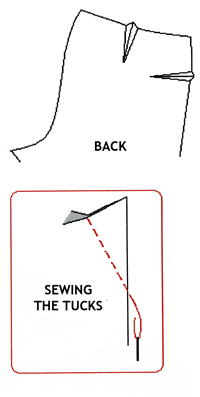
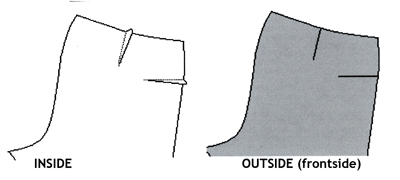
Line the back pieces up, right sides facing in, and sew the back seam
.
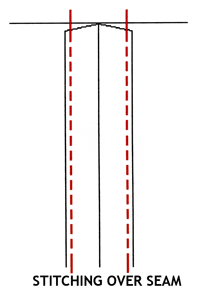
Line the back pieces up, right sides facing in, and sew the back seam. For an extra flat seam, press the seam open and top stitch over the seam allowance.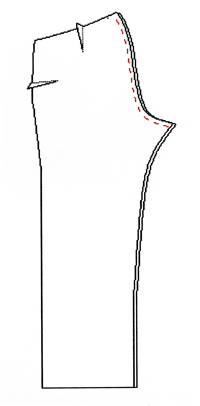
FRONT
This is how the pants will look after you finished sewing the fly and attaching the waistband. 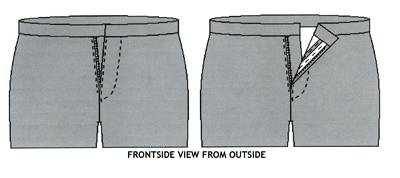
These are the front pieces to the pants with the curved line marked out by using dress makers chalk or removable pencil.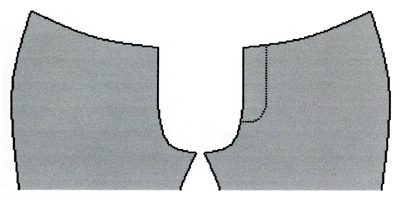
Fold ‘extra part’ 2 for the fly in half and press. Zigzag or otherwise finish the edges of the fly ‘extra parts 1 and 2. 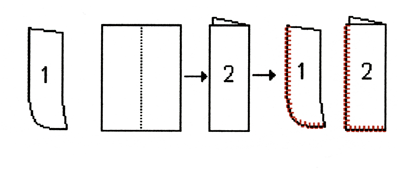
LEFT SIDE
Line up piece 1 with the left front piece, right sides facing, and attach.
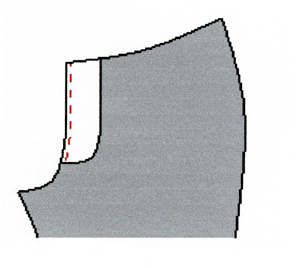
Open up and press seams flat. Fold back so wrong sides are facing and sew along pressed edge.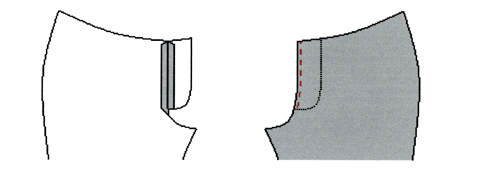
RIGHT SIDE
Lay the zip, front side down, on top of left front piece, right side facing. Lay the extra part 2 on top of the zip with the folded side towards the side seam. Line up the edges and attach the three parts by stitching. If, you have trouble with this step because the pieces keep moving, you can hand sew the zip into position first and then sew with the machine. 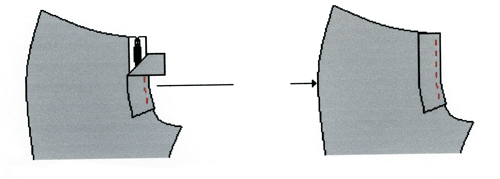
Fold zip out and press seam well then top stitch over the seam.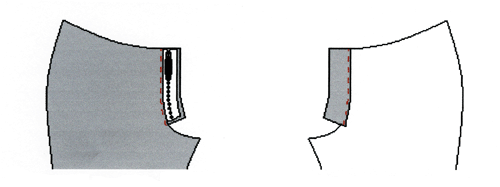
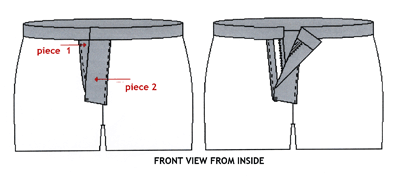
This is how it looks from outside as well as inside when sewn.
With right sides facing, line up the pants fronts together and sew the crotch up to
where the facing start.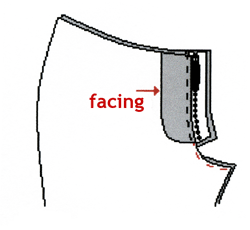
Fold pants open. On the front side, close the flaps and pin them shut.
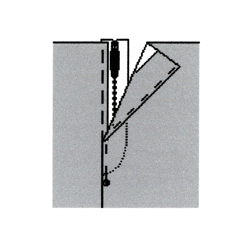
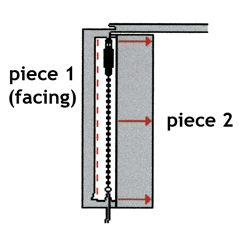
Turn to inside and carefully open flaps, making sure you do not dislodge the pins. Attach the zip to the SINGLE layer of facing (piece 1) making sure piece 2 is folded out of the way.
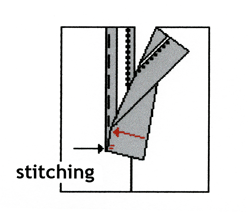
‘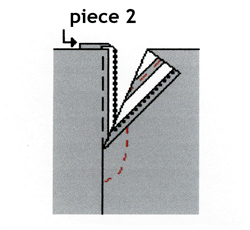 Turn pants to outside. Top stitch the curved line, making sure that the flap 2 is out of the way. This joins the flaps and give the fly its style.
Now fold piece 2 over and join it with a few stitches in the bottom corner.
Line up the pants with the right sides facing. Sew the side seams.
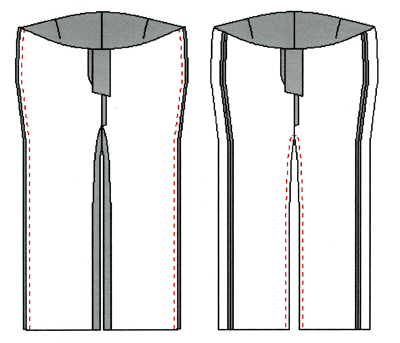
Line up the inside leg seams and sew., You may want to do a couple of extra rows at the crotch for re-enforcement.
CUFFS

a) Fold up a small edge of around 1 cm and press.
b) Fold up a larger edge, of around 1,5-2 cm, press and sew.
WAISTBAND
Attach the unfolded side (B) edge to the top of the pants, right sides of the fabric facing each other. Stitch on. Leave 1 cm seam allowance at each edge. If the waistband is too long, then cut off the excess. Fold up the waistband and press seams up towards the waistband.

Fold waistband right sides together and sew edges. 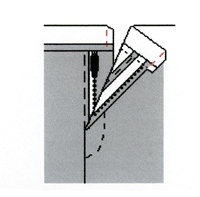
Then turn right side out and press well, being sure to pull out the corners.
NOTE! Corners are shown cut in the picture but you should cut the corners AFTER you have sewn the edge. Top stitch over waistband, joining it totally to the pants. 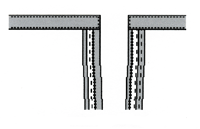


Pants sewing easy and simple thanks to the beautiful work.
Hi, I would like to know how to take in a waist band in the back .I have a hollow at the back and the band is always to big for me.Everywhere else it fits great.
Thank you.
Dianne Browne
Hi,
I will send your adaptation need to Meagan. We’re having a short paus at the moment.