One of the biggest problems with clothes for wheelchair users are the way sleeves and shoulders pull the back of the garment forward creating folds and gapping that is both uncomfortable and ugly. This applies mostly to wheelchair users propelling themselves forward manually, but also to anyone who moves about in the chair. A solution to this is swapping one garment – sweater, jacket, top – with two to prevent the pull caused by the shoulder-sleeves seems.
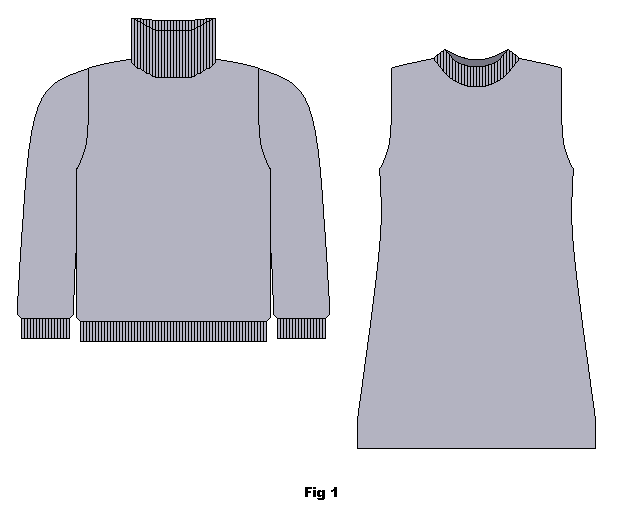
This adaption shows you how a regular sweater or dress can be reshaped by cutting and hemming it, thus enabling you to adapt it into something possible to combine. In this instruction we use the examples of a shrug/shoulder warmer and a tunique, but you can of course try making other types of tops this way. And of course you can always use the adapted garment by itself. You will need a jumper/sweater/tunic for this as well as some cotton rib knit fabric in a matching colour.
Example of basic garments (sweater and tunic) (fig. 1).
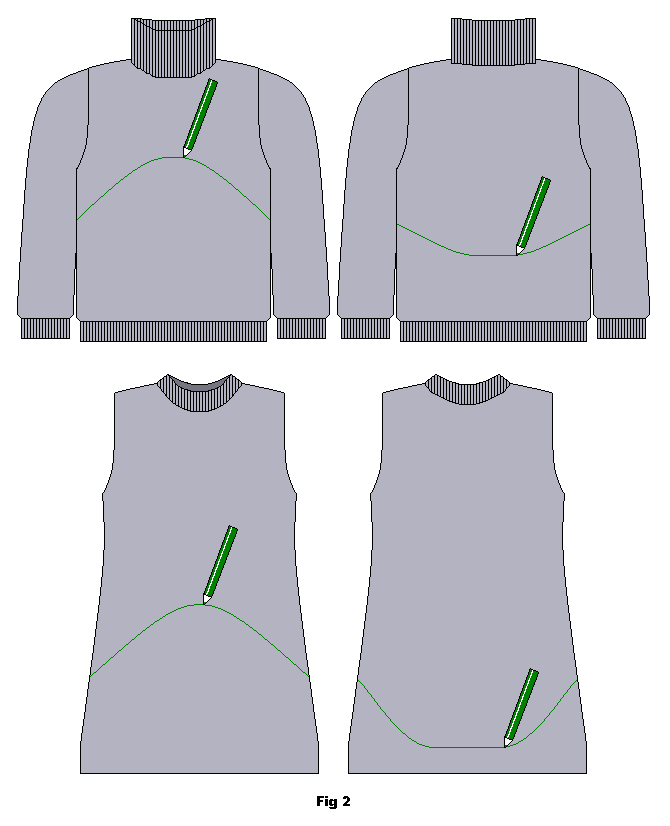
Draw up your cut lines according to your personal preferences (fig. 2).
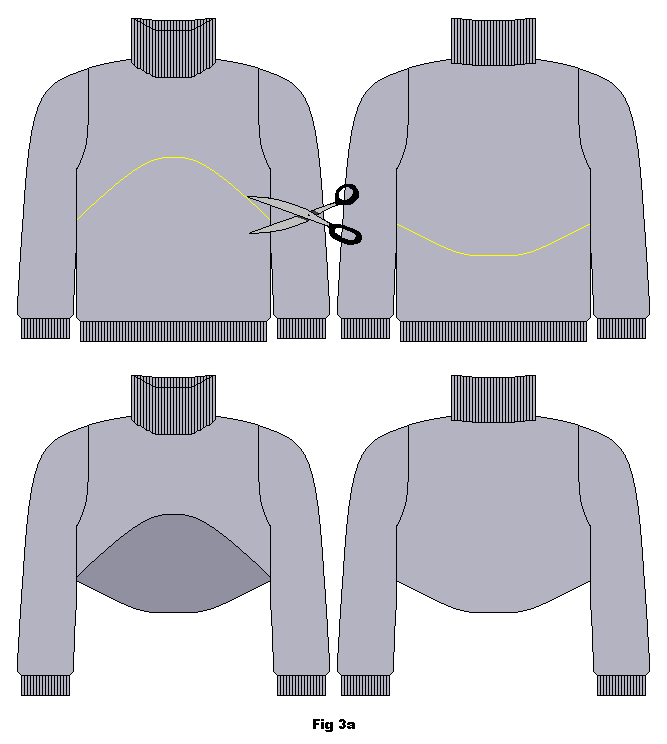
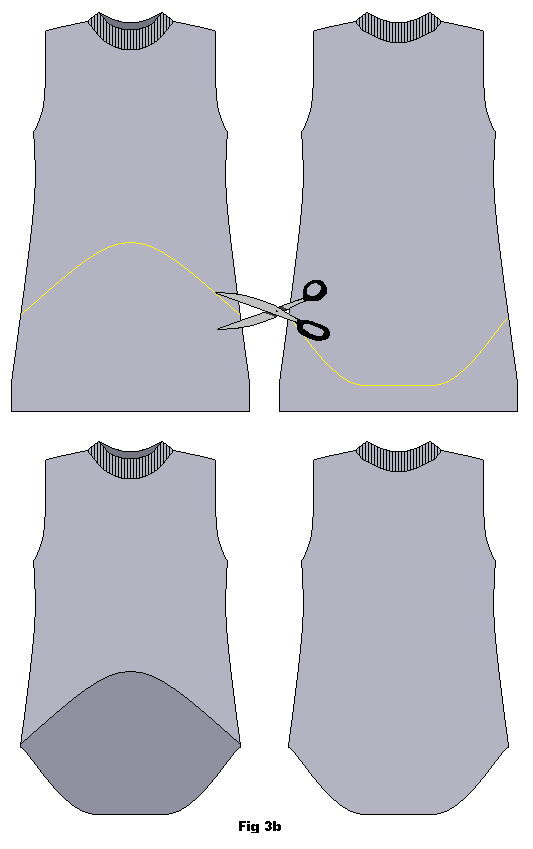
Cut out following your lines (fig. 3a and 3b).
Edging
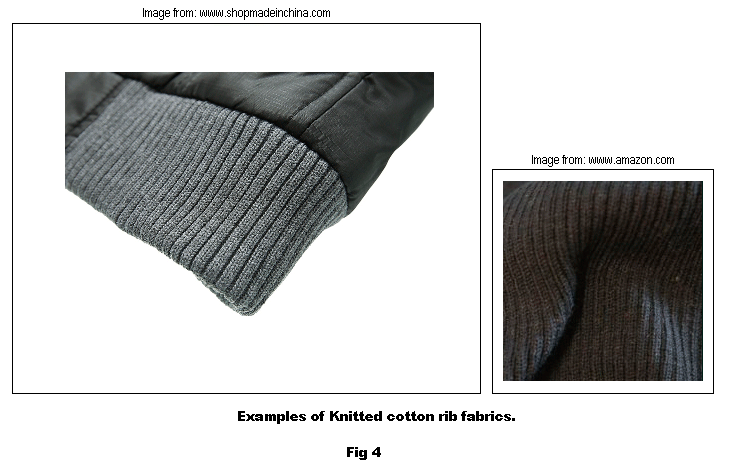
You will need some cotton rib knit fabric. This is the type of fabric used in sleeve cuffs etc. It is ribbed and stretchy and it comes in a tube. You can buy it by the meter but you do not need much. A ¼ of a meter should be enough with some to spare. The reason for using ribbing rather than regular fabric is that ribbing will stretch and fit around curves easier.
Examples of cotton rib knit fabric (fig. 4).
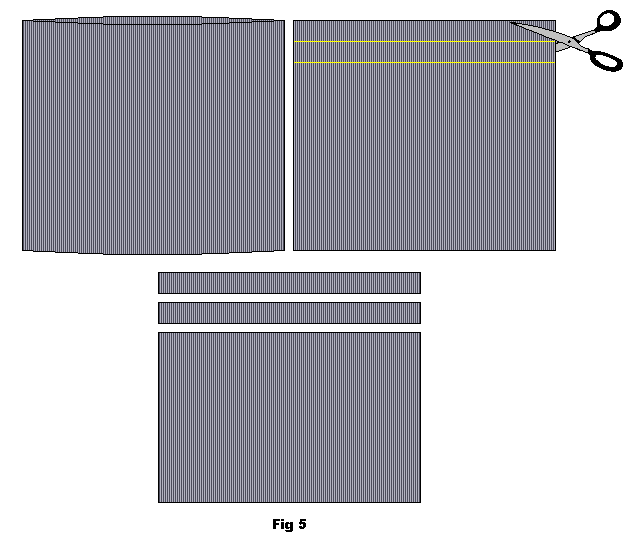
Mark out and cut 4 cm wide strips from your ribbed fabric. You will need 2 or more strips for this garment (fig. 5).
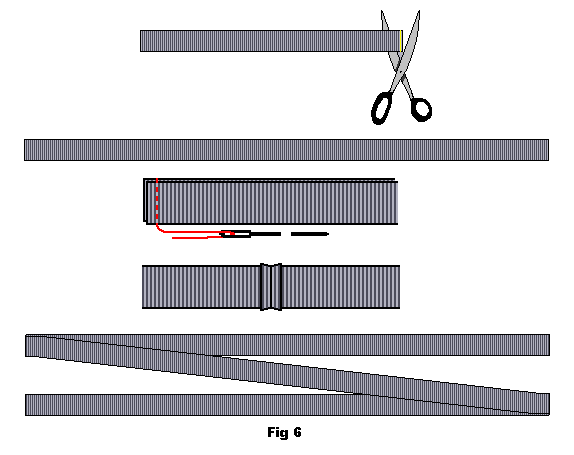
Cut open the side of the strips so they can be folded out flat. Depending on the length required and the width of the ribbing you may need 2 (or more) strips that you join together with a simple line of stitching (fig. 6).
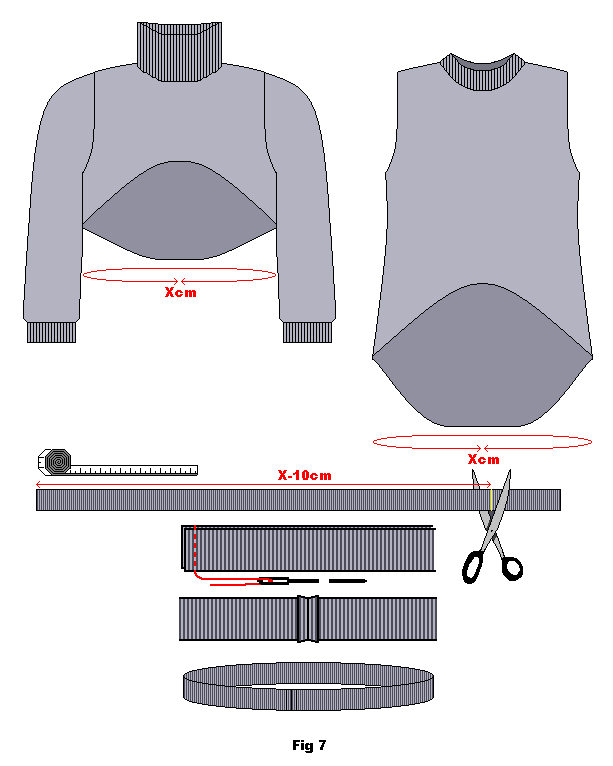
Measure, cut and join until you have the required length of rib knit fabric (fig. 7).
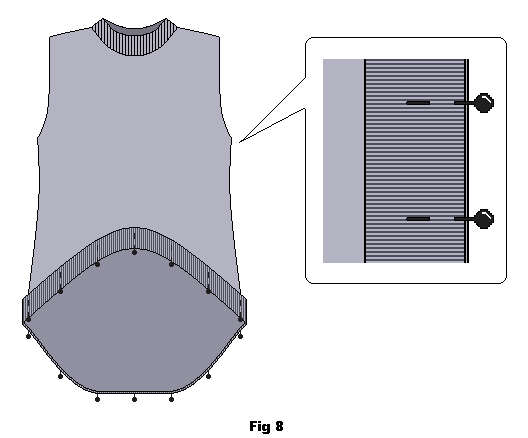
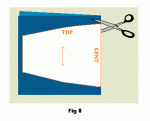
Pin the strip to the RIGHT side of the garment (right side to right side) all around the edge. Make sure the raw edge of the garment is lined up with the raw edge of the strip. You may need to stretch the strip around the corners (fig. 8).
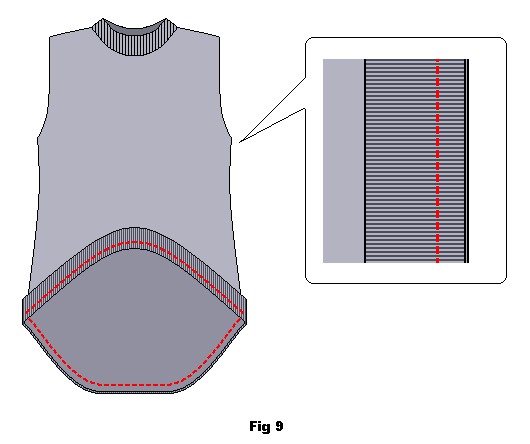
Sew around the entire edge. Leave a seam allowance of about 0,5 cm on the edge side (fig. 9).
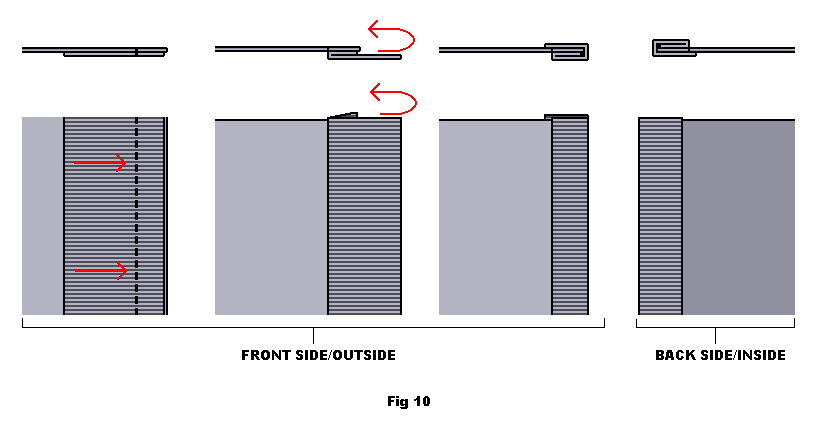
Once the strip is sewn into place fold it out and then wrap it around the raw edge of the sweater fabric unto the back side (fig. 10).
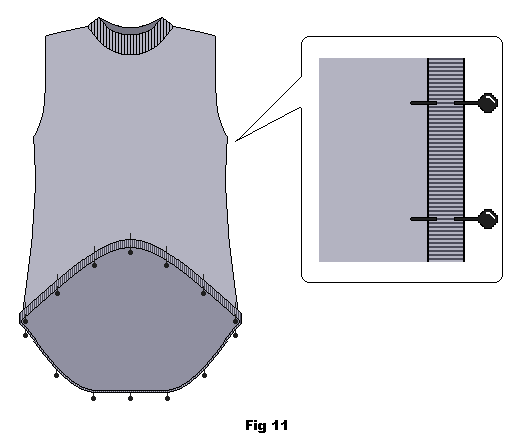
Pin the strip into place (fig. 11).
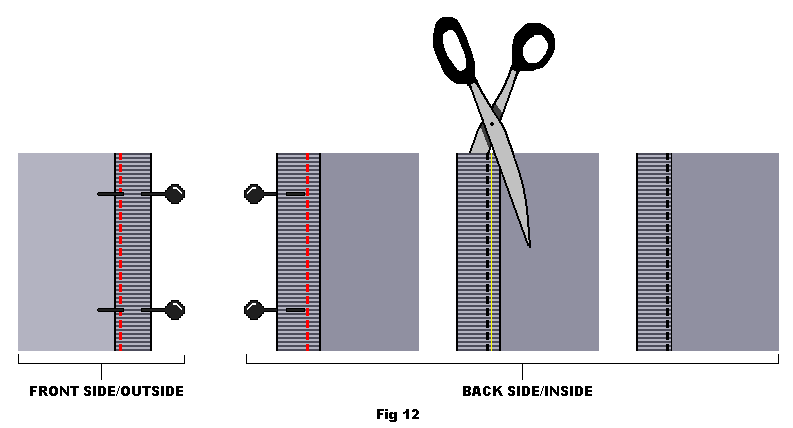
Sew into place from the front side. Sew along the join line of the rib knit edging. This should catch the edge of the rib knit on the back side. Once sewn into place you can remove any excess strip fabric from the back by cutting close to the stitch line (fig. 12). You do not need to overlock or zig-zag over edges on rib knit fabric.
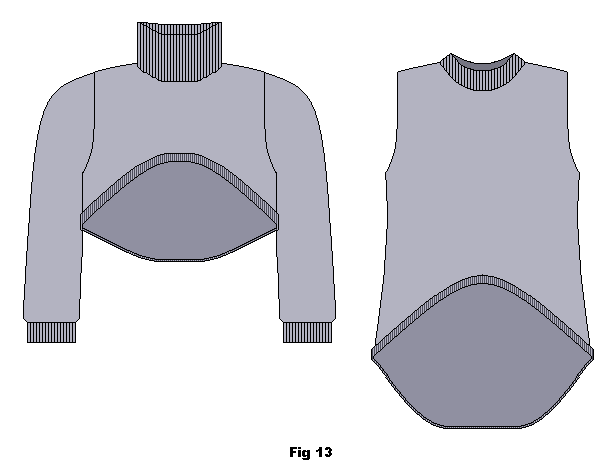
Example of finished result (fig. 13).




Wonderful and great ideal with for a dress or sweater! My daughter is DWARF body type. 28 years old with full adult rounded chest, and abdomen size 16-18 but very short 39 inches tall. I could nerve figure out how to work a sweater or a thicker sweat shirt to be comfortable while sitting in a chair or wheelchair that is warm and stylish without bulky material across the upper leg which become very difficult when going to the toilet trying to hold up the excess thicker fabric is exhausting with her short arms. Hoping I can cut the neck down and add a new stretch rib for the collar since she has no neck length her chin sit right on her chest. Thanks