NOTE! Please read “IMPORTANT to read before adapting shirts/tops” to decide what type of back suits you best.
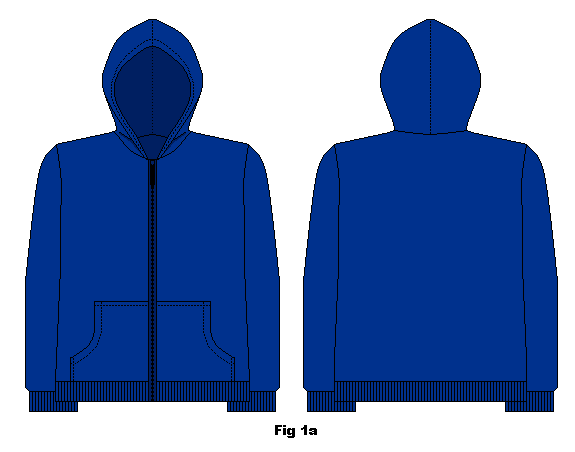
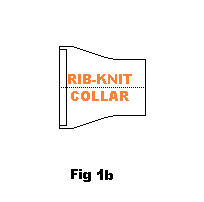
You will need a hooded jumper or a hooded zip up jumper (slightly looser fit) for this as well as some non-stretch cotton for pattern making and some cotton rib knit fabric in a matching colour for the collar, alternatively, some fabric of similar type and color as the jumper. You will also need the Fashionfreaks pattern for a “knit collar with high back” which you can find under pattern pieces for “wristband and collars” for jacket with raglan sleeves (men as well as women) (fig. 1a and 1b).
Make a pattern from the yoke part of jumper
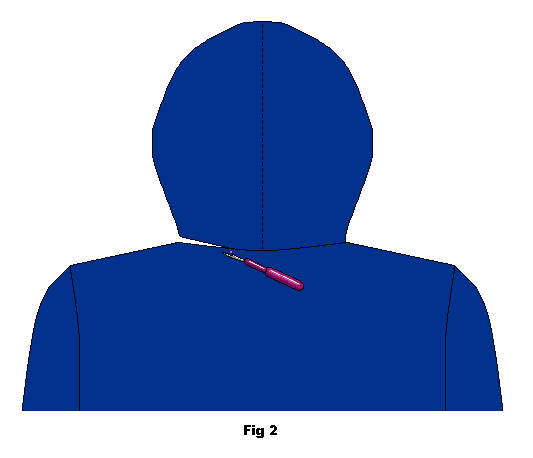
Remove the hood by unpicking the seam (fig. 2).
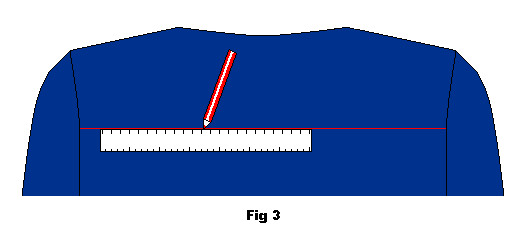
Use a ruler and mark a line across the back of the jumper between half and three quarters way down the back sleeve seam. You can also use the bottom yoke seam of a shirt to guide you (fig. 3).
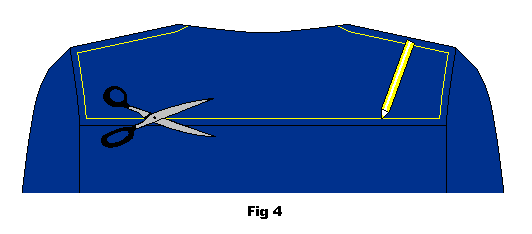
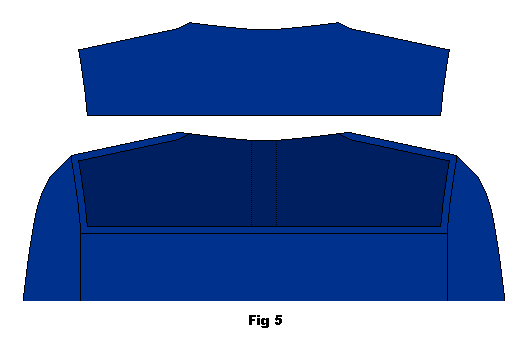
Use the seams surrounding the back yoke part of the jumper (sleeve and shoulder seams) as a guide giving yourself 1 cm allowance. Mark and cut the inner yoke piece away. Cut carefully as you will use this piece as a base for your pattern (fig. 4 and 5).
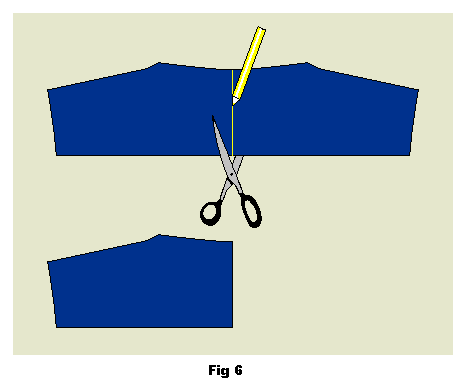
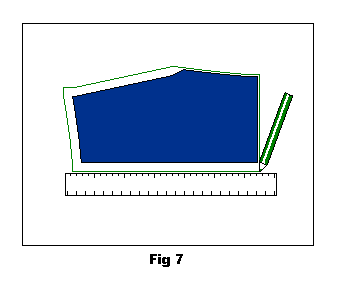
Cut the removed yoke piece in half and place on cotton pattern fabric. Redraw the size of the piece by adding 1 cm onto the bottom, shoulder and sides of it – not to the neck or middle (fig. 6 and 7).
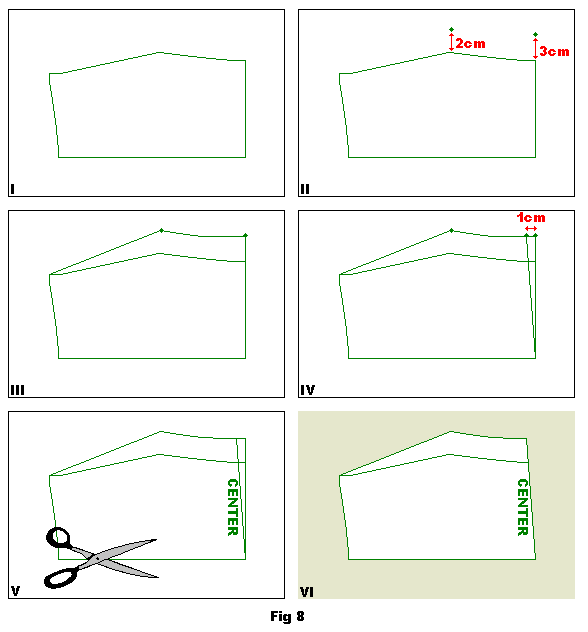
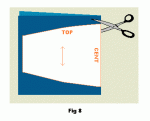
Use a ruler and make a mark approximately 2 cm up from the shoulder point and 3 cm up from the mid neck point on the center fold. Use the neck and shoulder points on the original piece as a guide but measure from the redrawn line. This is an estimate for a medium size shirt. For large to very large size shirt you may want to add another extra 0,5 to 1 cm. For smaller sizes you may want to use 0,5 cm less. See illustration (fig. 8) below image I and II.
Use the original redrawn lines as a guide and drew new line along the top connecting the points (fig. 8 image III).
Mark a point 1 cm in from the top of the new mid neck point (or 0.5 for smaller size’s). Use a ruler and draw angled line from the bottom mid point. This is your new centre fold line (fig. 8 image IV).
Cut out the piece and lay on a new piece of cotton (fig. 8 image V and VI).
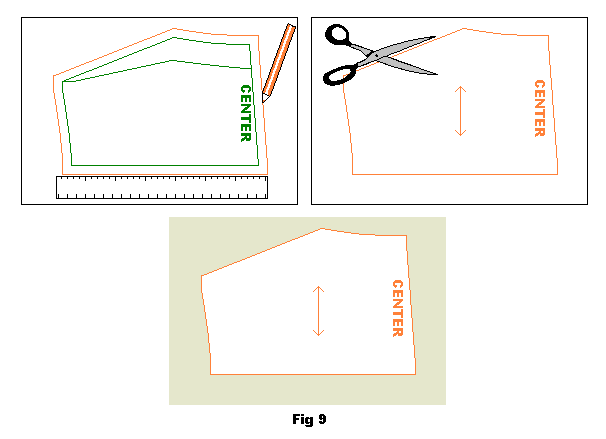
Add new seam allowance of 1 cm to all sides of the piece and cut out. This is now your pattern piece (fig. 9).
Make and attach replacement yoke piece recycling the hood
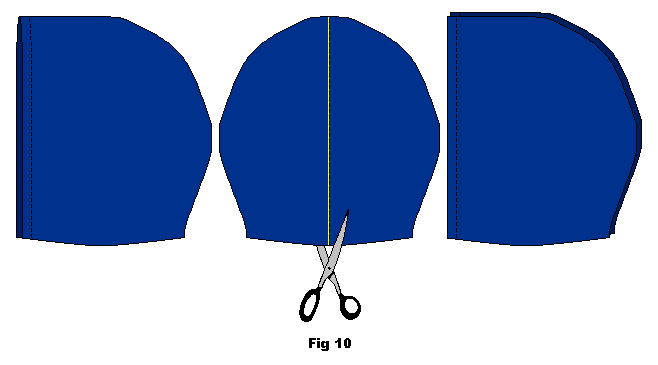
Lay out the removed hood. Cut up the center seam of the hood to provide two pieces of fabric (fig. 10).
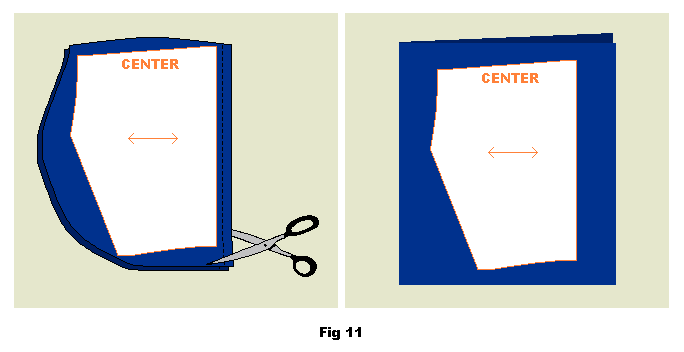
Lay your pattern piece on the dissembled hood fabric. Alternatively, skip this recycling step and lay the pattern on a piece of similarly match fabric that has been folded. Pin and cut it out (fig. 11).
You now have 2 fabric pieces. Place these together with right sides facing each other. Pin in place, sew together and zig-zag or overlock the edge. Fold and press to one side (fig. 12).
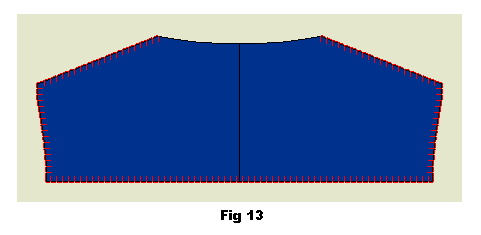
Overlock or zig-zag the shoulder, side and bottom edges of the piece to stop fraying (fig. 13).
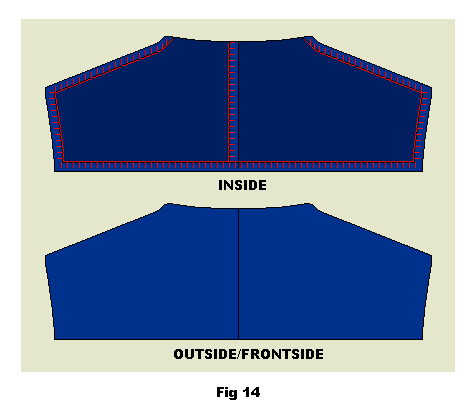
Fold the shoulder, side and bottom edges under 1 cm and press well (fig. 14).
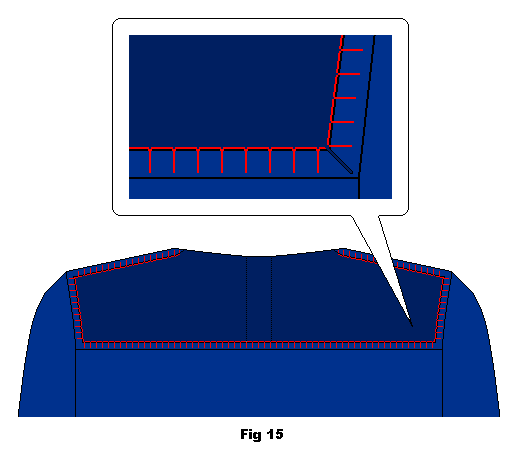
Zig-zag the raw edges of the shirt if possible. Cut small notches in the corners of the hole on the shirt. This allows for more movement of the original garment when inserting the new piece (fig. 15).
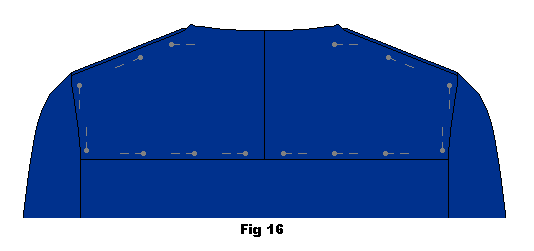
Begin to pin the new adapted piece to the shirt. Start at the bottom (at the middle point) and work your way out and up to the neck. Fold the ends under when you get to them. This might take some manipulating and readjustment to fit (fig.16).
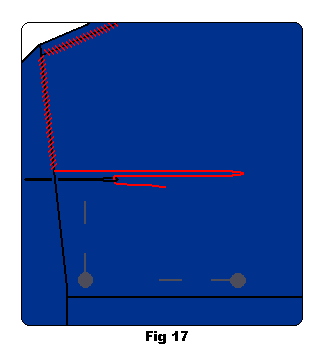
Hand sew replacement/adaptation piece into place using small careful stitches ands matching thread (fig. 17).
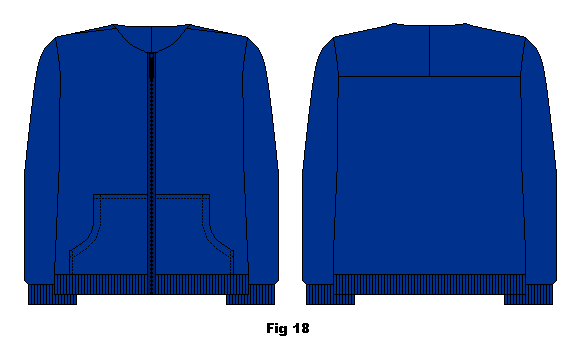
Example of jumper with adaptation piece in place (fig. 18).
Making the collar
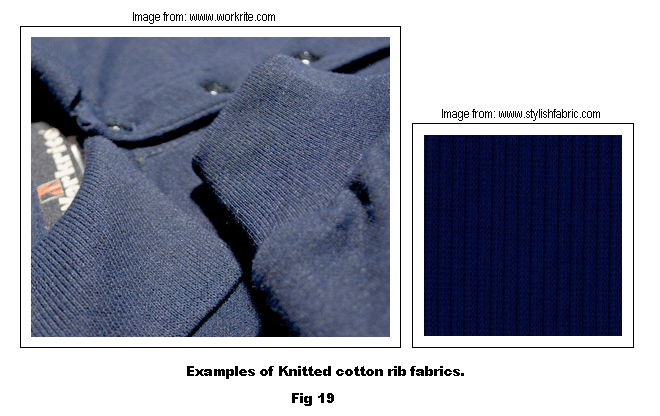
For the collar you need some cotton rib knit fabric. This is the type of fabric used for example in sleeve cuffs. It is ribbed and stretchy and it comes in a tube. You can buy it by the meter but you do not need much – 25 cm should be enough (fig. 19).
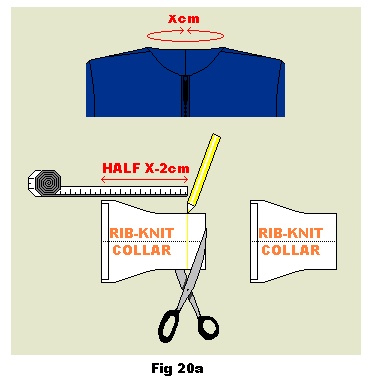
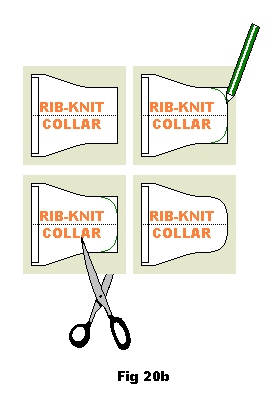
Use the pattern piece “knit collar – high back” from Fashionfreaks pattern for jackets with raglan sleeves (men’s or women’s). Note that you may have to adapt the length to fit the jumper which you do by measuring the neck opening and adjusting the length of the collar pattern (using half the adjustment measure). Round off the edges to give a nicer finish on the collar (fig. 20a and 20b).
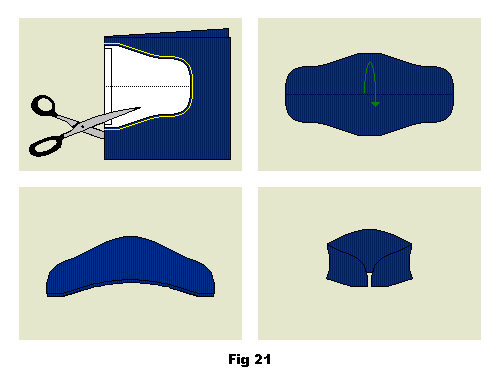
Lay your pattern piece on the fold of the rib knit fabric. Pin, add 1 cm seam allowance and cut out (fig. 21).
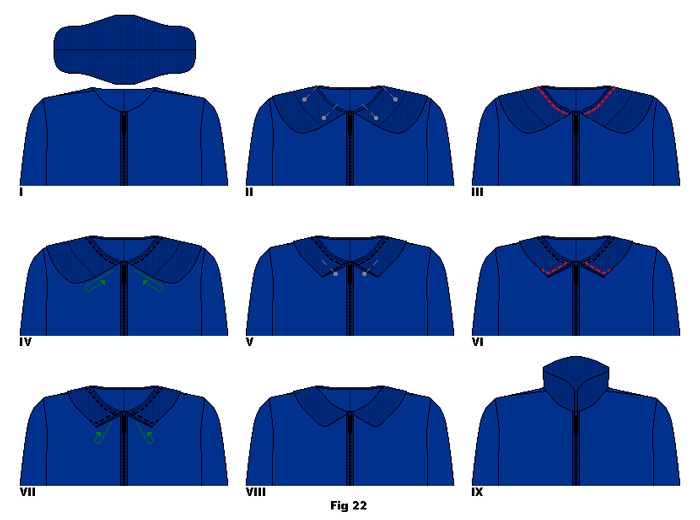
Lay the collar flat (fig. 22 image I) then pin the edge of the collar to the edge of the neck right sides facing each other (image II). Sew the collar into place with a 1 cm allowance (fig. 22 image III).
Fold the collar under itself so the “wrong side/inside” are facing out (fig. 22 image IV).
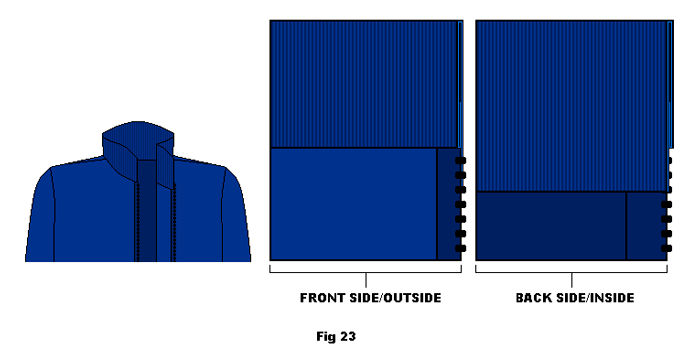
Note! You should fold the collar at the middle so the rib knit fabric is equally long on both sides (including the 1 cm allowance). See fig. 23 how the rib knit fabric on the inside of collar reaches 1 cm below the seam created in fig. 22 image I, II and III.
Pin the front collar edges and sew them together with a 1 cm seam allowance (fig. 22 image V and VI). Turn the collar over itself so the right side of the fabric faces out (fig. 22 image VII and VIII). Fold the collar up into standing (finished position) (fig. 22 image IX).
View of the collar close up (fig. 23).
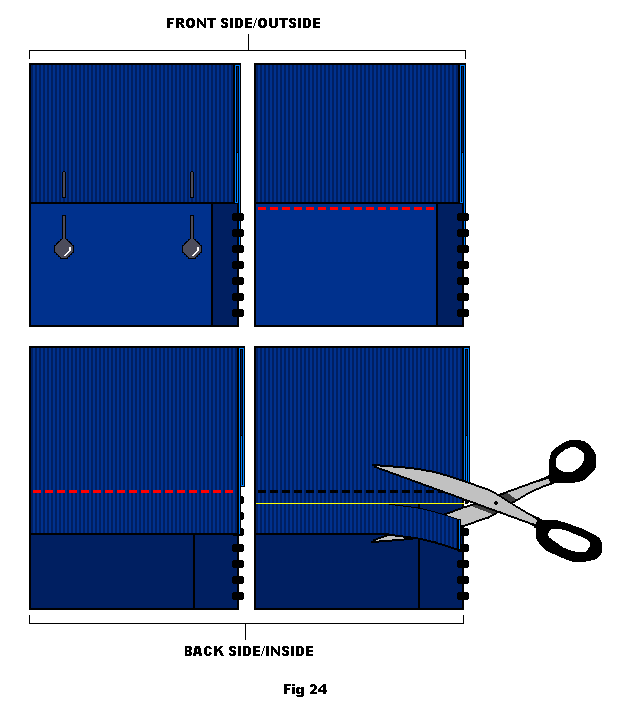
Pin collar together and sew along the join line of the rib knit and jumper. This should catch the edge of the rib knit on the inside. Once you have sewn the collar together you can remove any excess rib knit fabric from the back by cutting it close to the stitch line. Rib knit fabric does not fray so no need for zig-zag or overlock (fig. 24).
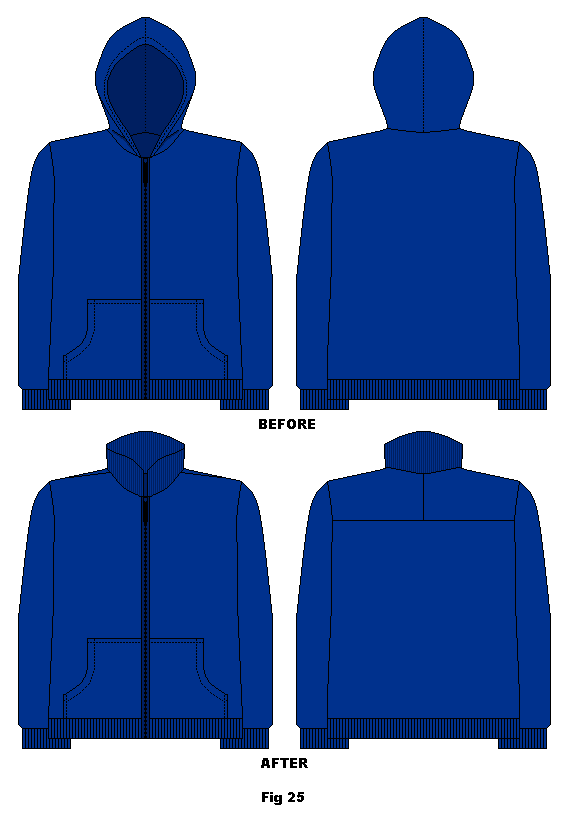
Example of finished garment (fig. 25).




I have a zippered front hoodie, that I want to convert to knitted collar. Just
Like the illustration! Why was the upper back area changed?,,,,Richard
To make the neckline at the back smaller
how to take off hood and thats all.