Sewing instructions for men’s pants:
- description of the content of the sewing instructions,
- adapting the pattern and sewing pockets,
- cutting out the pattern,
- sewing pants with simple fly,
- sewing pants with more complex short fly,
- sewing pants with extra long fly.
Sewing pants with simple fly
NOTE that the outside of the pants is marked as grey and the inside of the pants as white on the explanatory pictures. 
FRONT AND BACK PIECE
Sew the tucks in the back piece.
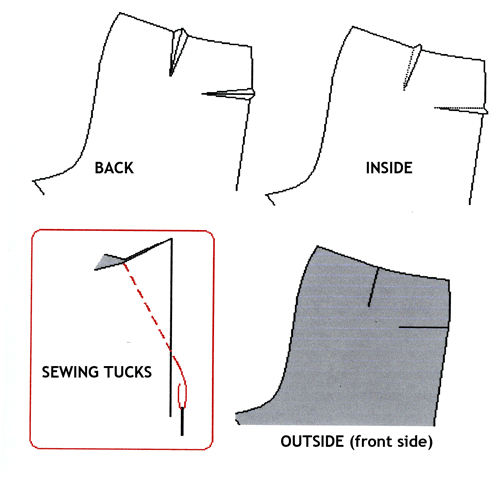
On the front piece sew zigzag stitch over the edges of both flaps (separately, not together) and using a removable pencil or dress makers chalk, mark the curve on the front of the left hand side. 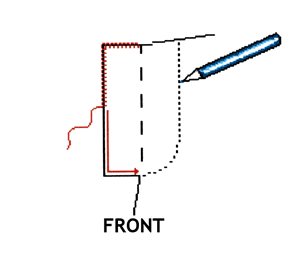
SEW LEGS
Line up the sides of front and back pieces, right sides facing in, and sew side leg seam. Do this for both legs. Line up the inside leg sides and sew together. Press seam open. Do this for both legs.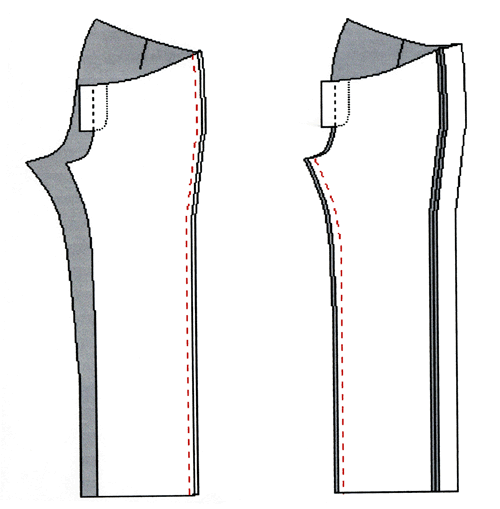
Leave one leg with wrong sides facing out, and turn the other leg so that the right sides are facing out. Put the right side out leg into the other leg, lining up the crotch seam.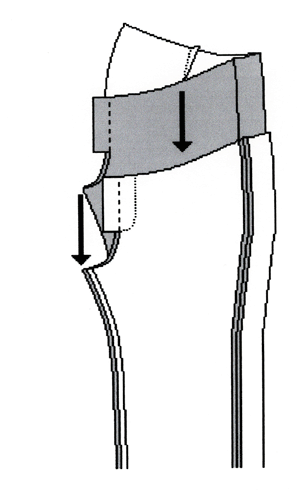
SEW FLY
With legs lined up inside each other, sew the front crotch. 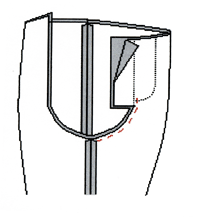 Then by pressing the seam, and following the line, press and HAND stitch the flaps so that the left side overlaps the right side.
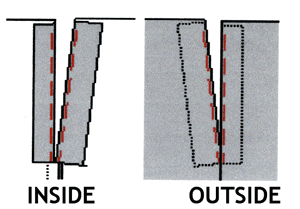
Turn the pants to the outside and attach the zip on the right side. 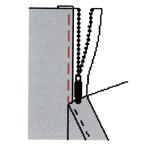
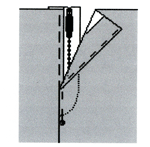 Then, close the overlapping flaps and pin together.
Turn the pants to the inside and carefully open the flaps (you should have the remaining ‘unattached’ flap to the left side with zip pinned to its top). Make sure you do not dislodge the pins on the outside.
Attach the zip to the SINGLE layer of the left flap. The zip is now attached to the right side of the front piece (including right flap) and the left flap of the fly.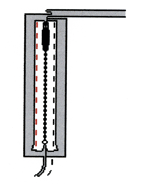
Turn pants to the outside again and overstitch the curved line to join the flaps and give the fly its style.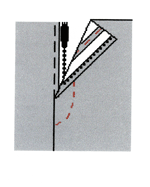
Finally, finish sewing the back seam of the crotch. 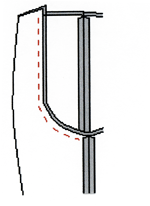
WAISTBAND
Fold and press as shown
Attach the unfolded side (B) edge to the top of the pants, right sides of the fabric facing each other. Make sure that the 5 cm overlap is on the left side. Stitch on. Fold up the waistband and press seams up towards the waistband.
Fold waistband right sides together and sew edges. 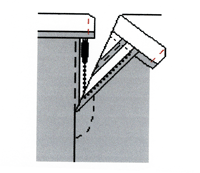
Then turn right side out and press well, being sure to pull out the corners.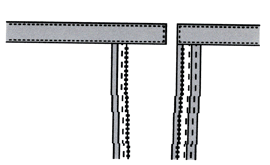
NOTE! Corners are shown cut in the picture but you should cut the corners AFTER you have sewn the edge. Top stitch over waistband, joining it totally to the pants.
CUFFS

a) Fold up a small edge of around 1 cm and press.
b) Fold up a larger edge, of around 1,5-2 cm, press and sew.


this is a wonderful, simple, straight forward pattern. I do enjoy it is nice and encouraging
im a fashion major student in high school from Indonesia. its very helpful for me, thank you! but, how to sew pockets in trousers? i only need the picture my teacher asked me to do the work steps of women’s trousers
You have instructions for pockets in the links at top of page. If these are not the type of pockets you want I advice you to look at a non-seated pant’s pattern with the type you are looking for.
Can this patter be adapt4ed to someone who is a 9 X? I have a son with a 74 inche waistband and it is so hard to find him pants that fit. I am hunting simple pants patterns.
Trying to do some research on adapting to size you need together with a Swedish contact. If we have a test model for it, would you be willing to try it out? If so send me a confirmation on fashionfreaks@independentliving.org
Susanne
Does this pattern include seam allowance or should it be added?
Nice very helpful
I found your pages in a “google search” for a free pattern for a woman’s raglan sleeve jacket… I teach monthly meetings to an American Seing Guild neighborhood group and the raglan sleeve is the lesson this month… I just printed and put together the pattern pieces… Your instructions are clear and easy to follow… also printed the woman’s pants pattern for myself… I know it will be successful !! I Thank you so much for your work…
Thank you so much for this simple pattern
I have used it to help me make a bariatric track pant after measuring off a worn out
garment.
So I had a pattern but no instructions until I found your blog.