Sewing instructions for women’s non stretch skirt:
- description of the content of the sewing instructions,
- examples of where to put in zips,
- cutting out the pattern,
- sewing skirt together and putting in zip,
- sewing waistband for skirt with one zip,
- sewing waistband for skirt with two zips.
Description of the content of the sewing instructions
NOTE! DESCRIPTION FOR ADAPTING PATTERN TO
ZIPS IN FRONT PIECE FURTHER DOWN ON PAGE.
The pattern for the non-stretch skirt has a slightly different back divided in three parts. It is made up of two side sections and one middle panel. This creates a shapelier curve for the backside and seating area.
It is advisable that you make this skirt in a larger size because non-stretch fabrics sit differently on the body and it is easier to make something smaller if it is too big than the other way around.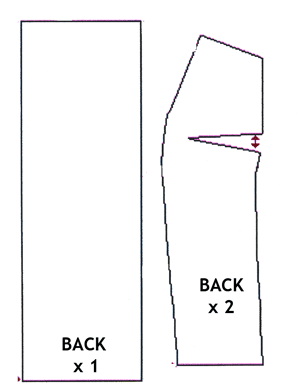
These are the pattern pieces for the back of the non-stretch skirt. If you chose to insert the zip in an existing seam you can skip the rest of the instructions on this page.
If you chose to have the zip inserted in the front then you will also have to alter the pattern for the skirt front.
ADAPTING THE PATTERN FOR FRONT ZIP
Click here for examples of where to put in zips
or go to link two of the content of the sewing instructions.
You can use the same front pattern as for the stretch skirt. Remember you may want to use a larger size so the skirt is not too tight. You will need to make a new paper pattern. The easiest place to insert a zip is to follow the line of either the left or right tuck.
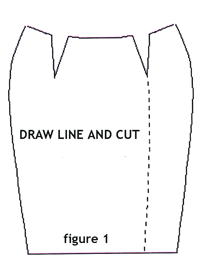
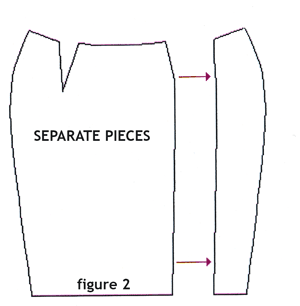
Once you have drawn your line you cut on that line and separate the pieces. Then you will add seam allowance to the new cut sides as well as the rest.
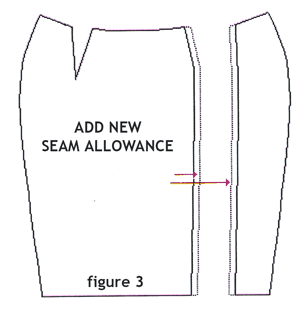
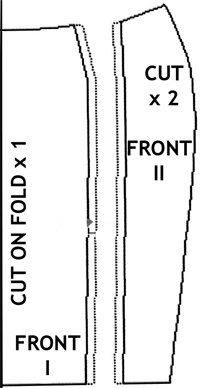
These are the pattern pieces for the non-stretch skirt with one zip inserted at front.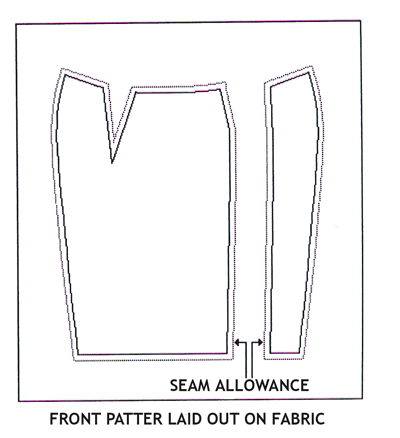
You can also divide the front pattern into three pieces for a solution with two zips in line with both tucks.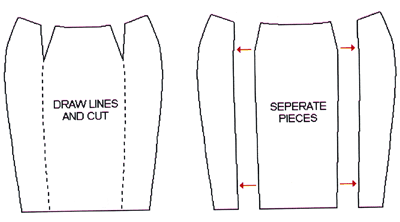
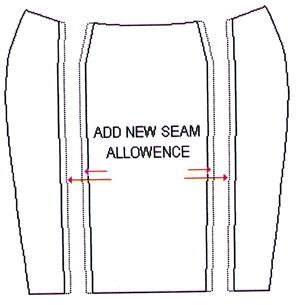 These are the pattern pieces for a non-stretch skirt with two zips inserted at front.