NOTE! The adaptations on this website are NOT individually adaptations for ready made pants. They are general adaptations for pants to seated position. Please read the instructions under “IMPORTANT to read before adapting pants” first!
Entrance page for pants adaptations to seated position
Each pants adaptation will be individualised depending ont the pair of pants you are adapting. There is no standardises pattern pieces, as each pattern piece has to be derived from the pants you are intending to adapt. Measurements are offered as a guide. You may be lucky enough to be successful on your first attempt, or it may take some trial an error to discover which adaptation fits you. You may also need to try different styles and sizes of pants.
All the adaptations on the jeans and pants are made as simple as possible. Some adaptations will work for some people and some will not. Sometimes it takes a bit of trial and error before finding the right combination of pants/jeans adaptations that suit you best.
It was important for us to keep the jeans and pants looking as much like the original garment as possible, so we have tried to find a balance between a successfully adaptation that make the garment more functional that does not alter he appearance of the garment more than was necessary.
Types of adaptations available for pants
BACK ADAPTATIONS:
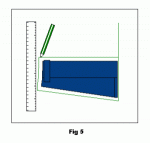
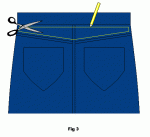
The point of this adaptation is to raise the back side of the pants to a higher level and give it some curve around the backside area. This is done not only to make it sit higher but to stop the tightness and cutting across the front waist that is often an issue with pants and jeans when one is in a sitting position.
FLY ADAPTATION:
This adaptation shows you how to lengthen the fly in a pair of jeans. It is a useful adaptation made to make pants easier to get into or for personal hygiene reasons.
BUTTON REPLACEMENT:
This adaptation shows you how to replace the regular rivet style button on jeans with a hook and eye.
KNEE TUCK:
The knee tuck is designed to give the knee area a slight curve which can be beneficial to reducing some of the bulkiness that occurs behind the knee when one is in a sitting position.
POCKET ADAPTATION:
The pocket adaptation is designed to close the pockets, which can gape open and are often useless to those who sit. It also remove some of the bulkiness that a pockets can cause on the upper thighs.
NOTE!
Zips in the sides were a trial adaptation but they were unsuccessful due to the nature of a ready made garment. If you require pants with zips in the side it is recommended that you make the pants from scratch. Information on where to put in zips in garments are available under page for simple adaptations.
Click here to go direct to informations on where to put in zips.
You can of course try to adapt ready made pants and depending on how skilled/meticulous you are and the quality of the pants the results will vary. For instructions on how to sew in zips in seams read the instructions for zips in non stretch skirts. Putting in zips in pant seams are done the same way.
Click here to go directly to sewing instructions for zips in seams (non stretch skirts”.


I am trying to alter a regular pant pattern to fit an 18 year old college student with Spina Bifida. She has been wearing stretch pants but now would like to have a pair that is not stretch that she can wear to Church. The first sample pair I made was too blousy in the front so I tried to take out 1 1/2 inches oout of the front pieces in the side seams. Have not heard from the girl yet to see if that worked. If it is still too blousy that would probably indicate that there is too much fabric from waist to crotch. I was looking at your pants and see that the front is lower than the back. She wants elastic in the waist as that is what she is able to handle. Any suggestions? I am going to print off your pattern and make a sample for her. I really want to help this girl so if you have any suggestions I would love to have them.
Our pants pattern is created at an angle (making them shaped to a seated position) which makes them, as you have figured out, lower in the front and higher in the back. The pattern might look very similar to “normal” patterns but in reality there’s quite a bit of difference. We’ve tried alot of different ideas to fix both patterns and adaptions of ready-made garments (not just pants) and to get it right you have to create the adaptation from the “middle” and not the “sides” of pattern pieces/garment parts – in you case from the crotch seam. Every time we tried to fix things starting from the sides (and believe me we did it so many times) it ended up with fabric crinkling or blousing, legs twisting etc etc.
The images below are of a pair of adapted ready-made pants. You can see how much the adaption actually lengthens the back. If you have a “normal” pattern you want to adapt I suggest you look at how we’ve shaped the adaptation piece for ready-made pants and try to use this shape to adapt your pattern. Remember – start from the middle back seam of the pants! Treat any tucks in the sides merely as consequences of the main adaptation.
Whether or not you try to make adaptations to ready-made pants or to “normal” patterns or end up usig our adapted pattern, we would love to hear from you. We are planning to include a part on the site with examples, ideas, success stories and pitfalls that we have received from our internet network.
You reach us at fashionfreaks@independentliving.org
Edit: Meagan reminded me to say that we have the adpatation for ready-made pants with an elastic back like the image below.
Pants sewing easy and simple thanks to the beautiful work
can you please help ???I’m trying to make over a pair of pull on denim capris. It’s for a friend that is in nursing home….she is in wheelchair and they have asked that the backs of her pants be opened and put a velcro fastener on them. Can you please give me some suggestions ??/thanks Tammy
I alter clothing for a nursing home and find the best way to alter pants is to split at the back seam and zigzag the edges. Then add a strip of belting to the left side (about 6-8inches long)
sew a strip of velcro (soft piece) to the belting. Add the other strip of belting to the other side of the waist. I use about a five inch piece of velcro. This works very well.I also alter tops and nightgowns by splitting them down the back and making a placket as on a blouse and use strips of velcro to close. The staff find this works well for easier dressing and undressing. Hopefully you find this of use.